
How to Deposit and Withdraw USD with Fluidkey and Wise
In your Fluidkey account, USDC is treated as US dollars (USD) at a 1:1 ratio. You can use this balance to on-ramp or off-ramp USD between Fluidkey and external bank accounts.
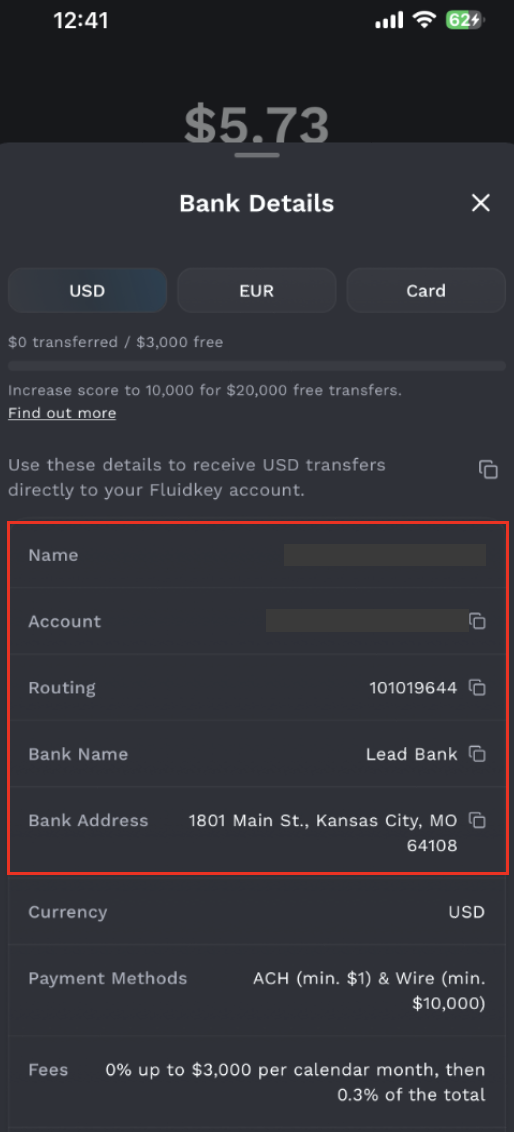
Once you complete KYC in the "Bank" section of the app, Fluidkey provides you with a dedicated ACH account — powered by Noah, with Lead Bank as the US banking partner. Since the account is opened in your own name, it can be used to deposit funds into — or withdraw funds from — international money transfer services such as Wise.
Each user receives a free transfer allowance of USD 3,000 per month, covering both on-ramp and off-ramp transactions. Once this limit is exceeded, transfers can continue at a flat 0.3% fee. Below, we'll walk through how to deposit USD into your Wise account via Fluidkey and how to withdraw it back; from there, you can also use Wise's SWIFT feature to further transfer funds to your local bank account.
Section 1 — Depositing into Wise via Fluidkey
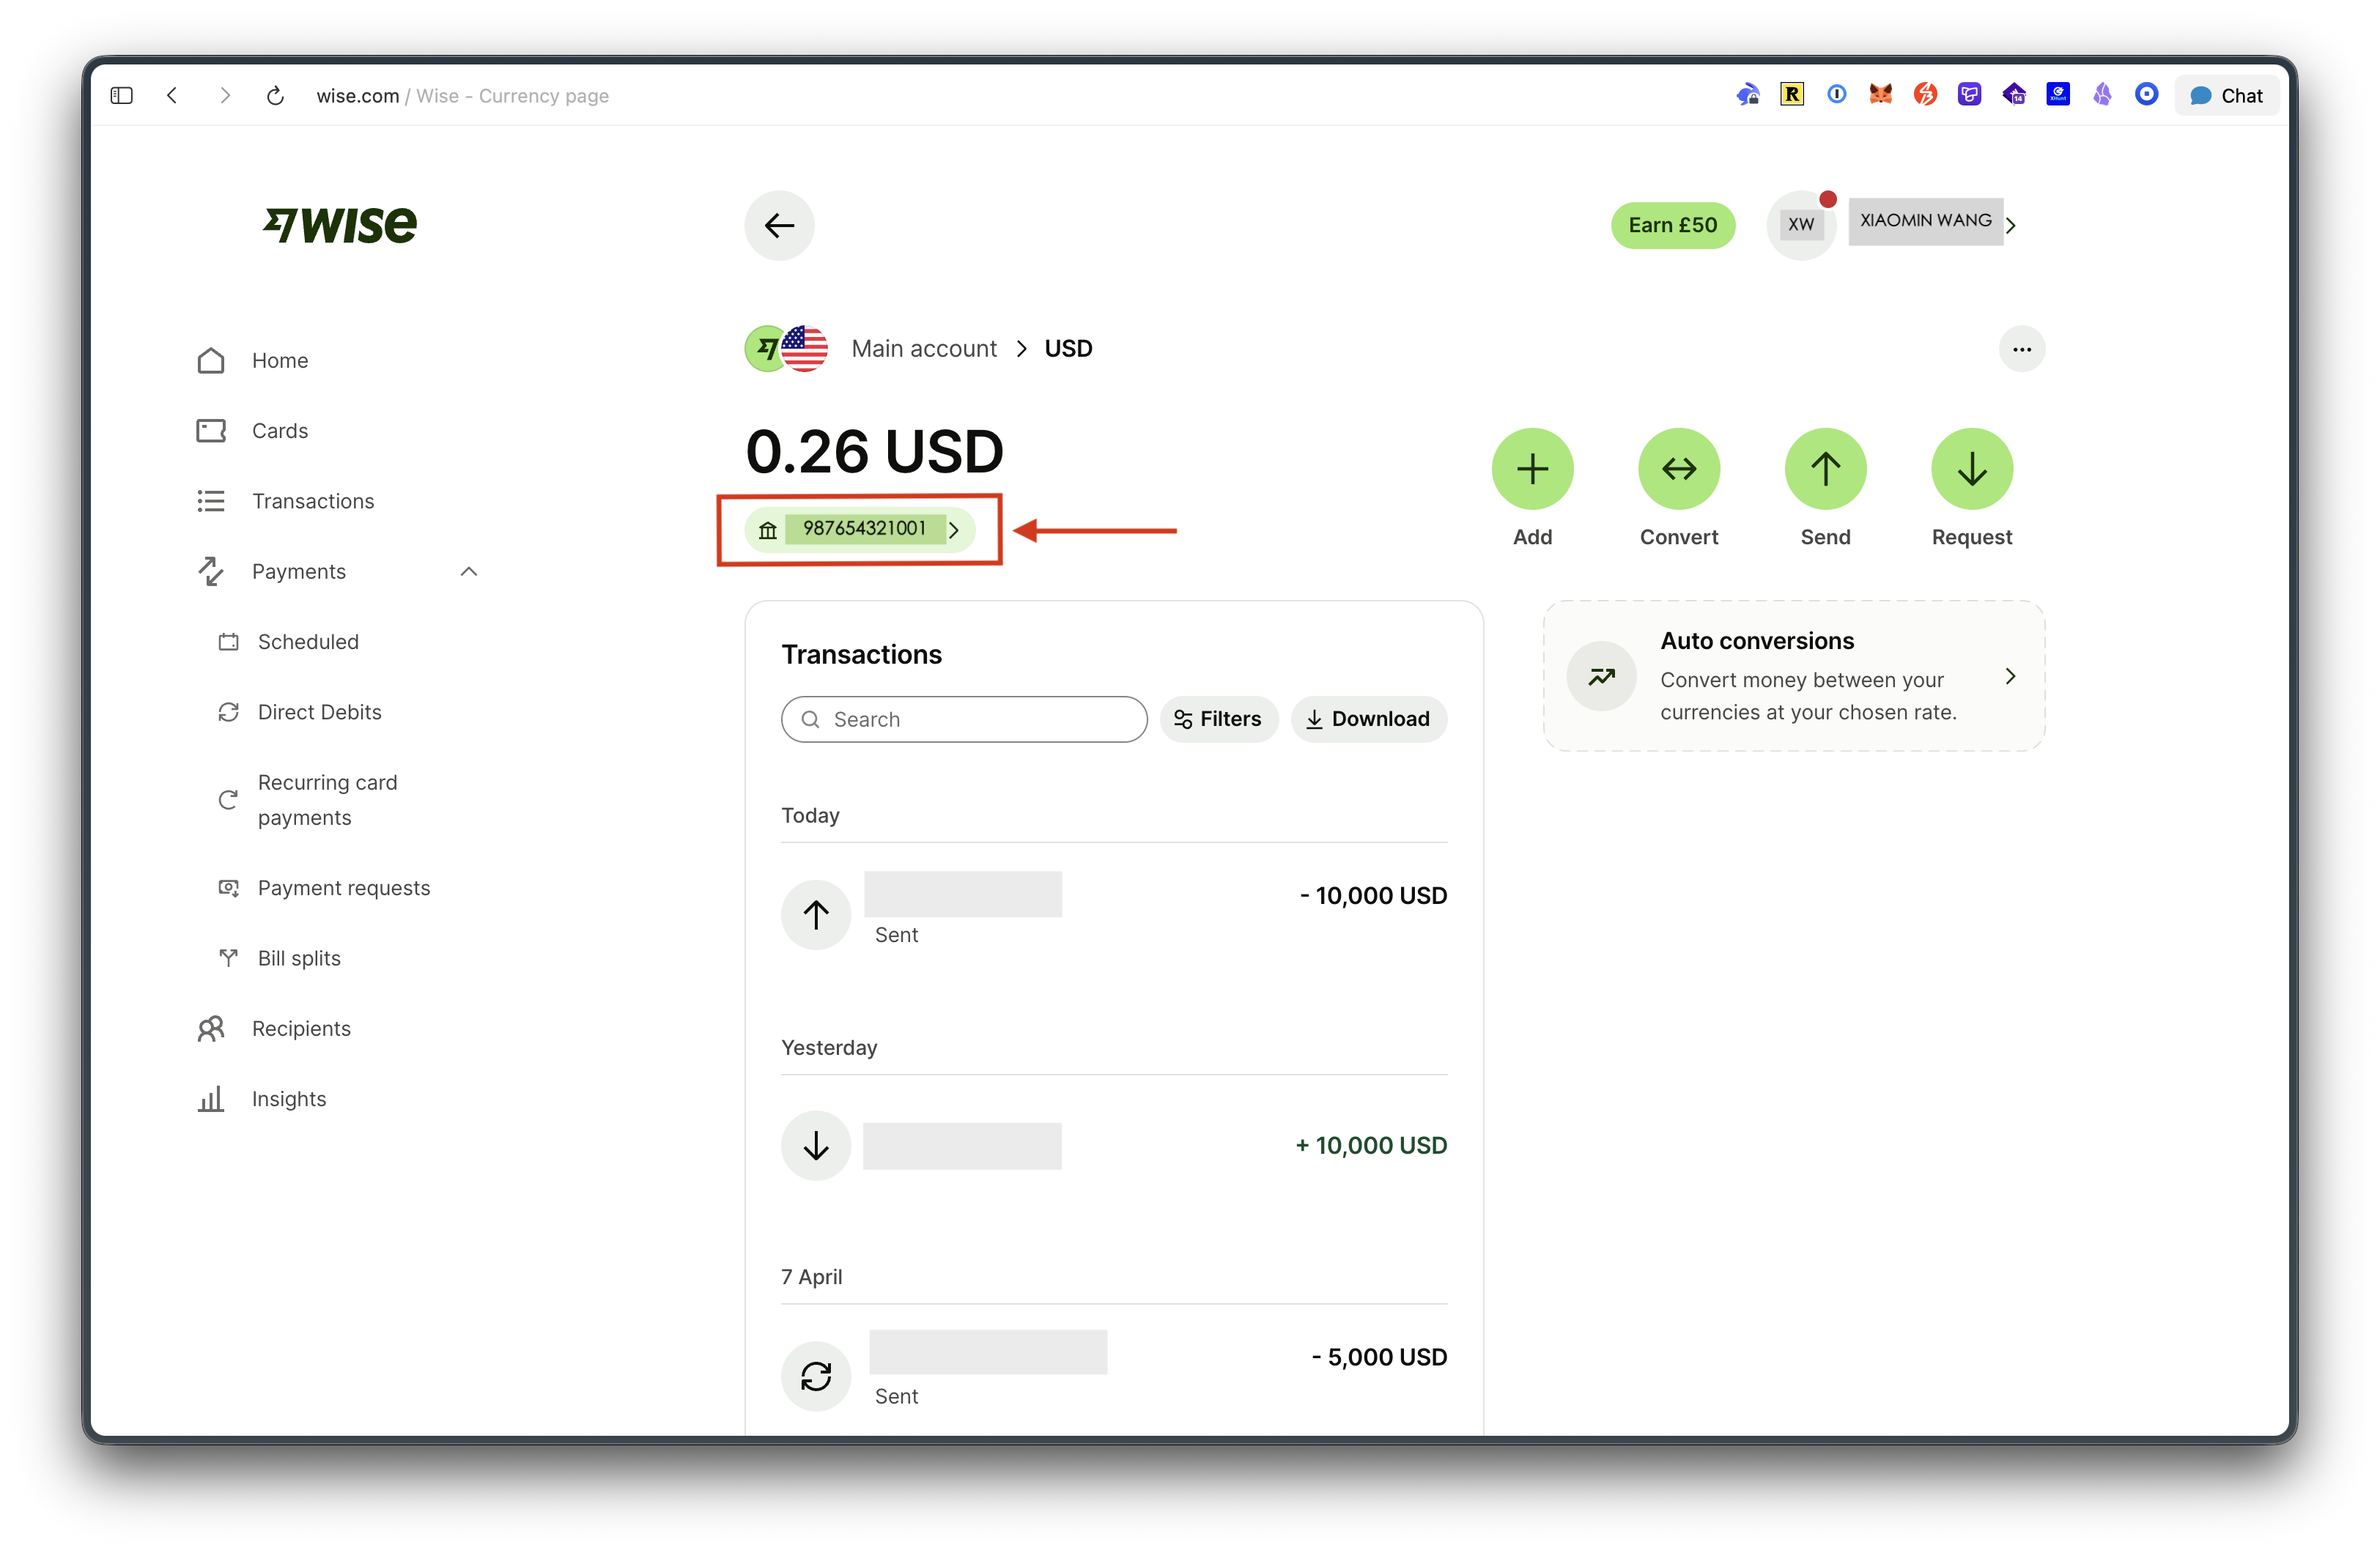
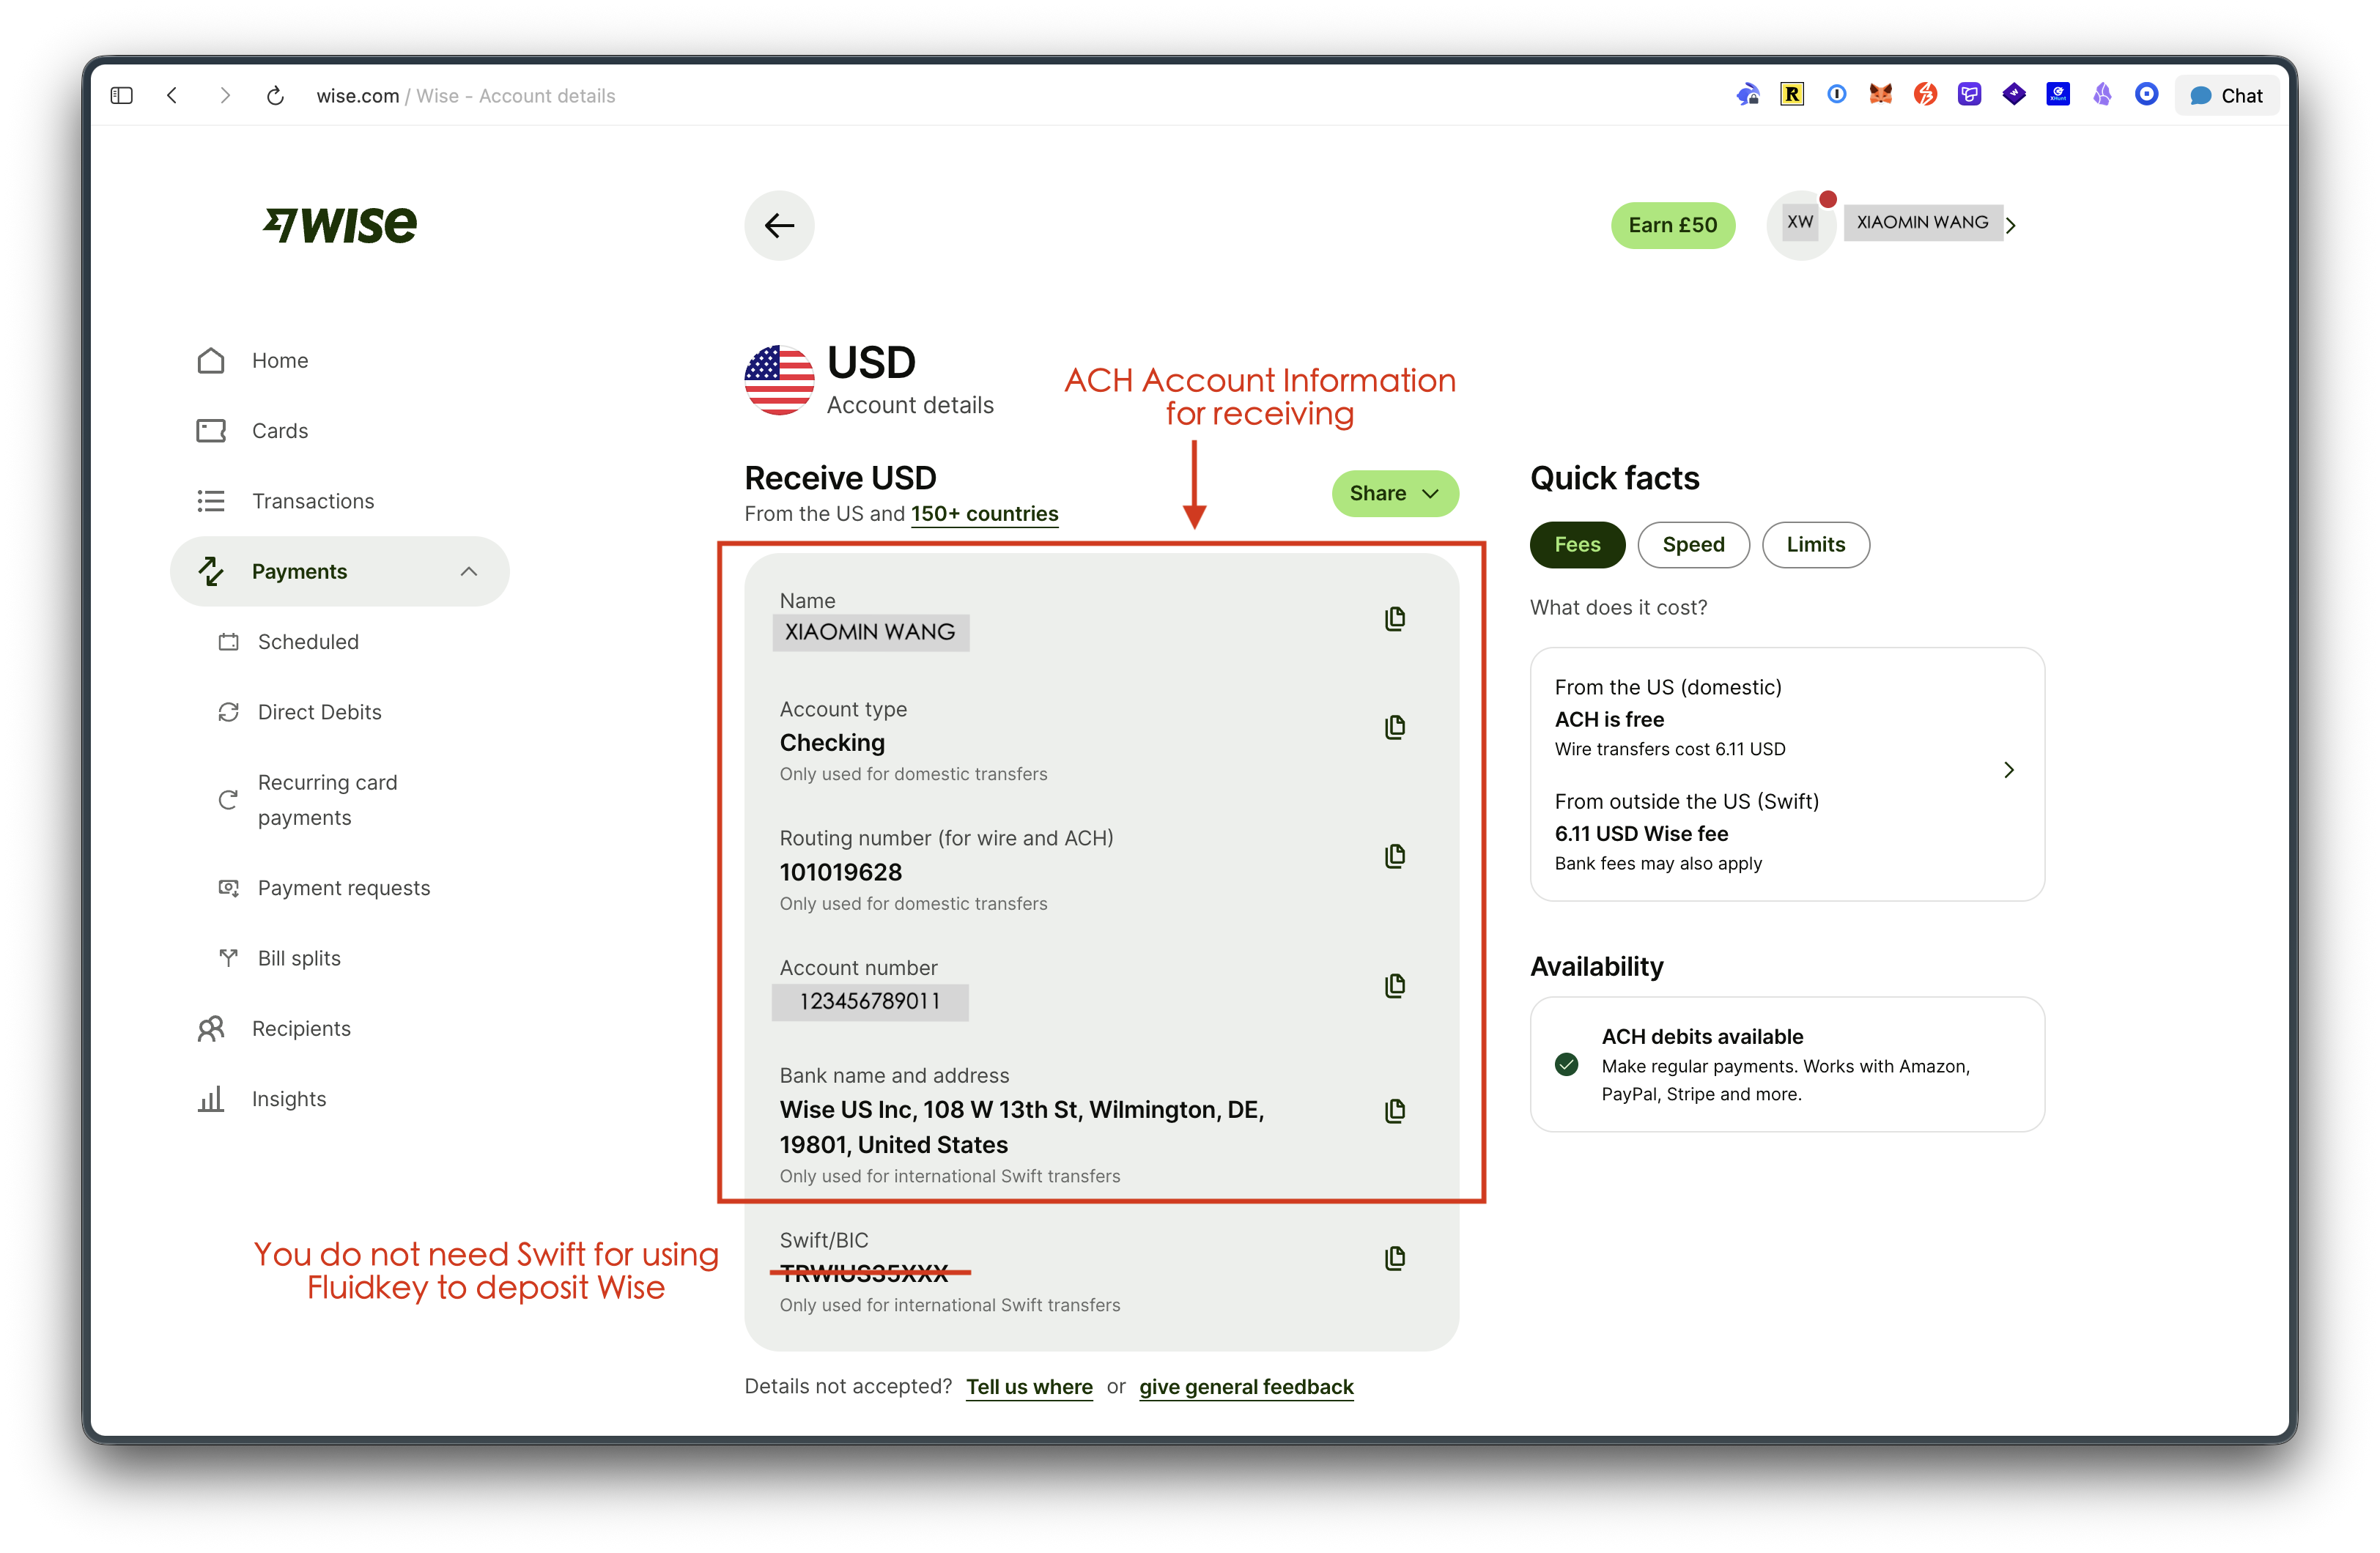
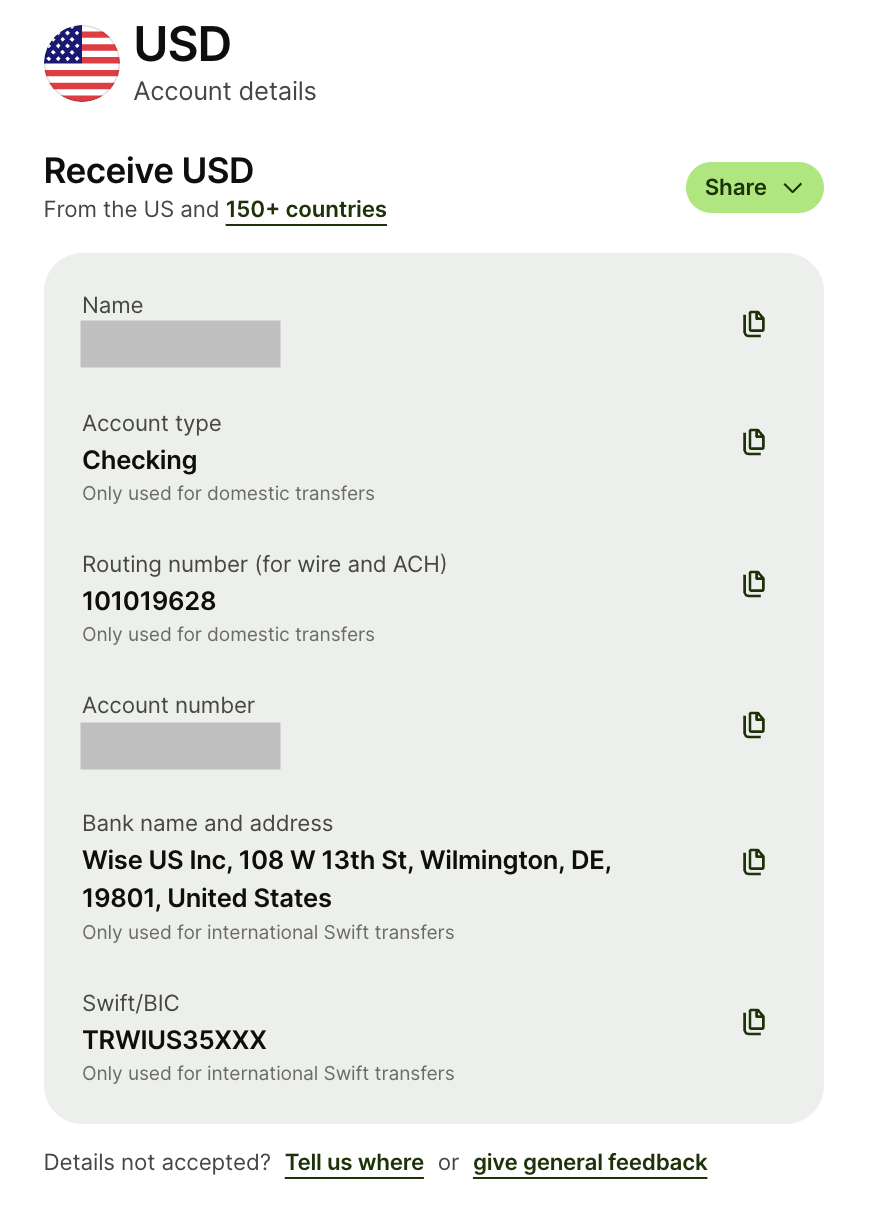
Step 1 — Get Your Wise USD Account Receiving Details
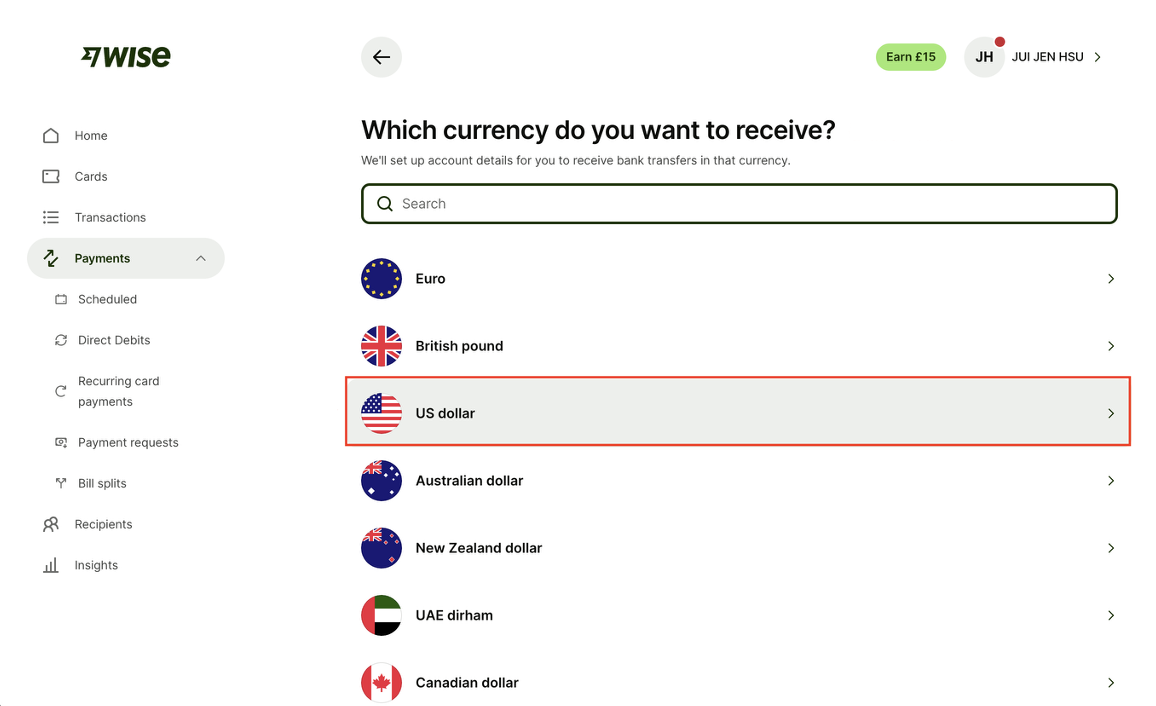
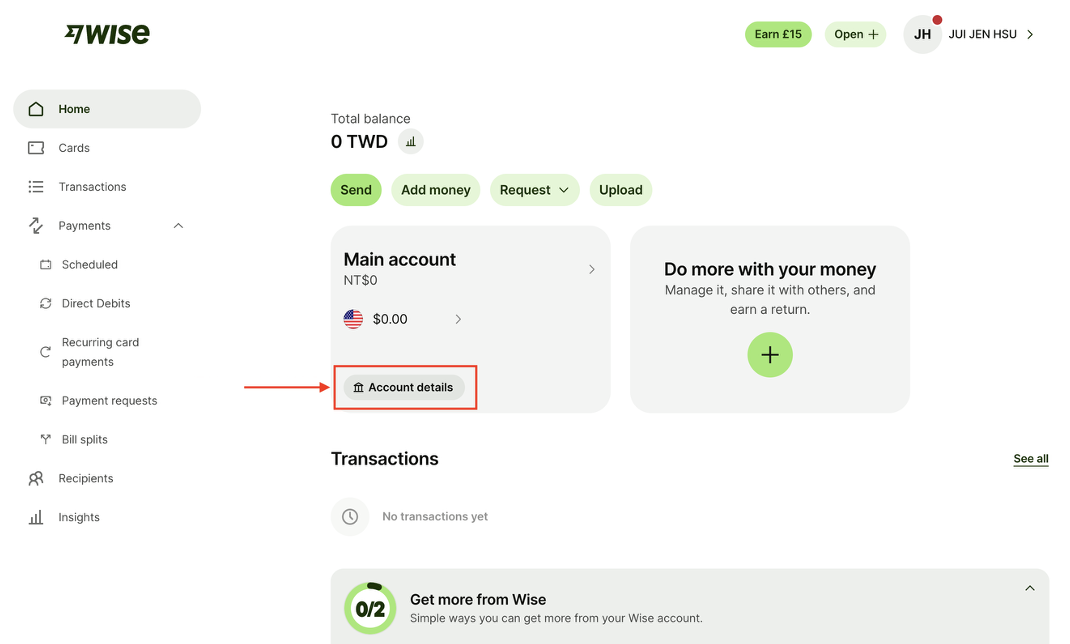
In Wise, tap "Account Details" to retrieve your ACH receiving information.
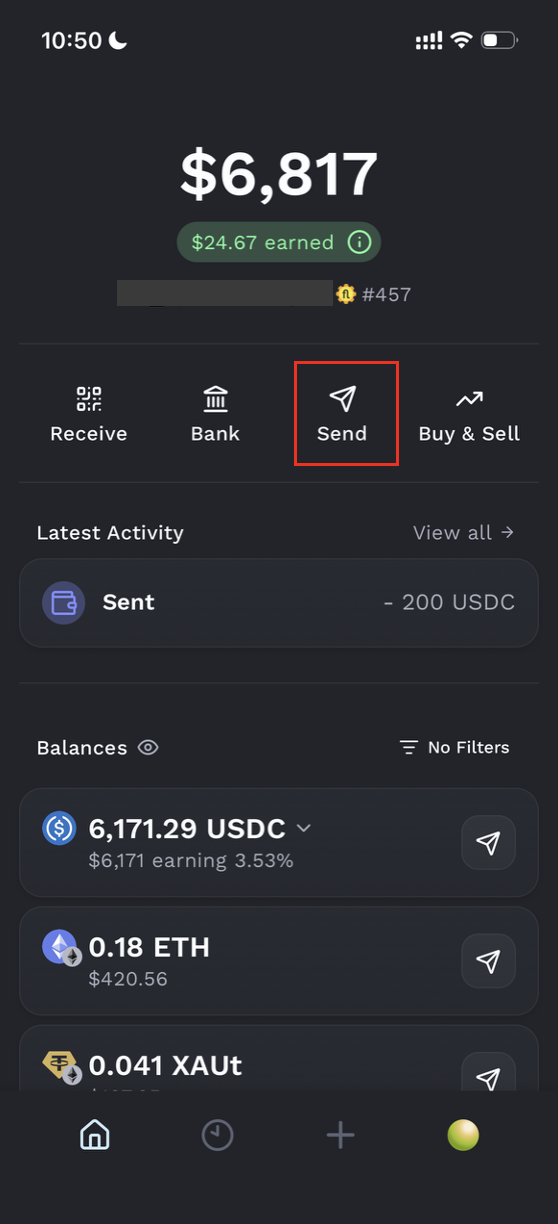
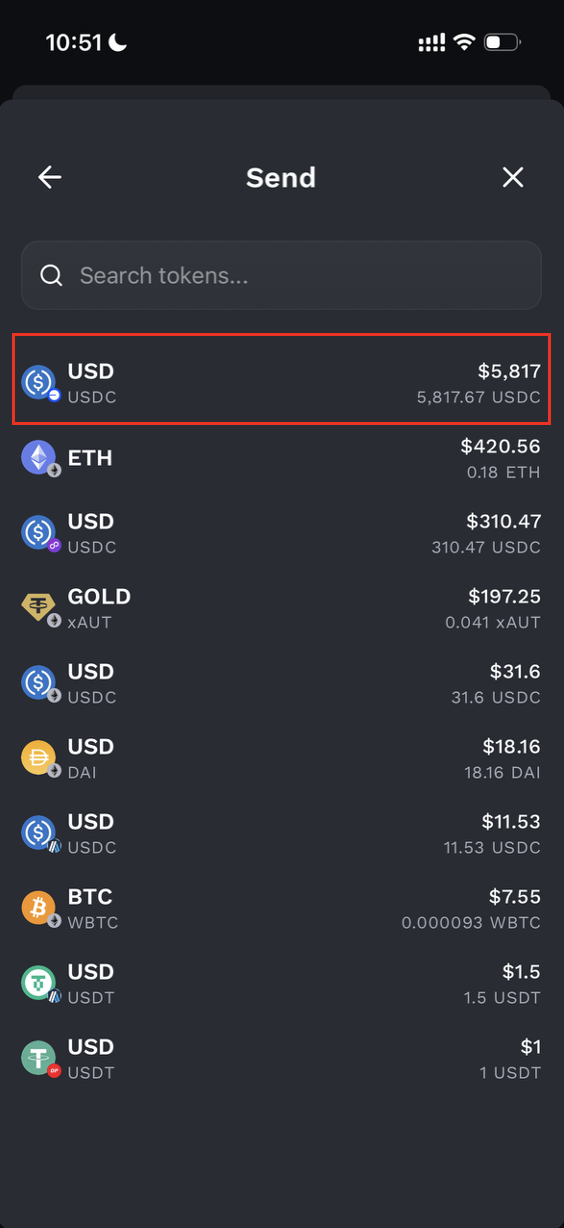
Step 2 — Initiate the Transfer from Fluidkey
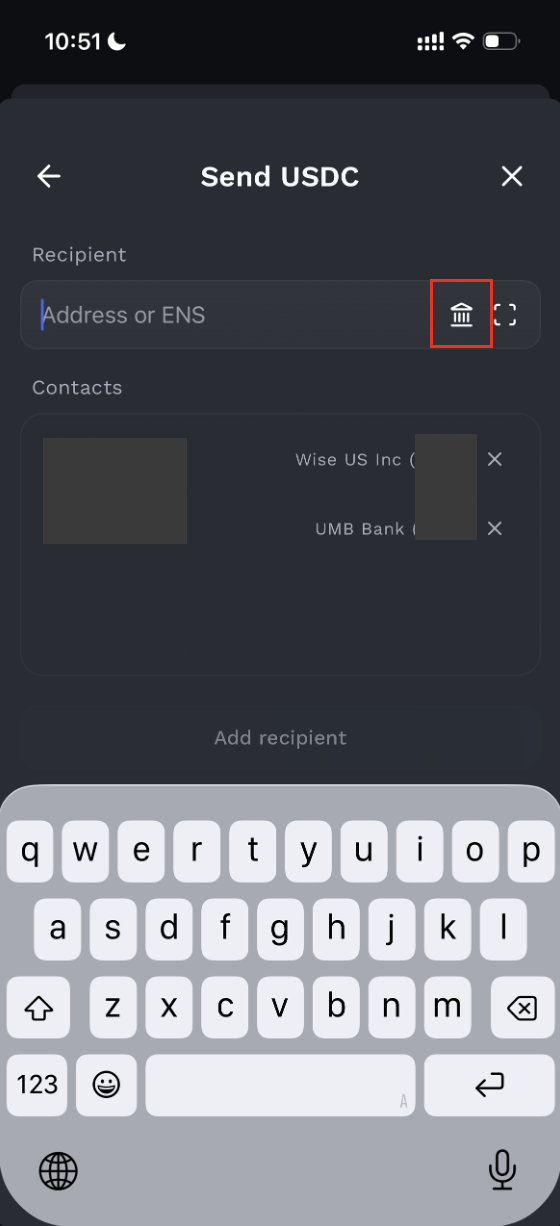
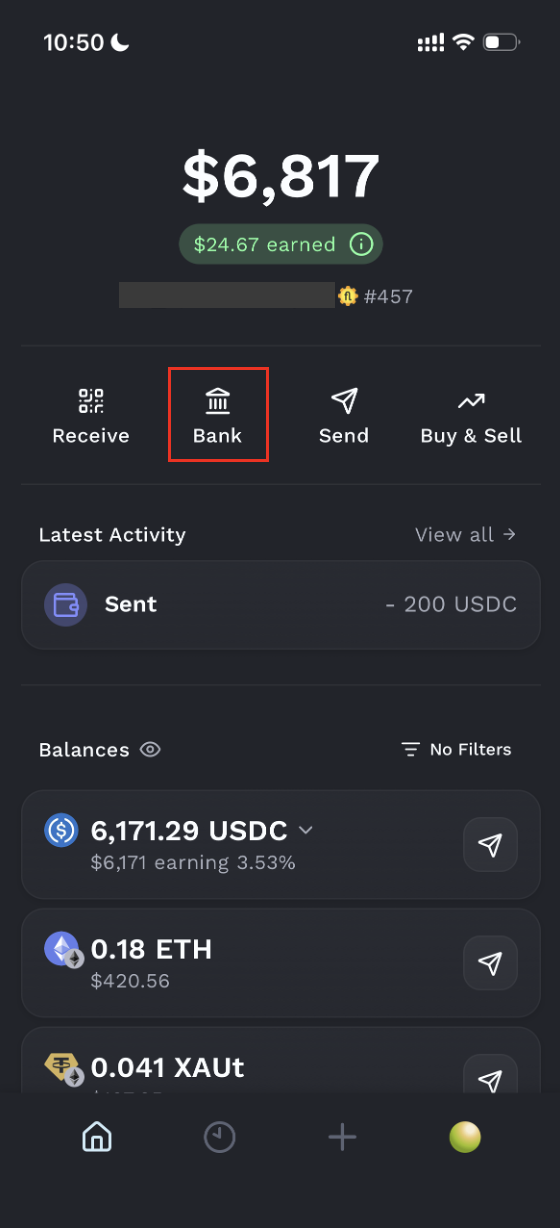
Return to the Fluidkey home screen and tap "Send."
Select USDC, then tap the small bank icon to the right of the recipient address field.
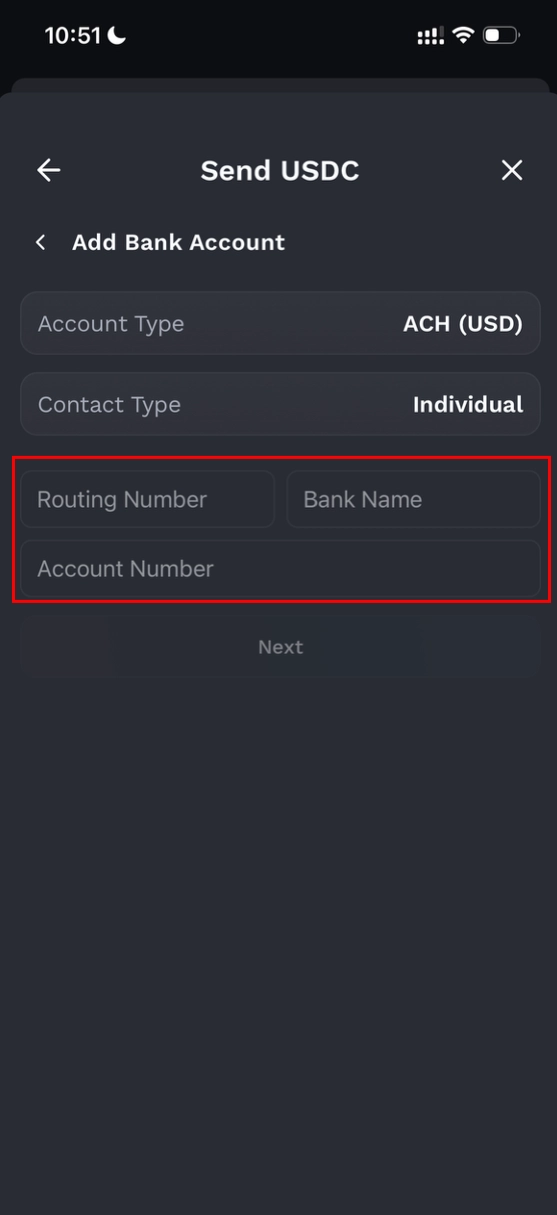
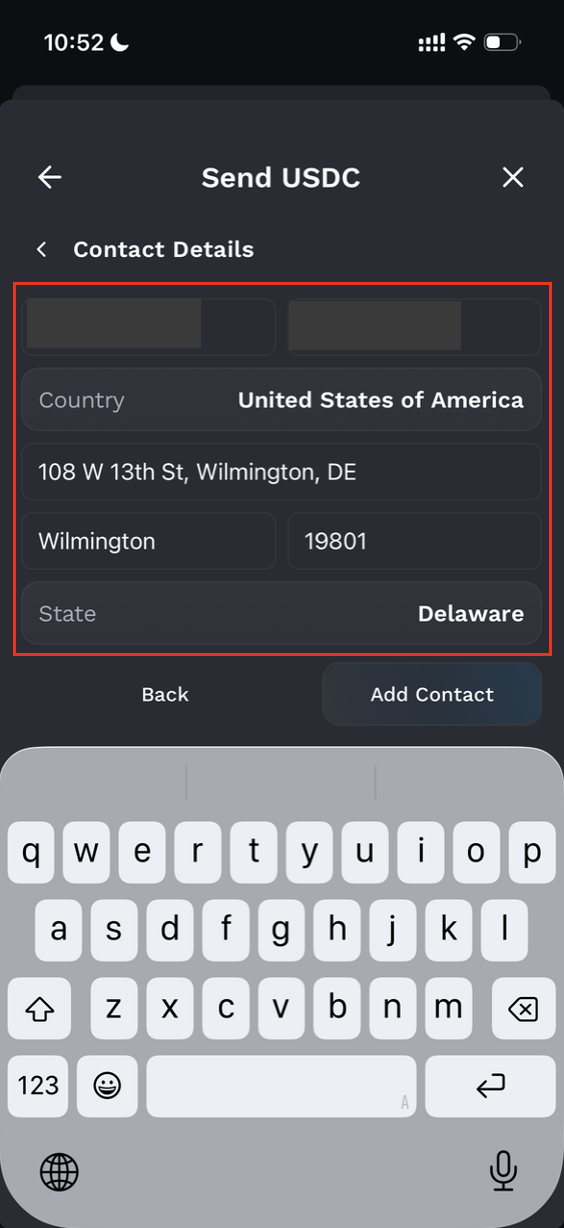
Step 3 — Fill In the Account Details
Enter the information using the receiving details provided by Wise, and tick "Add Contact" to save this account as a reusable contact for future transfers.
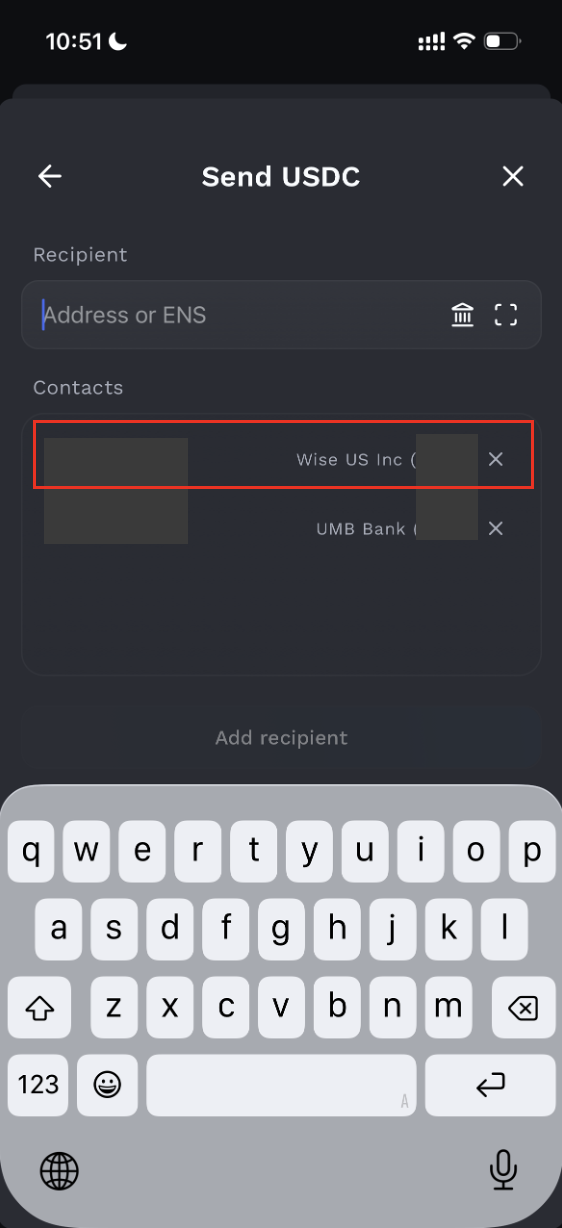
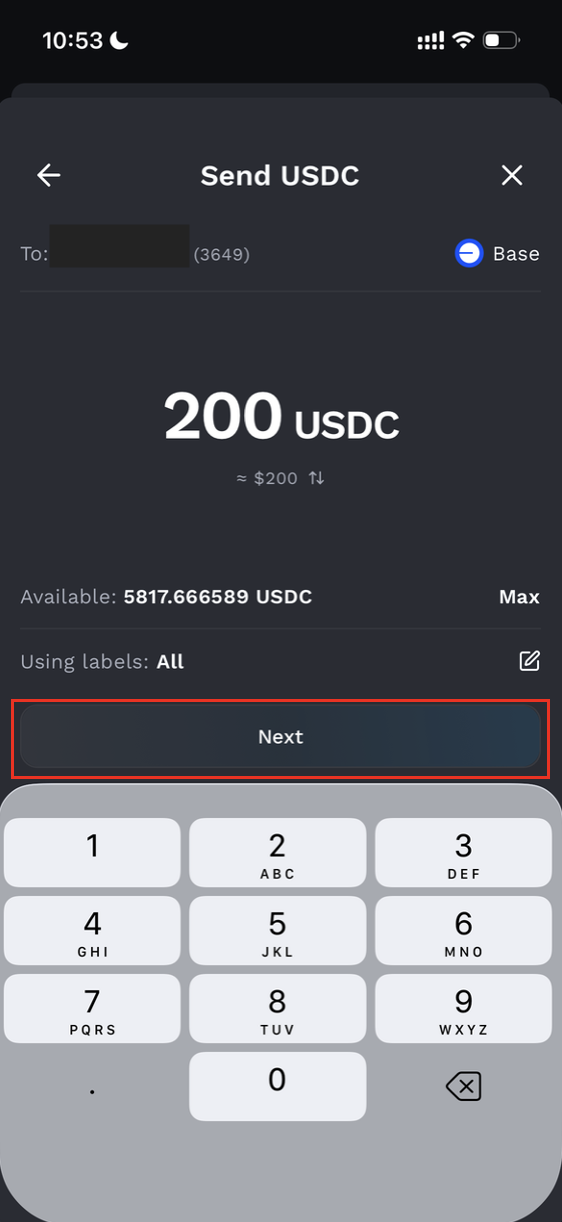
Step 4 — Select the Saved Contact and Enter the Amount
Tap the contact you just saved (Wise), enter the transfer amount, and tap "Next."
Sending USDC on the Base chain incurs no on-chain gas fees, and there is no transaction fee as well within your USD 3,000 monthly allowance.
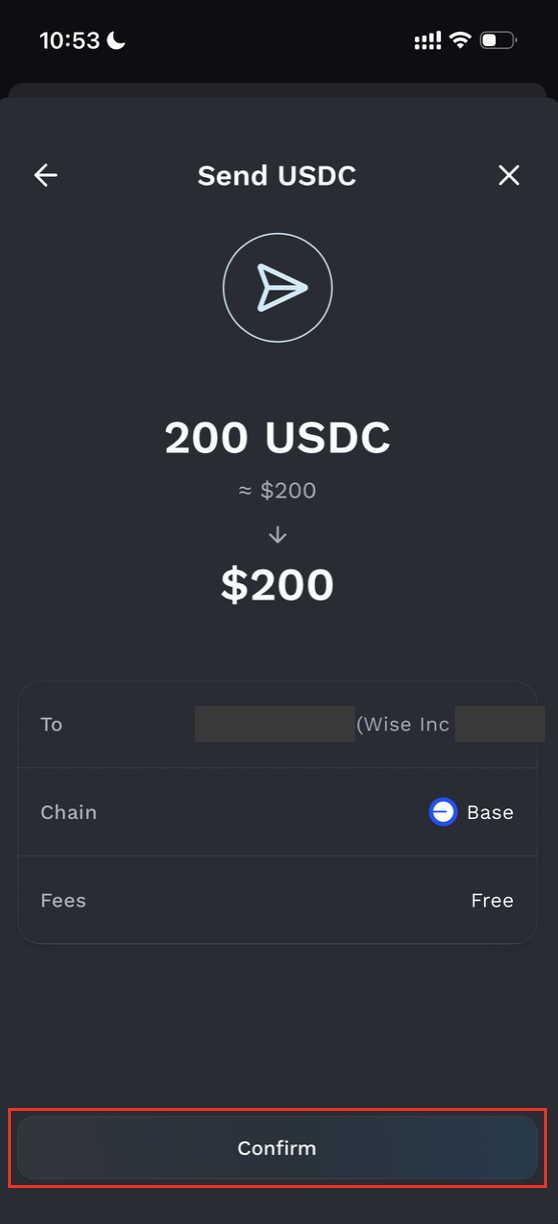
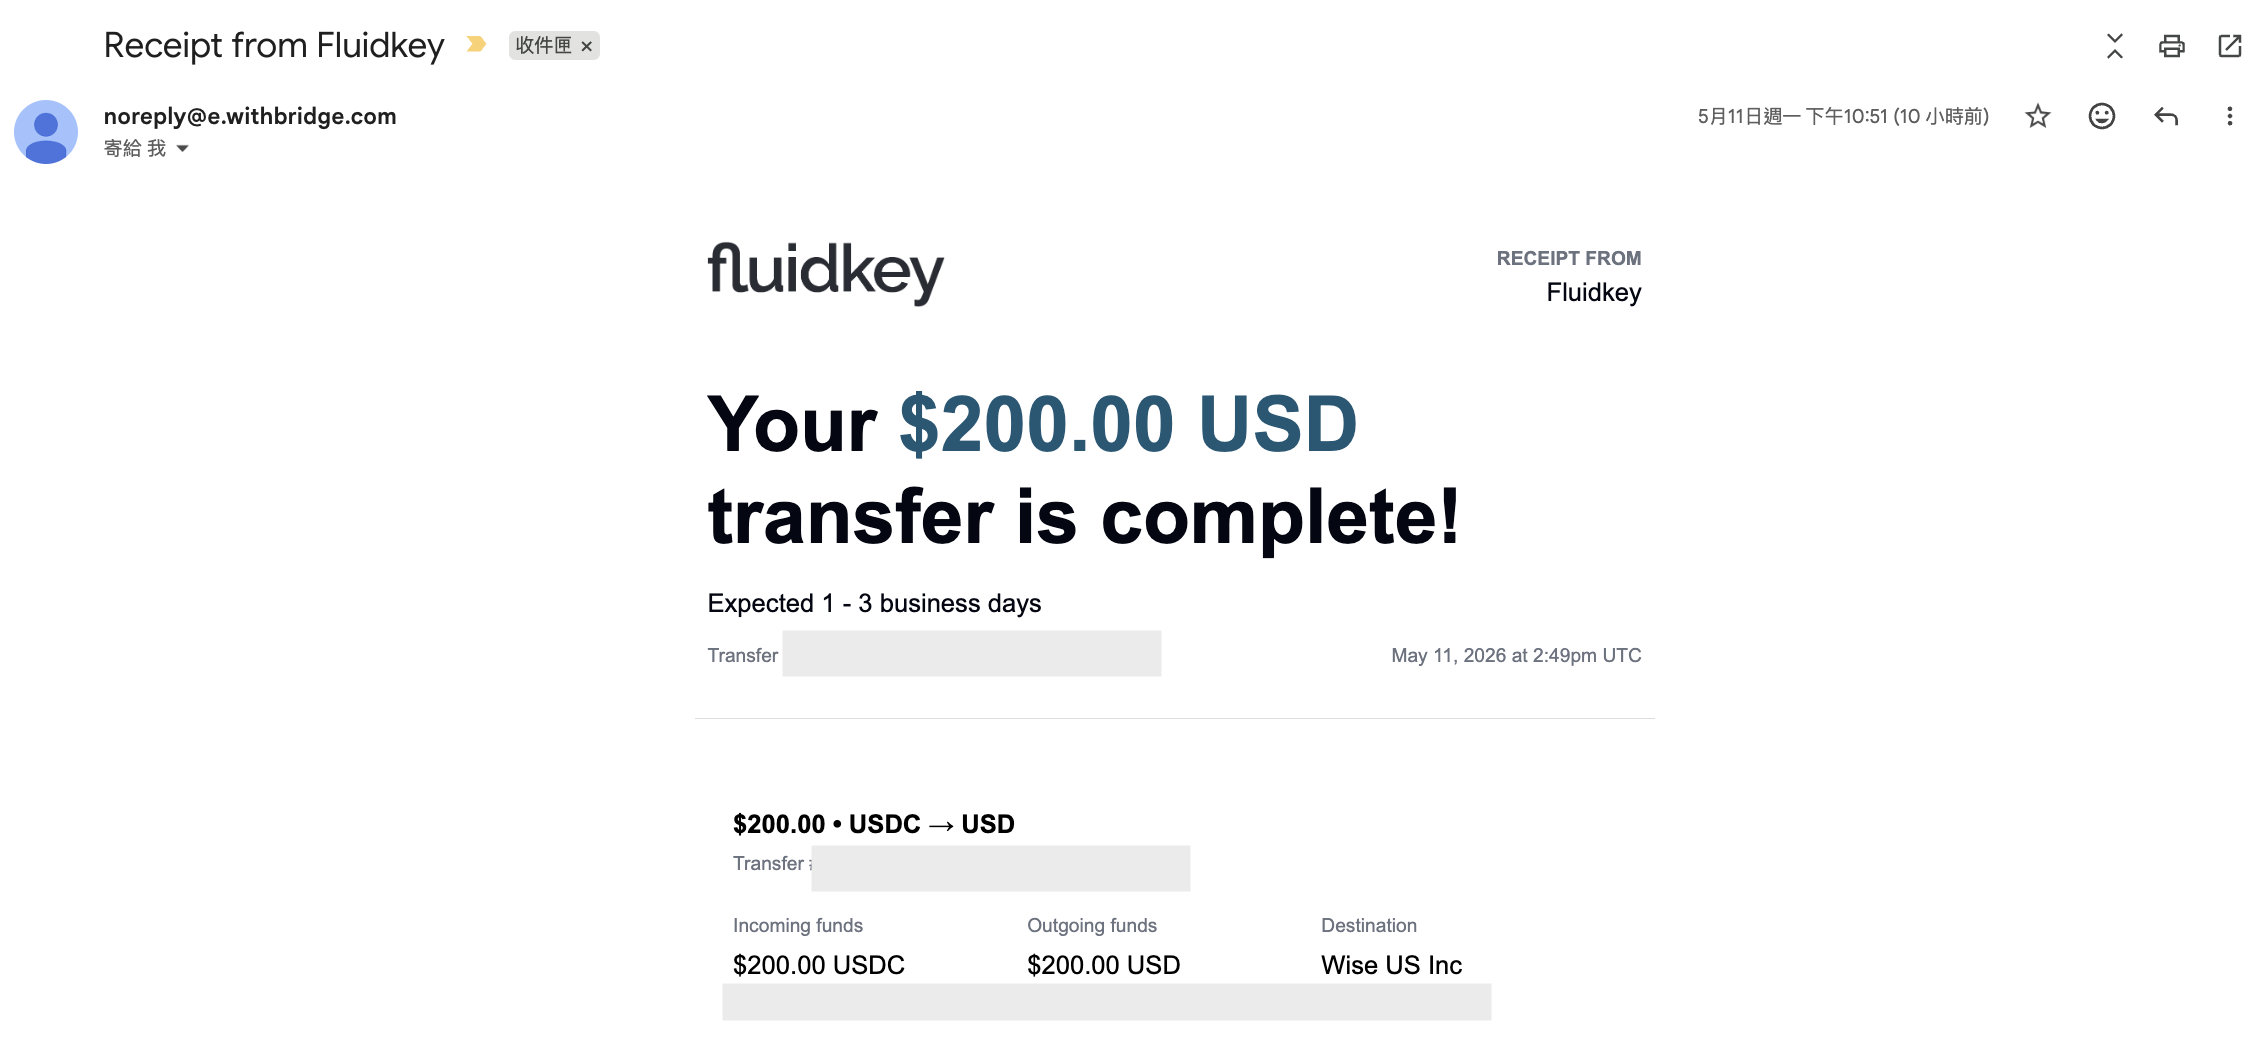
Once the transfer is complete, you'll receive a receipt from Fluidkey — then simply wait 1–3 business days for the ACH transfer to clear!
Section 2 — How to Withdraw USD from Wise to Fluidkey
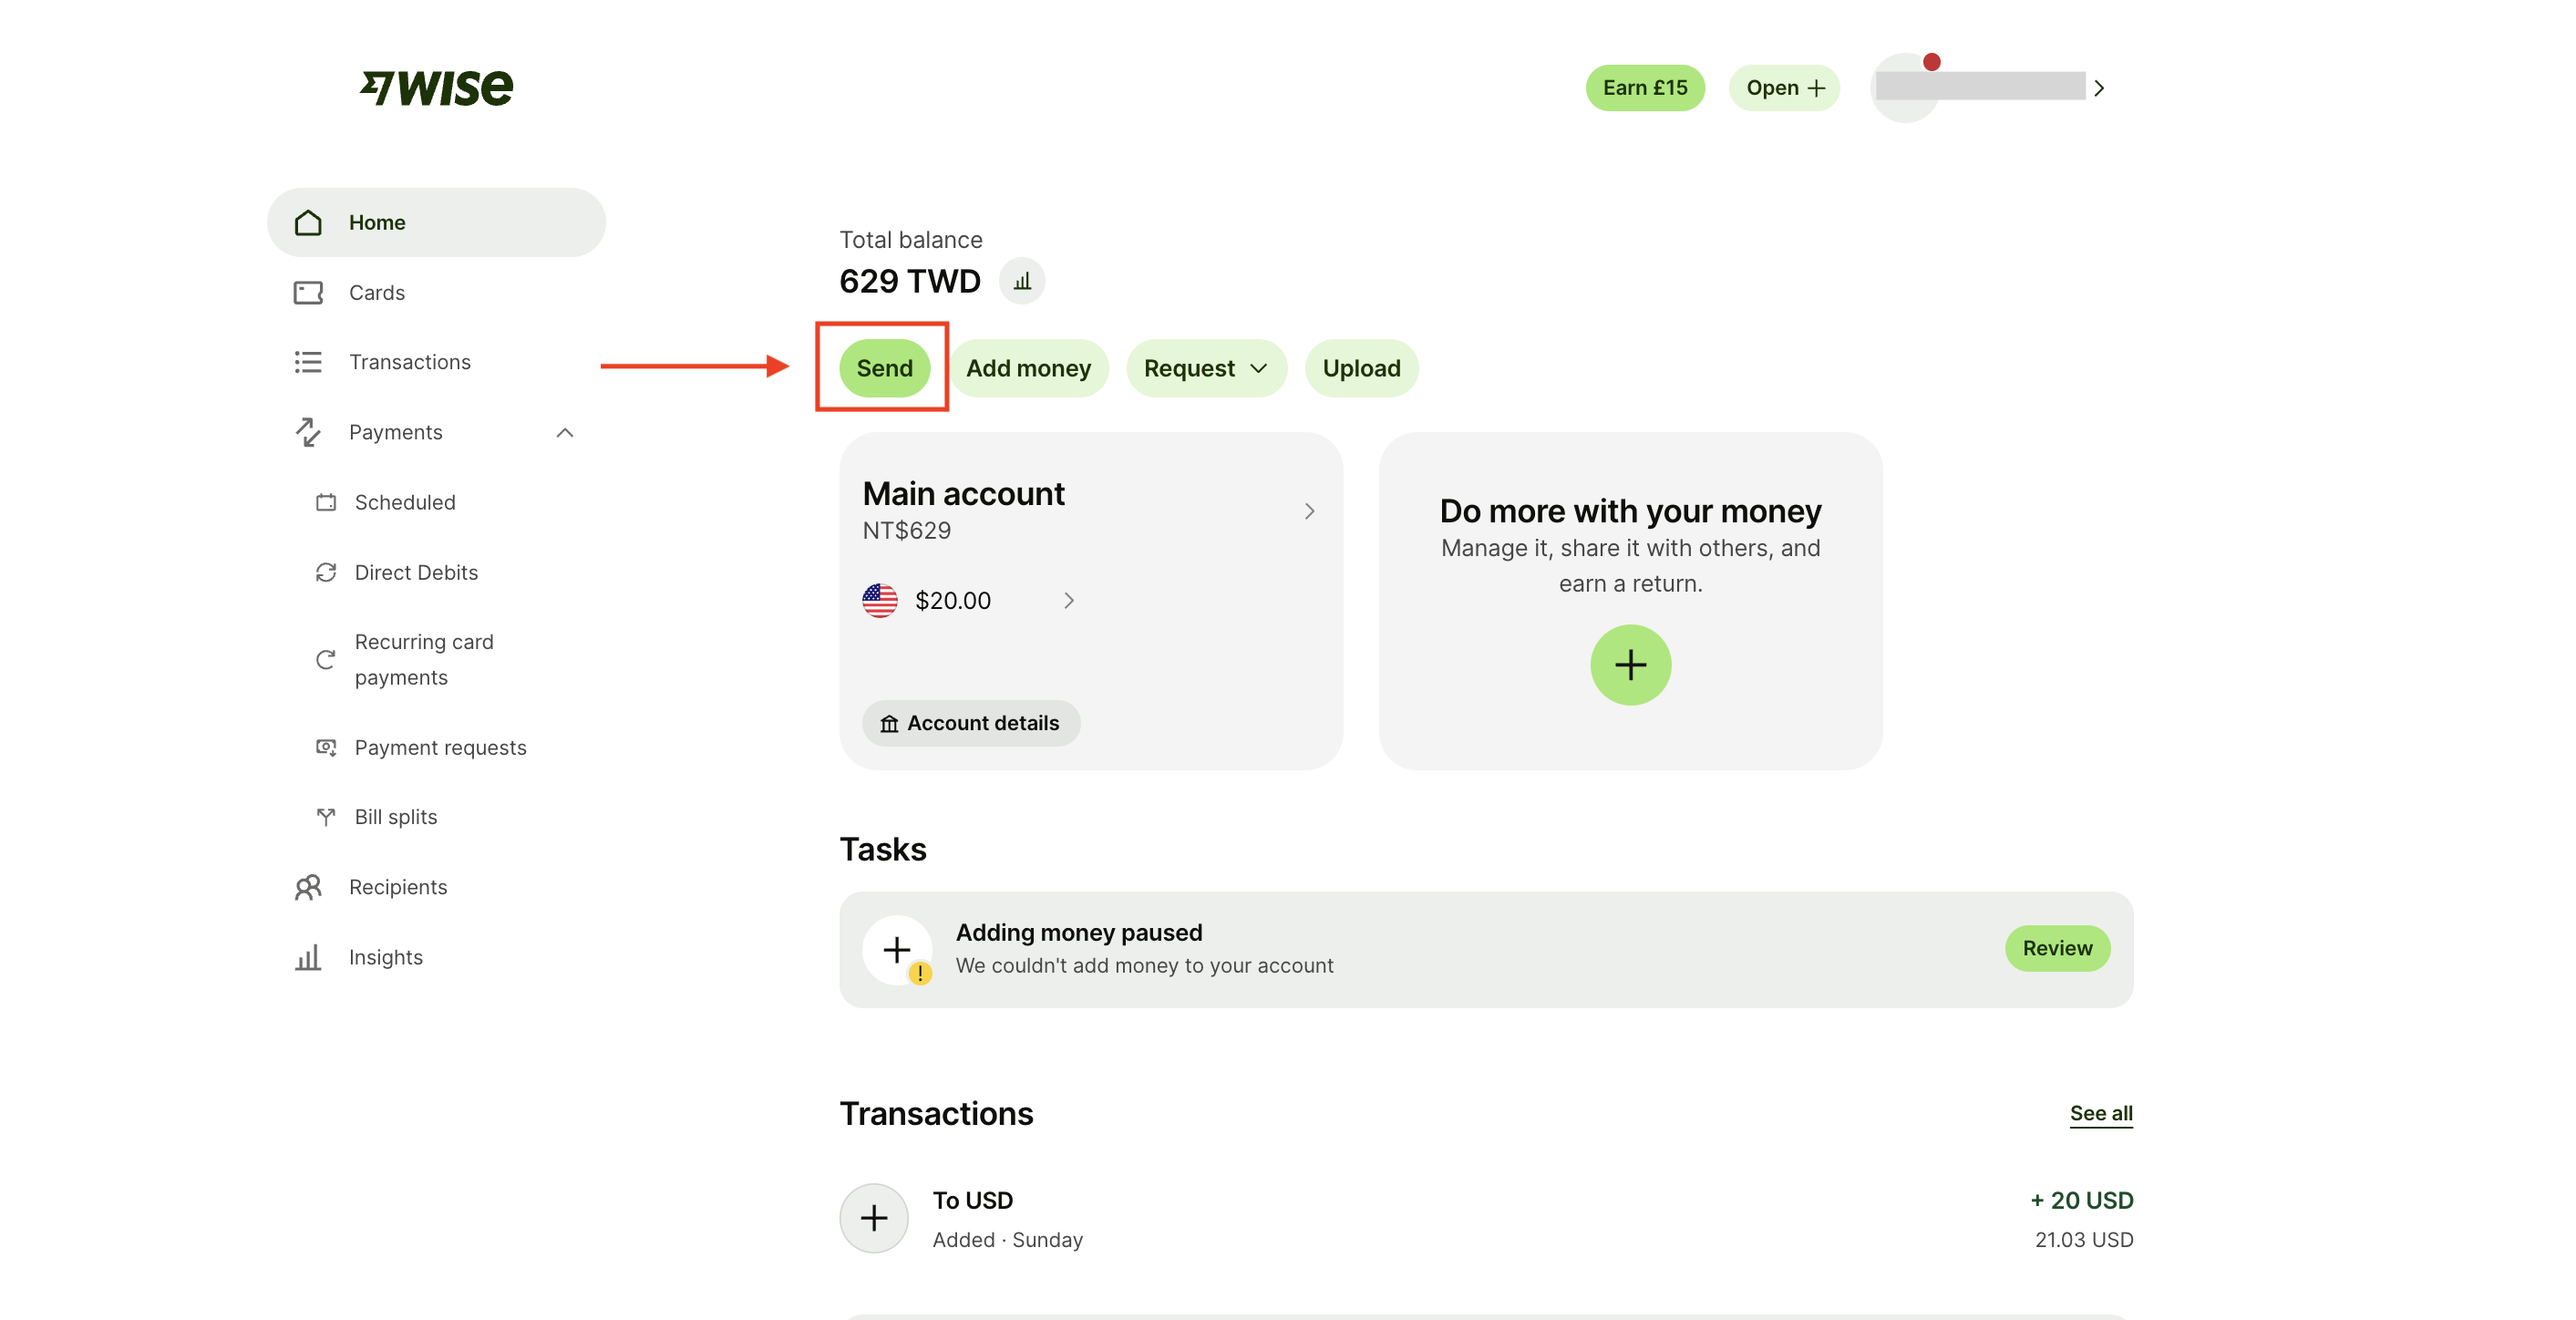
Step 1 — Start a Transfer in Wise
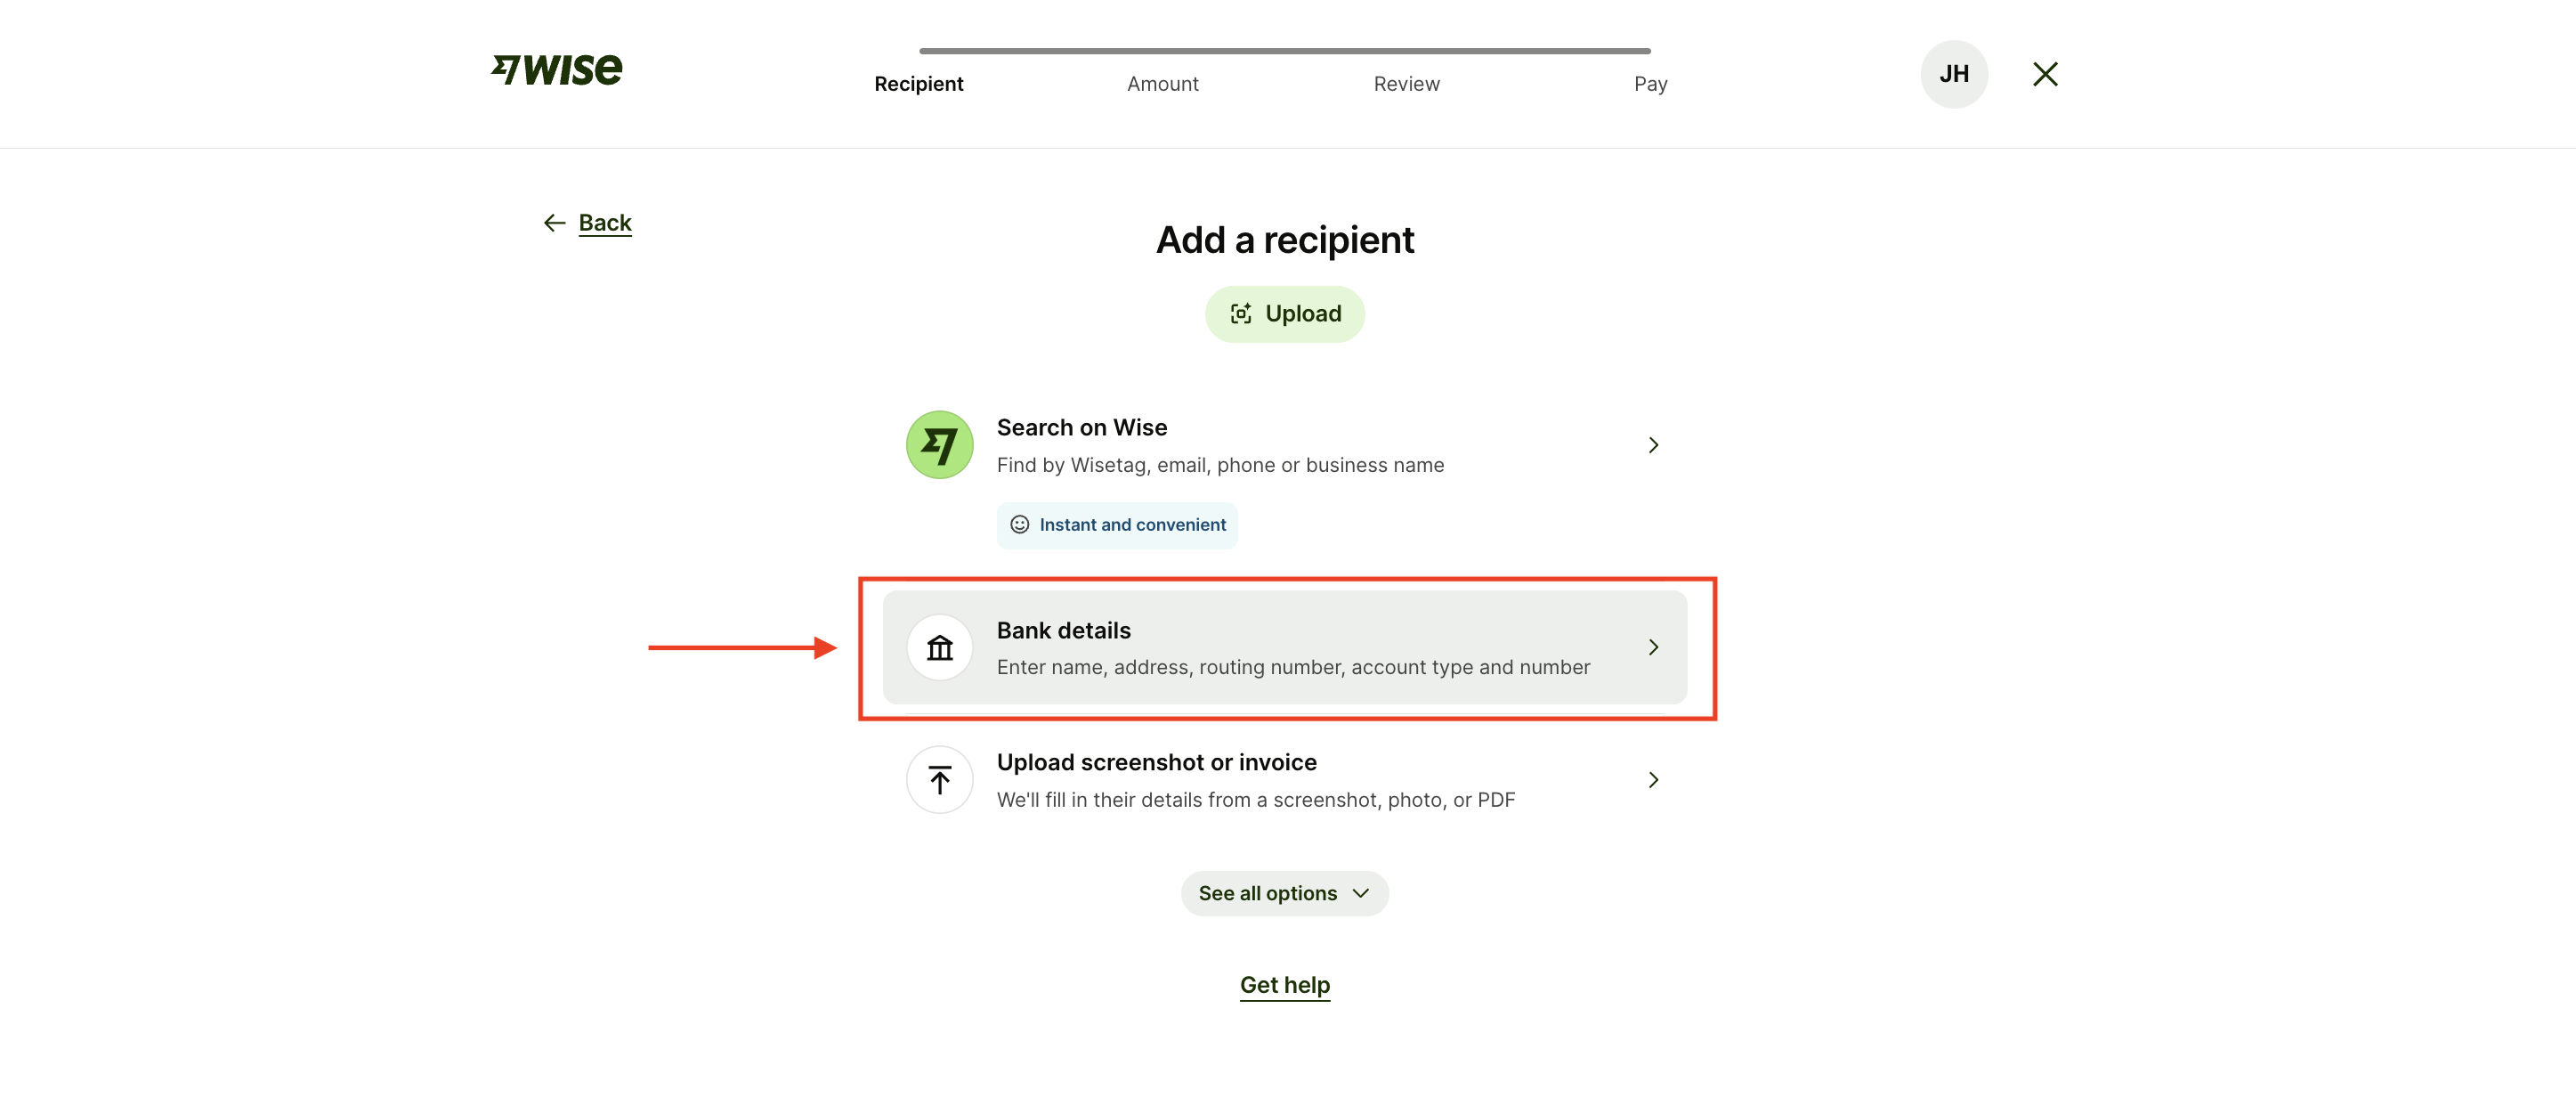
On the home screen, tap "Send," choose "USD" as the transfer currency, and select "Enter bank details manually" when adding the recipient.
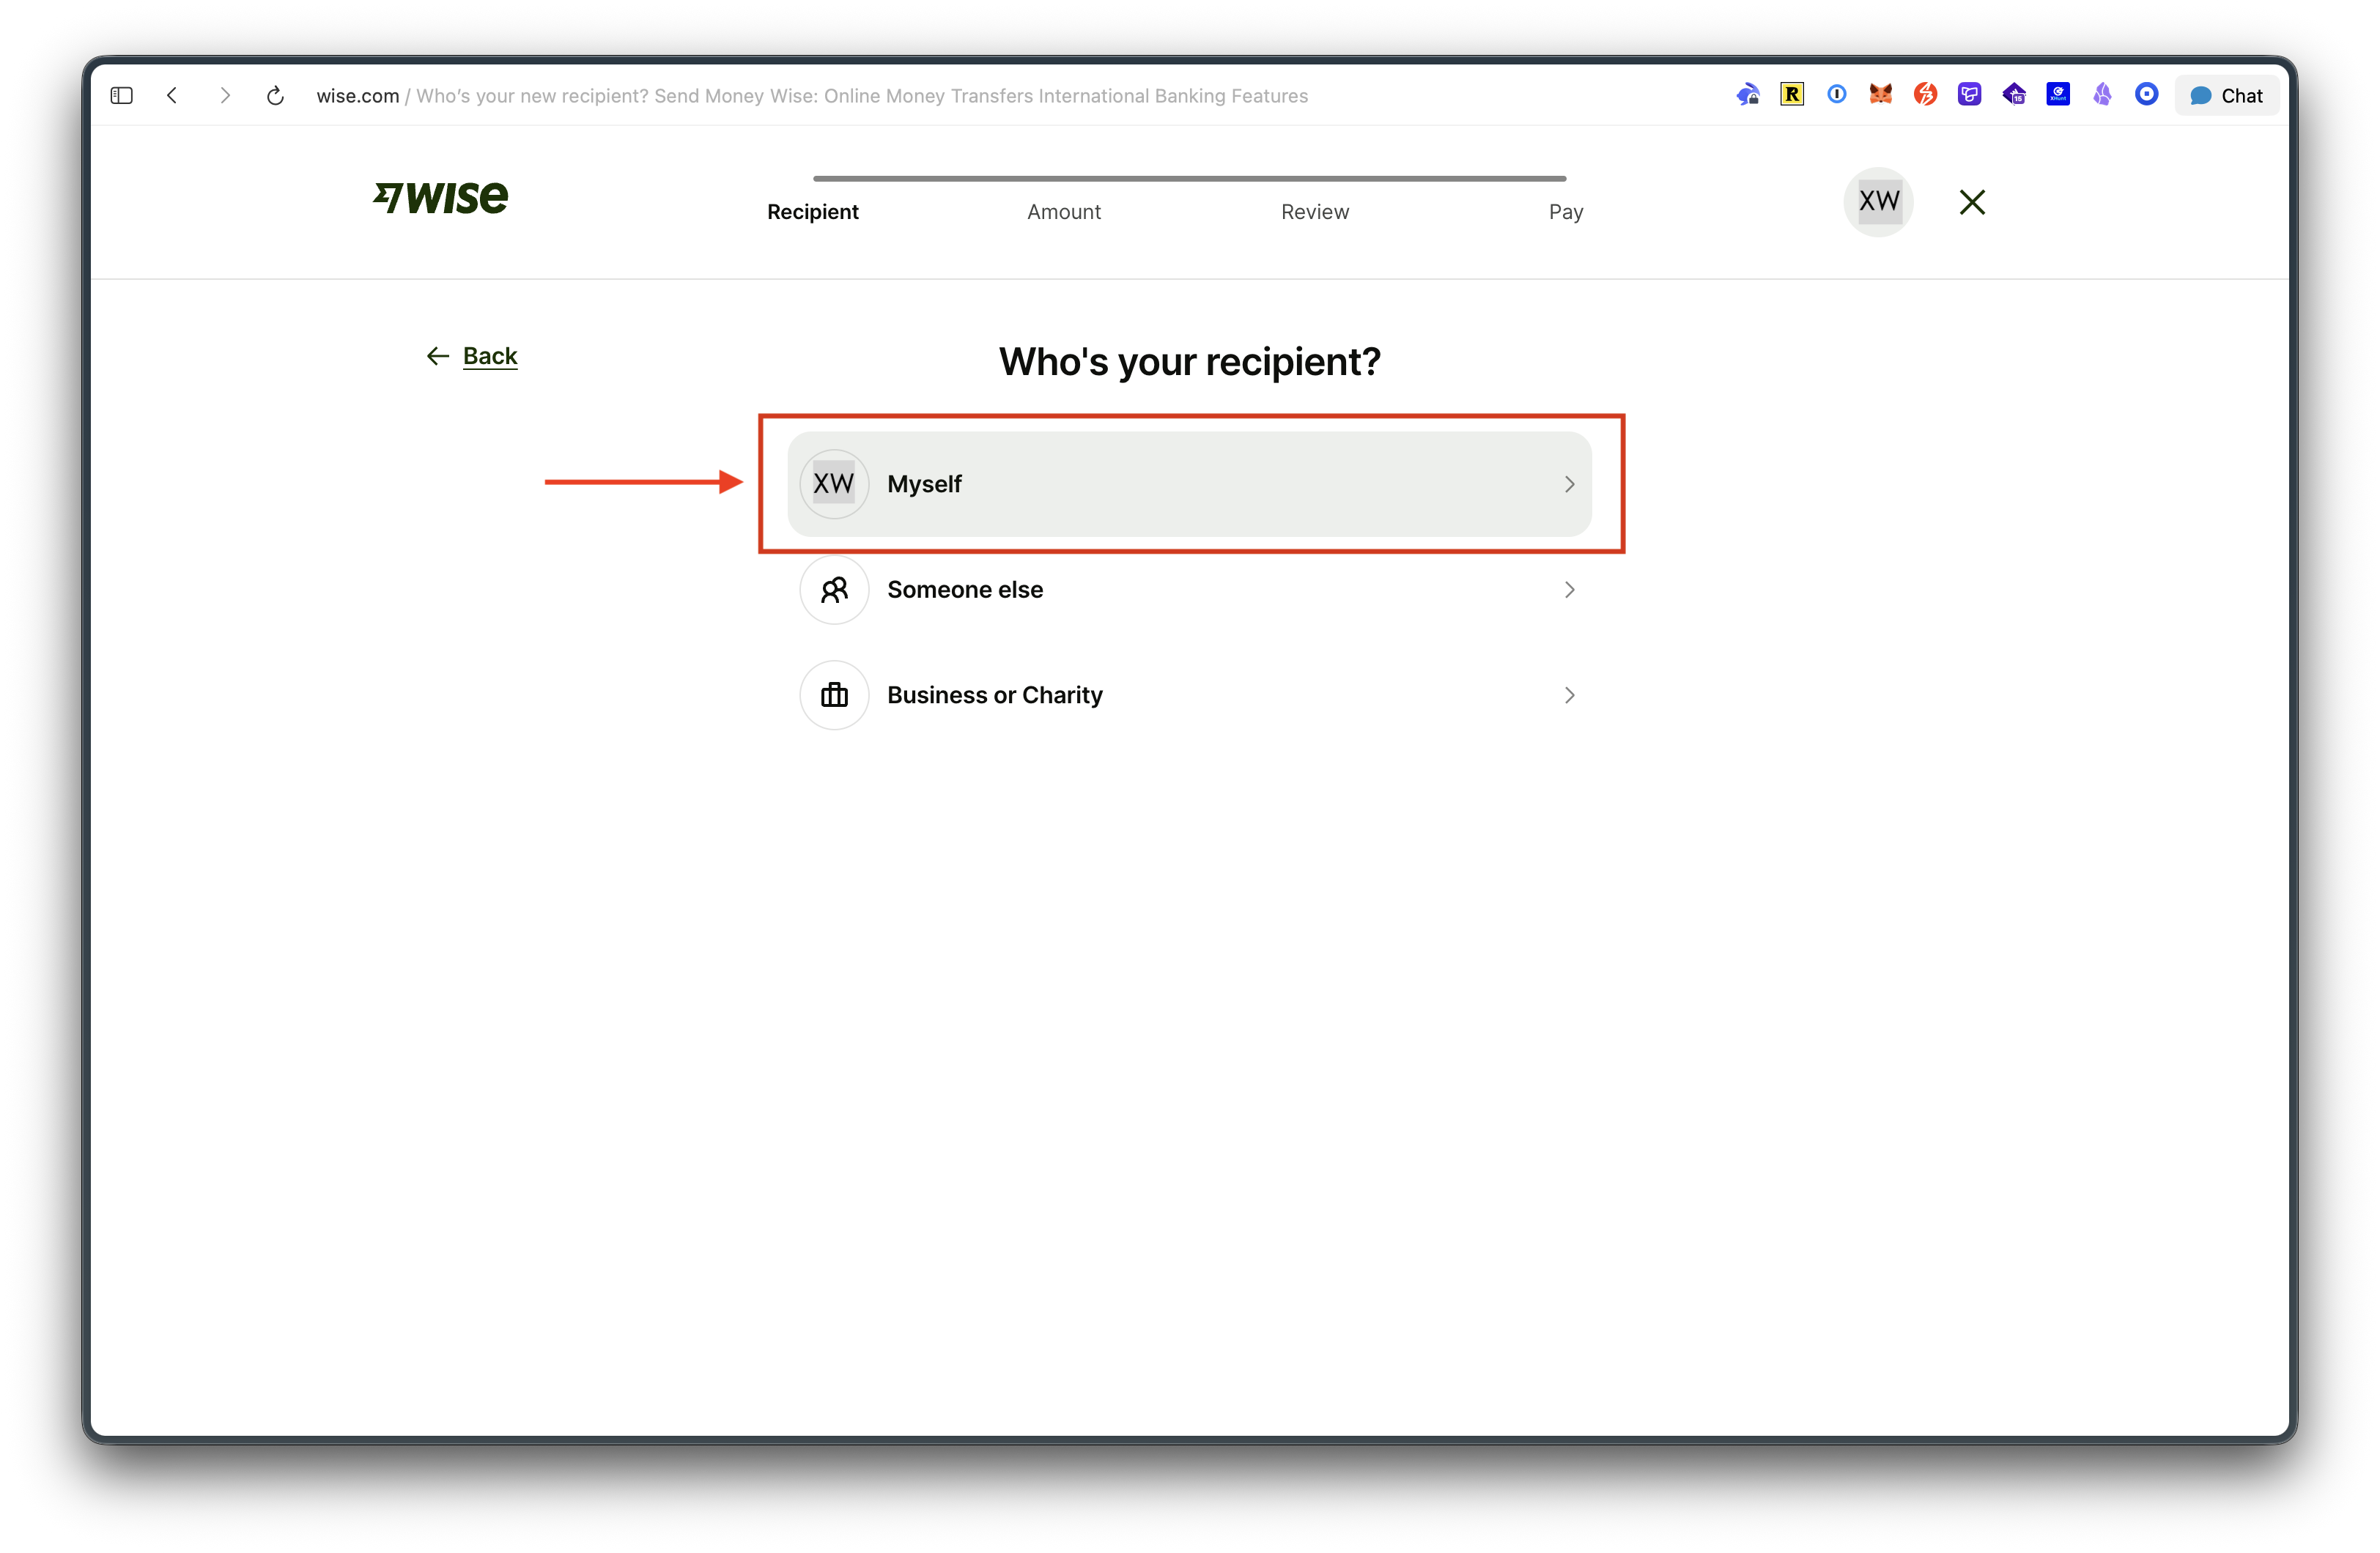
Step 2 — Set Up the Recipient
For the recipient, choose "Myself," select "ACH," and then fill in the receiving account details.
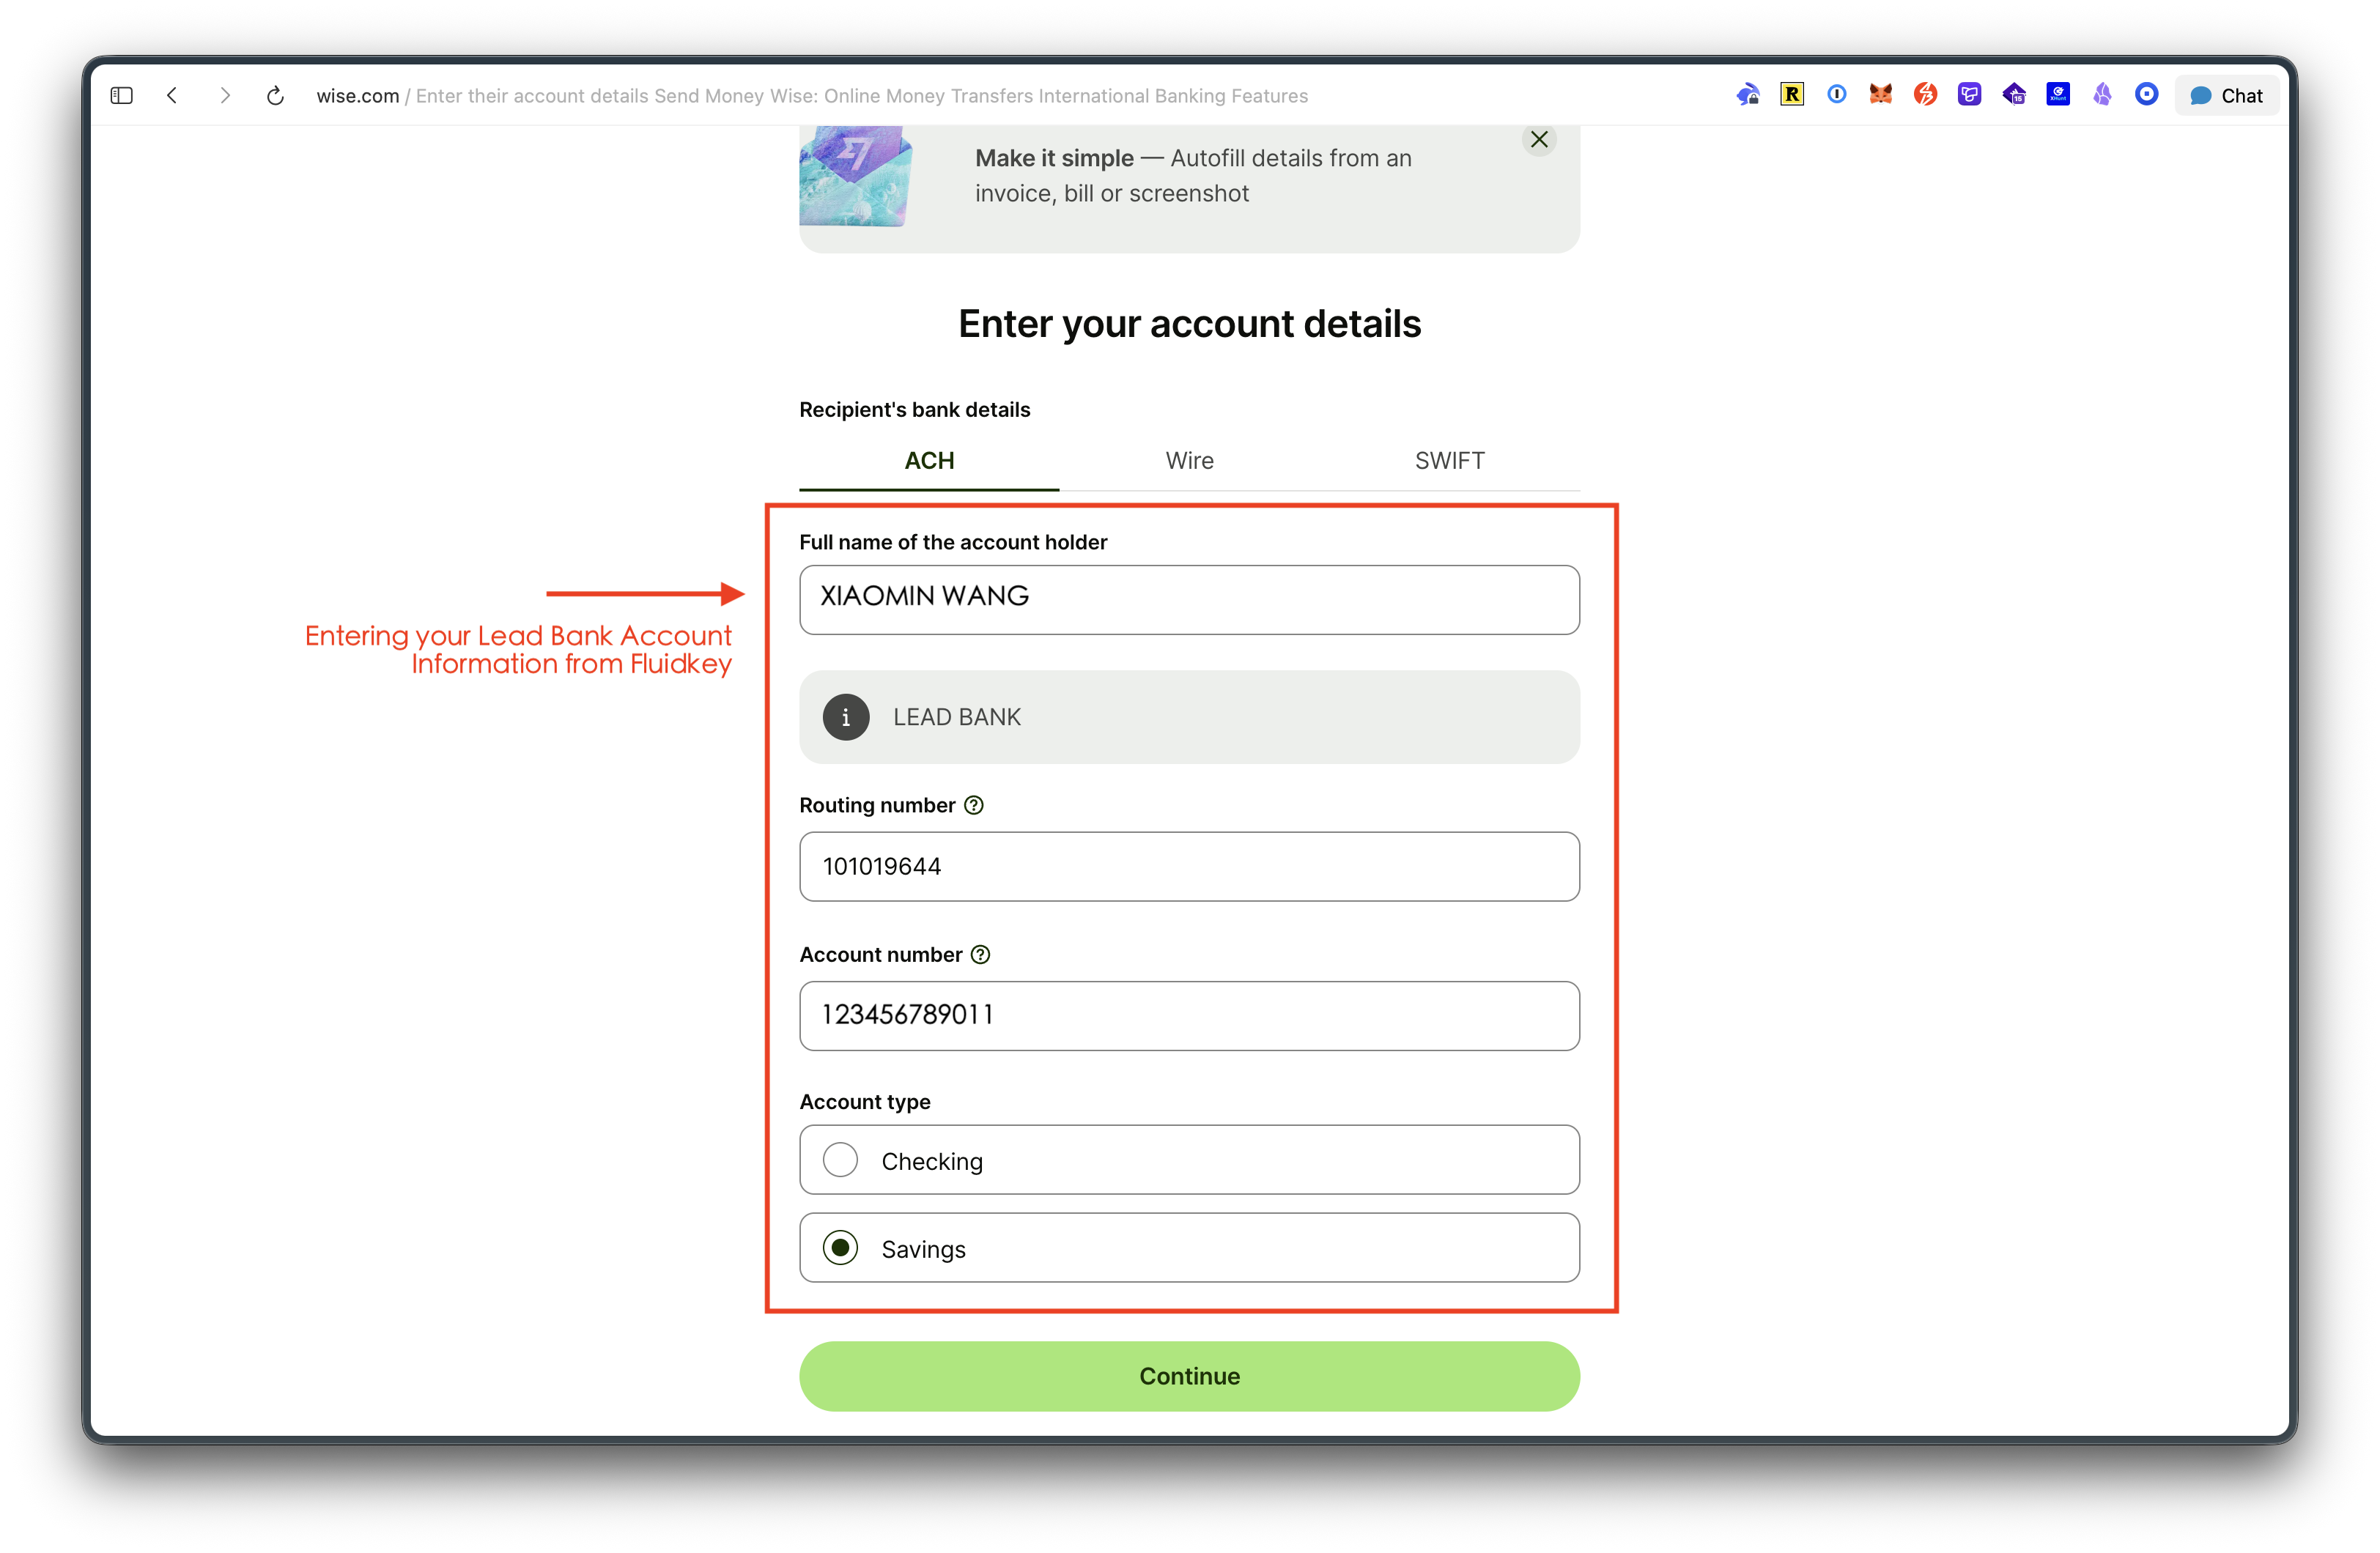
Please go to the "Bank" section on the Fluidkey homepage, where you'll find the required account details. (Note: The full name on your SSB Bank account must match exactly the name on your Wise account.)
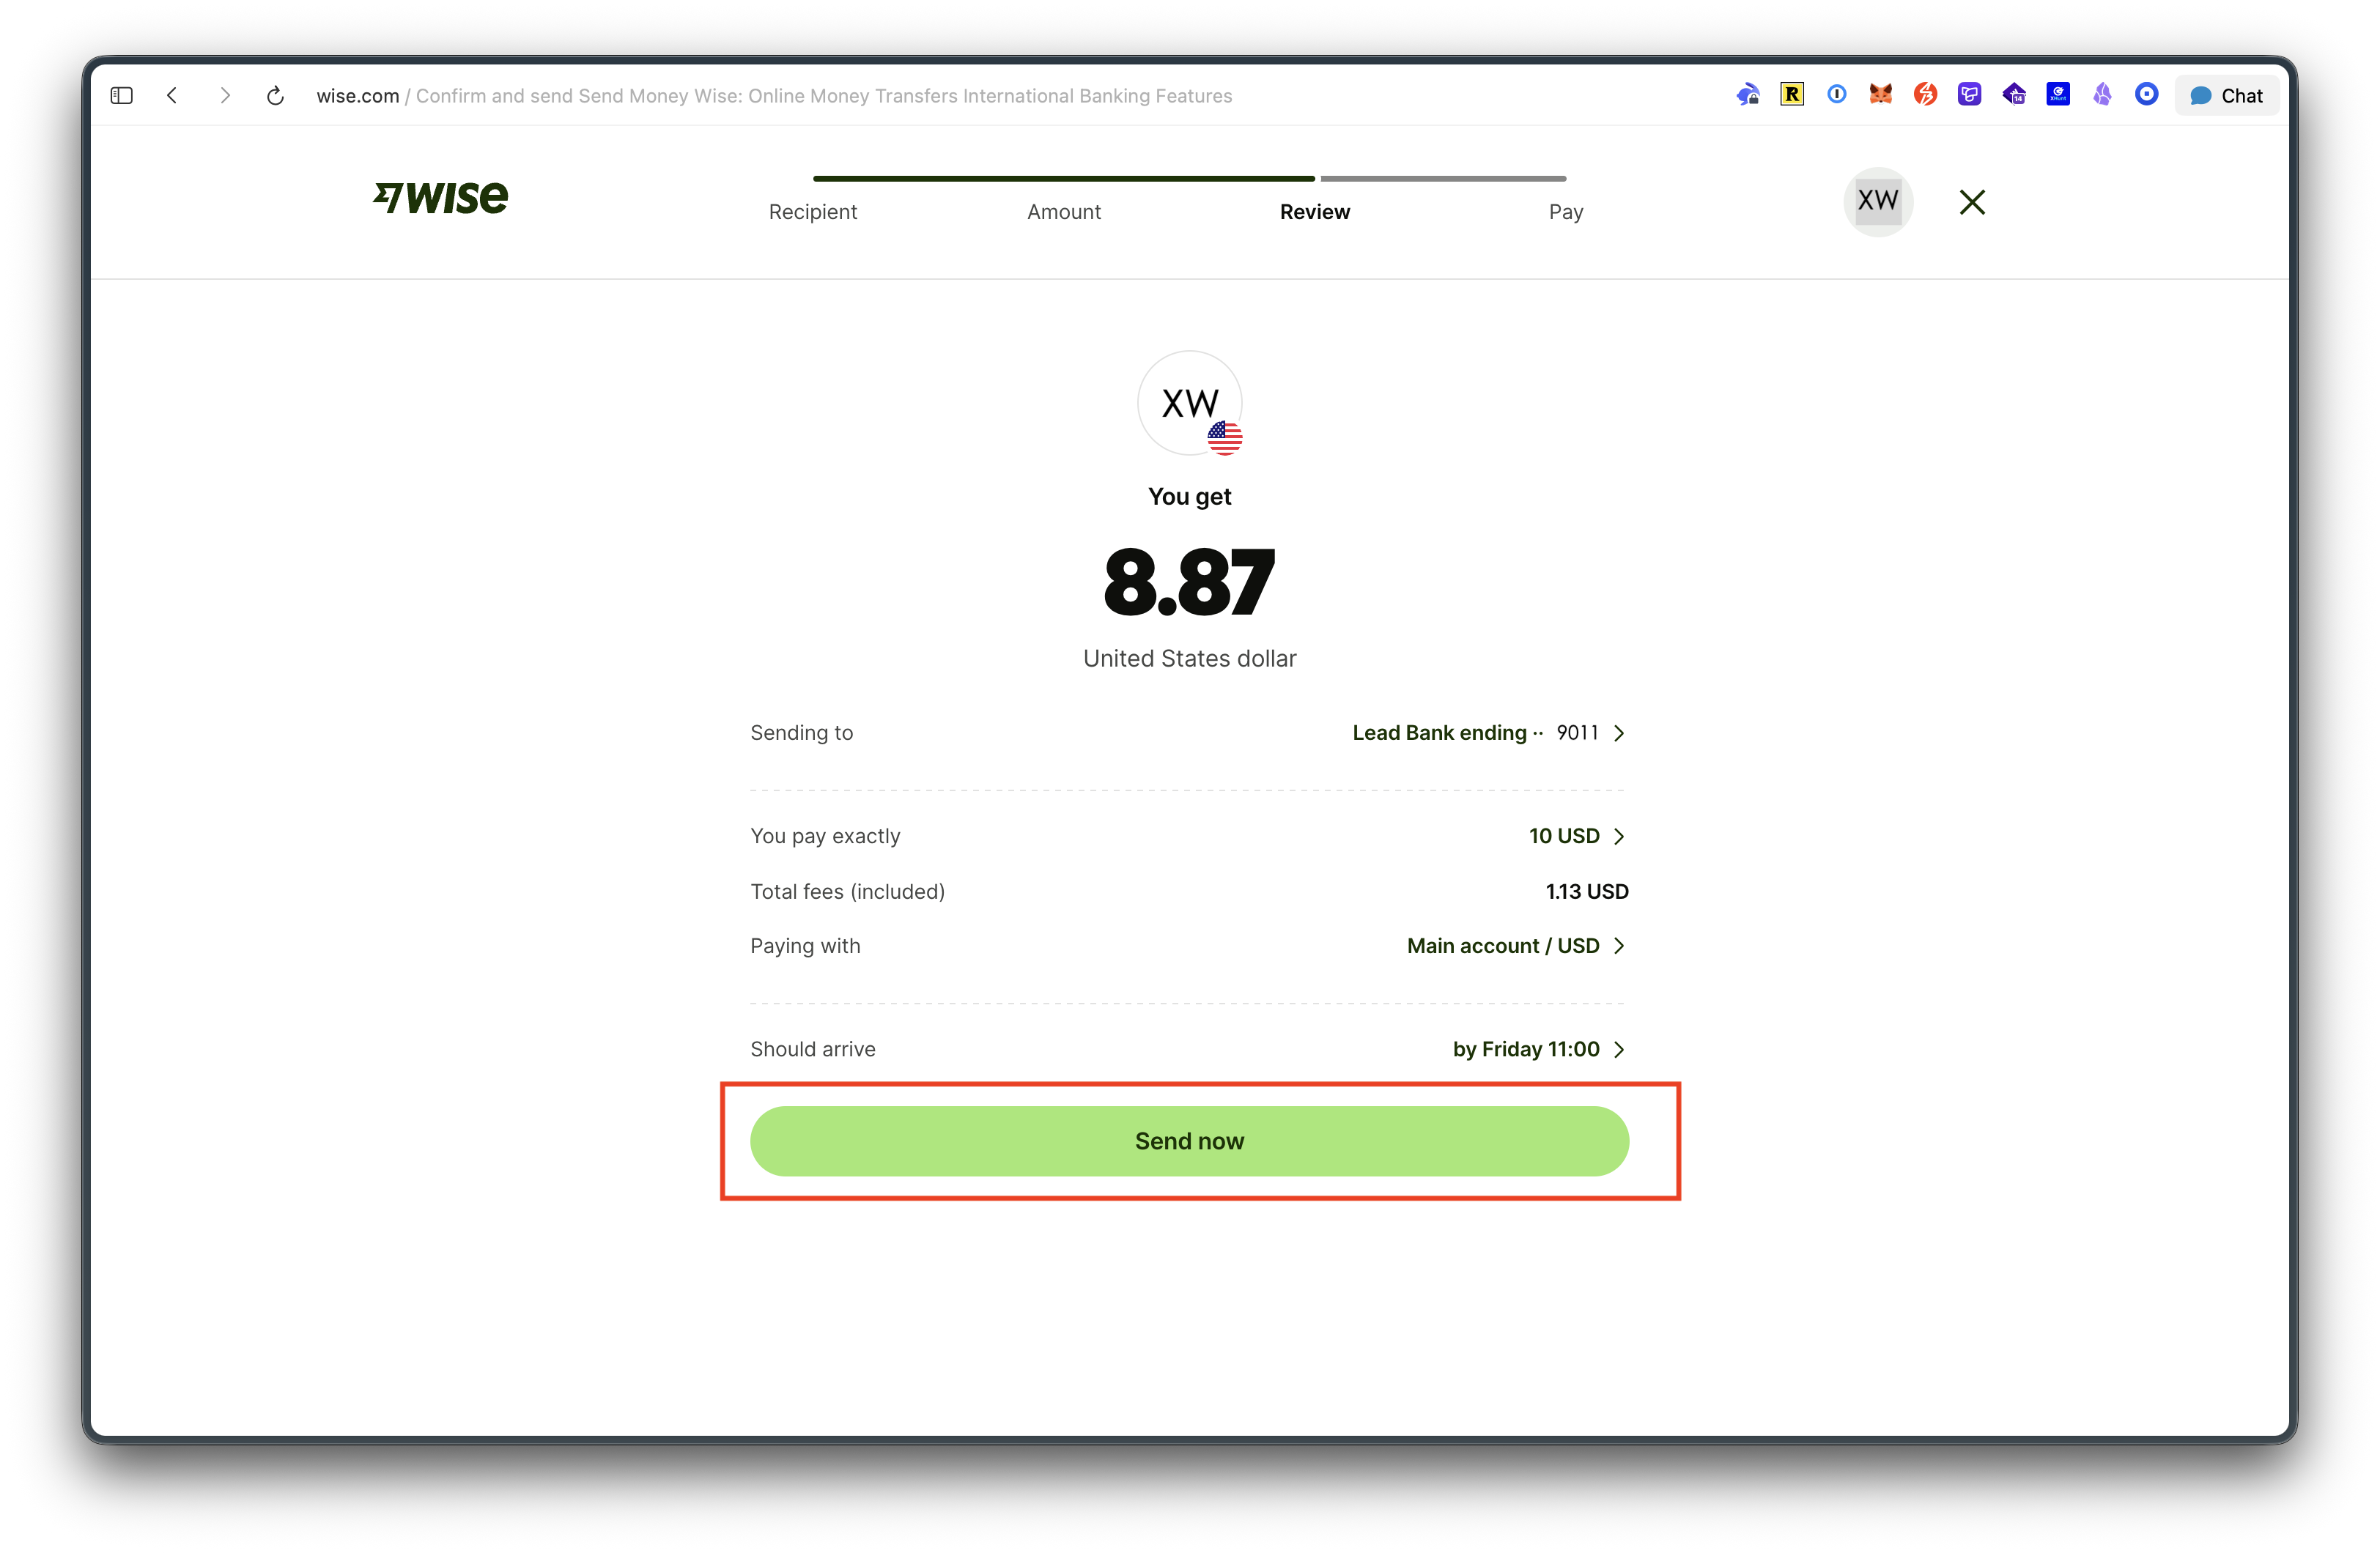
Step 3 — Enter the Transfer Amount
After filling in the recipient bank details, enter the amount you'd like to send and the system will show the fees you need to pay.
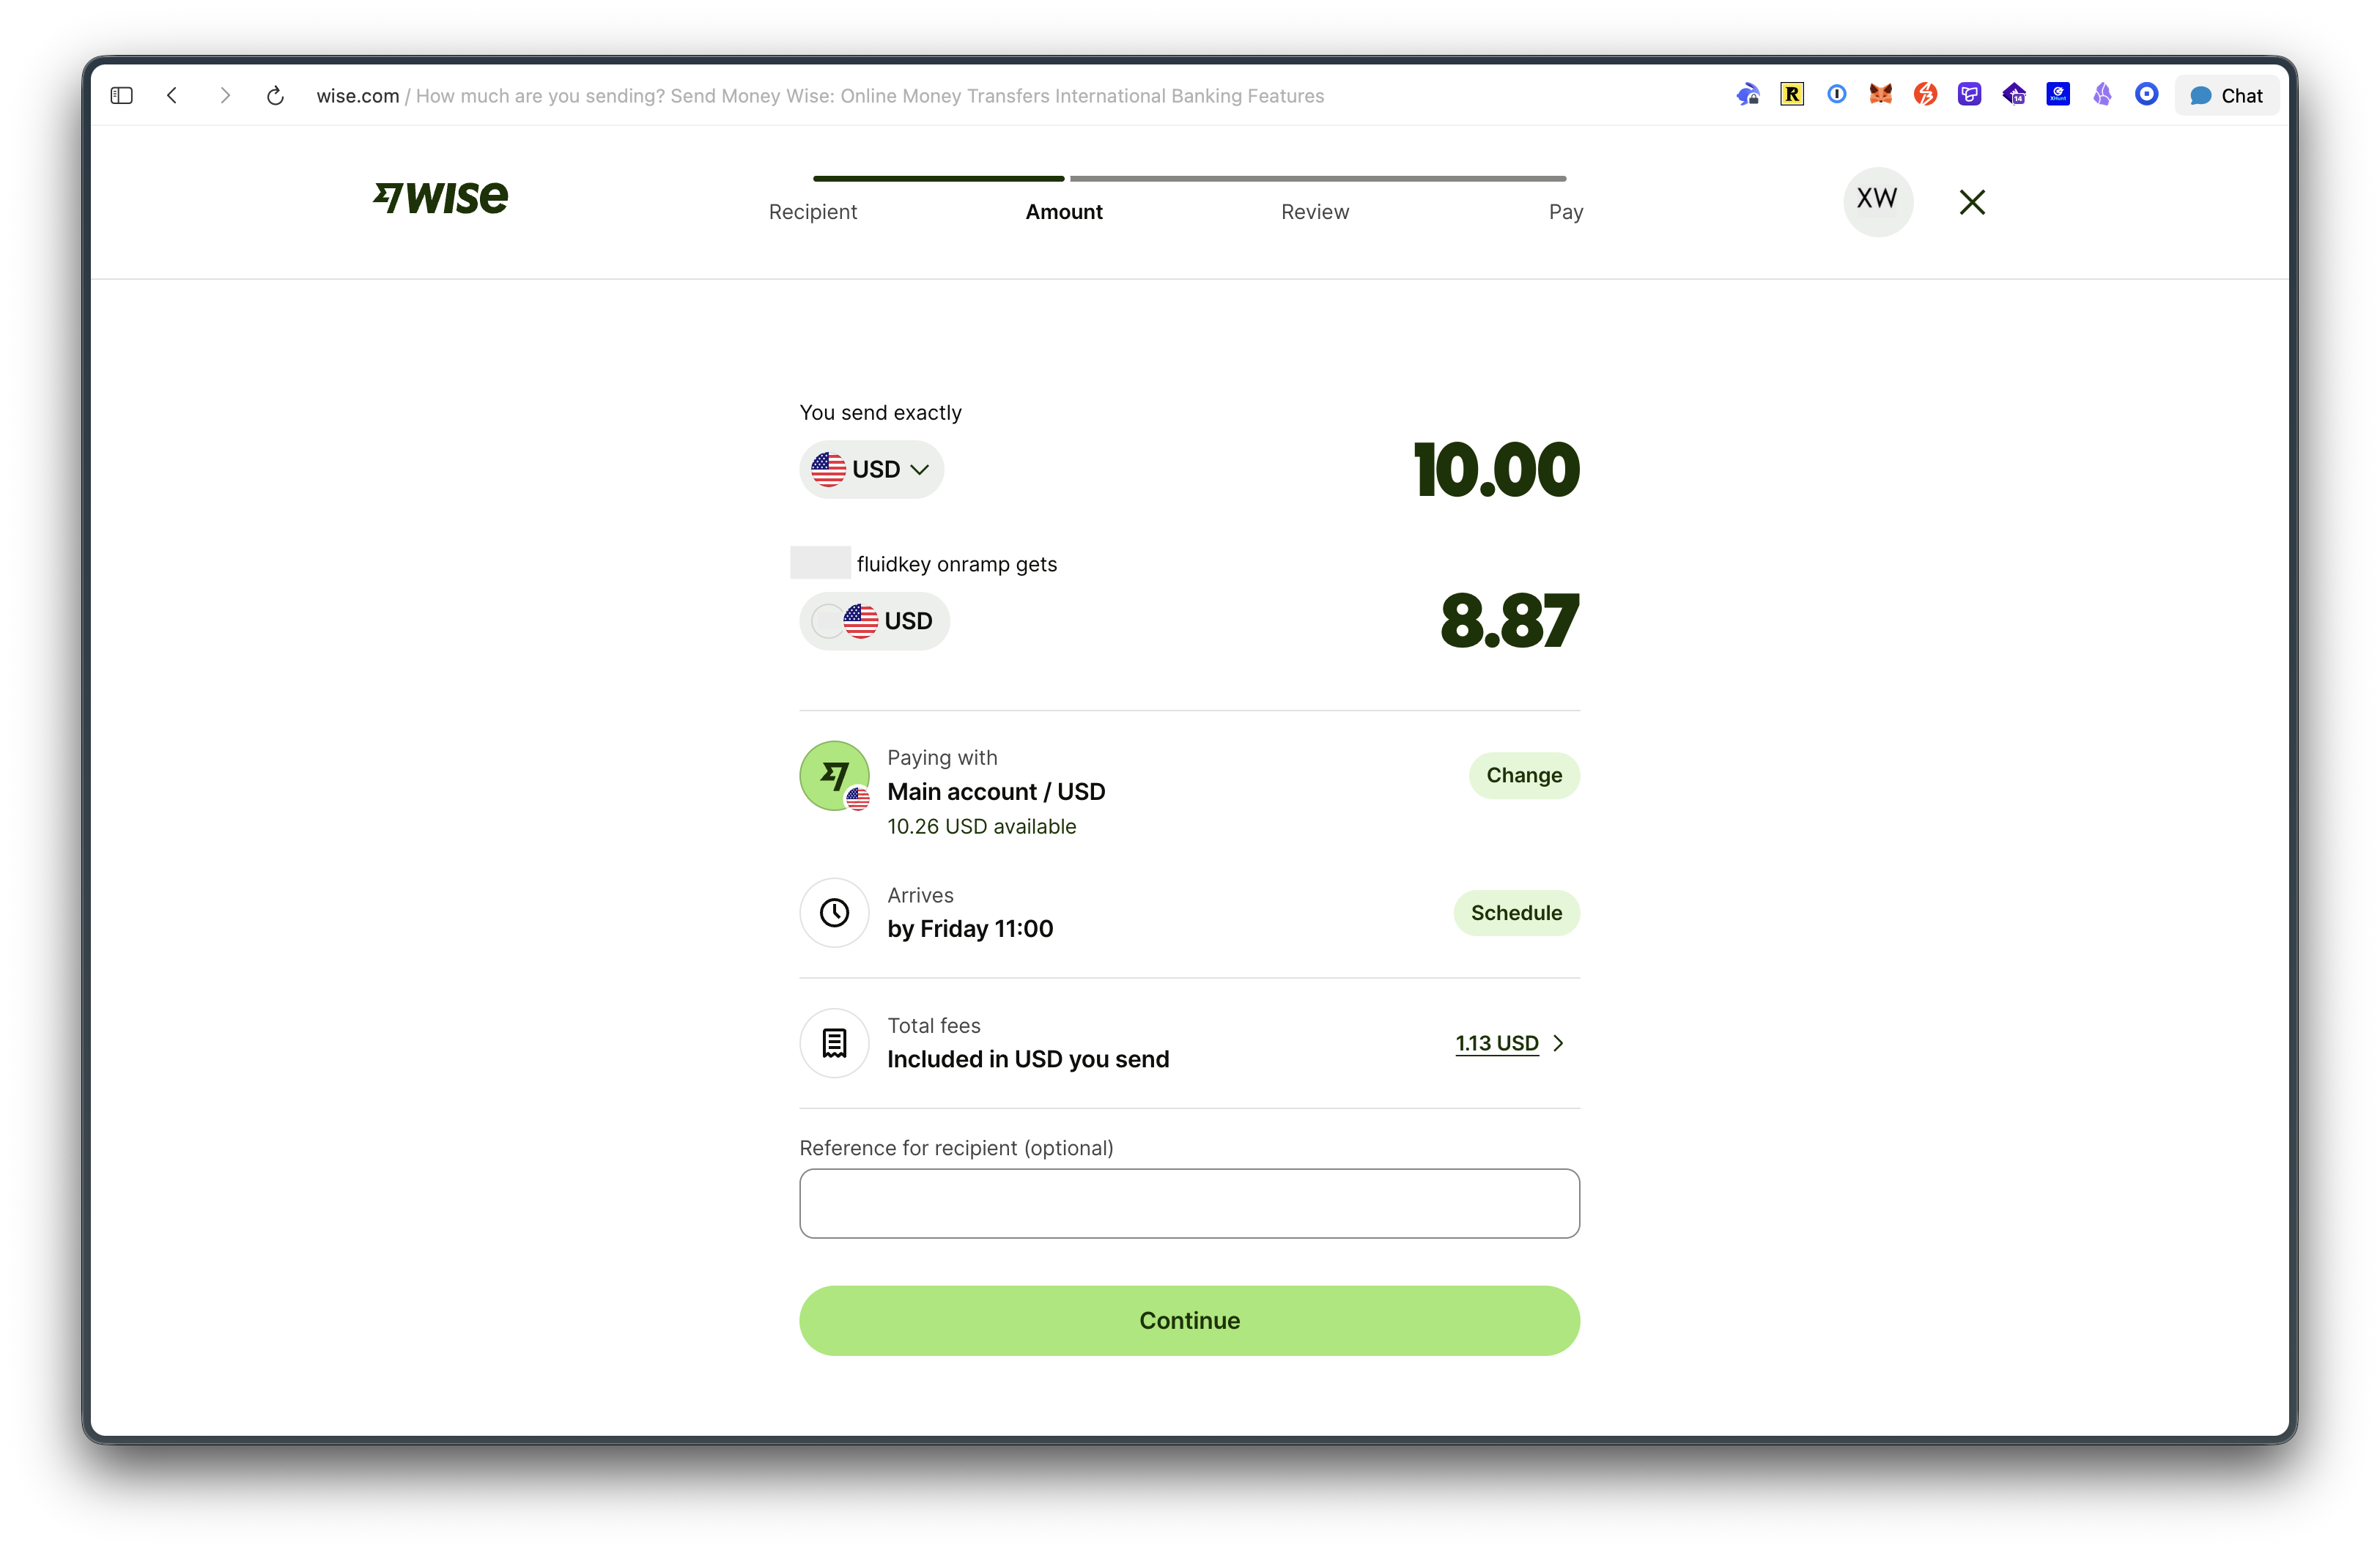
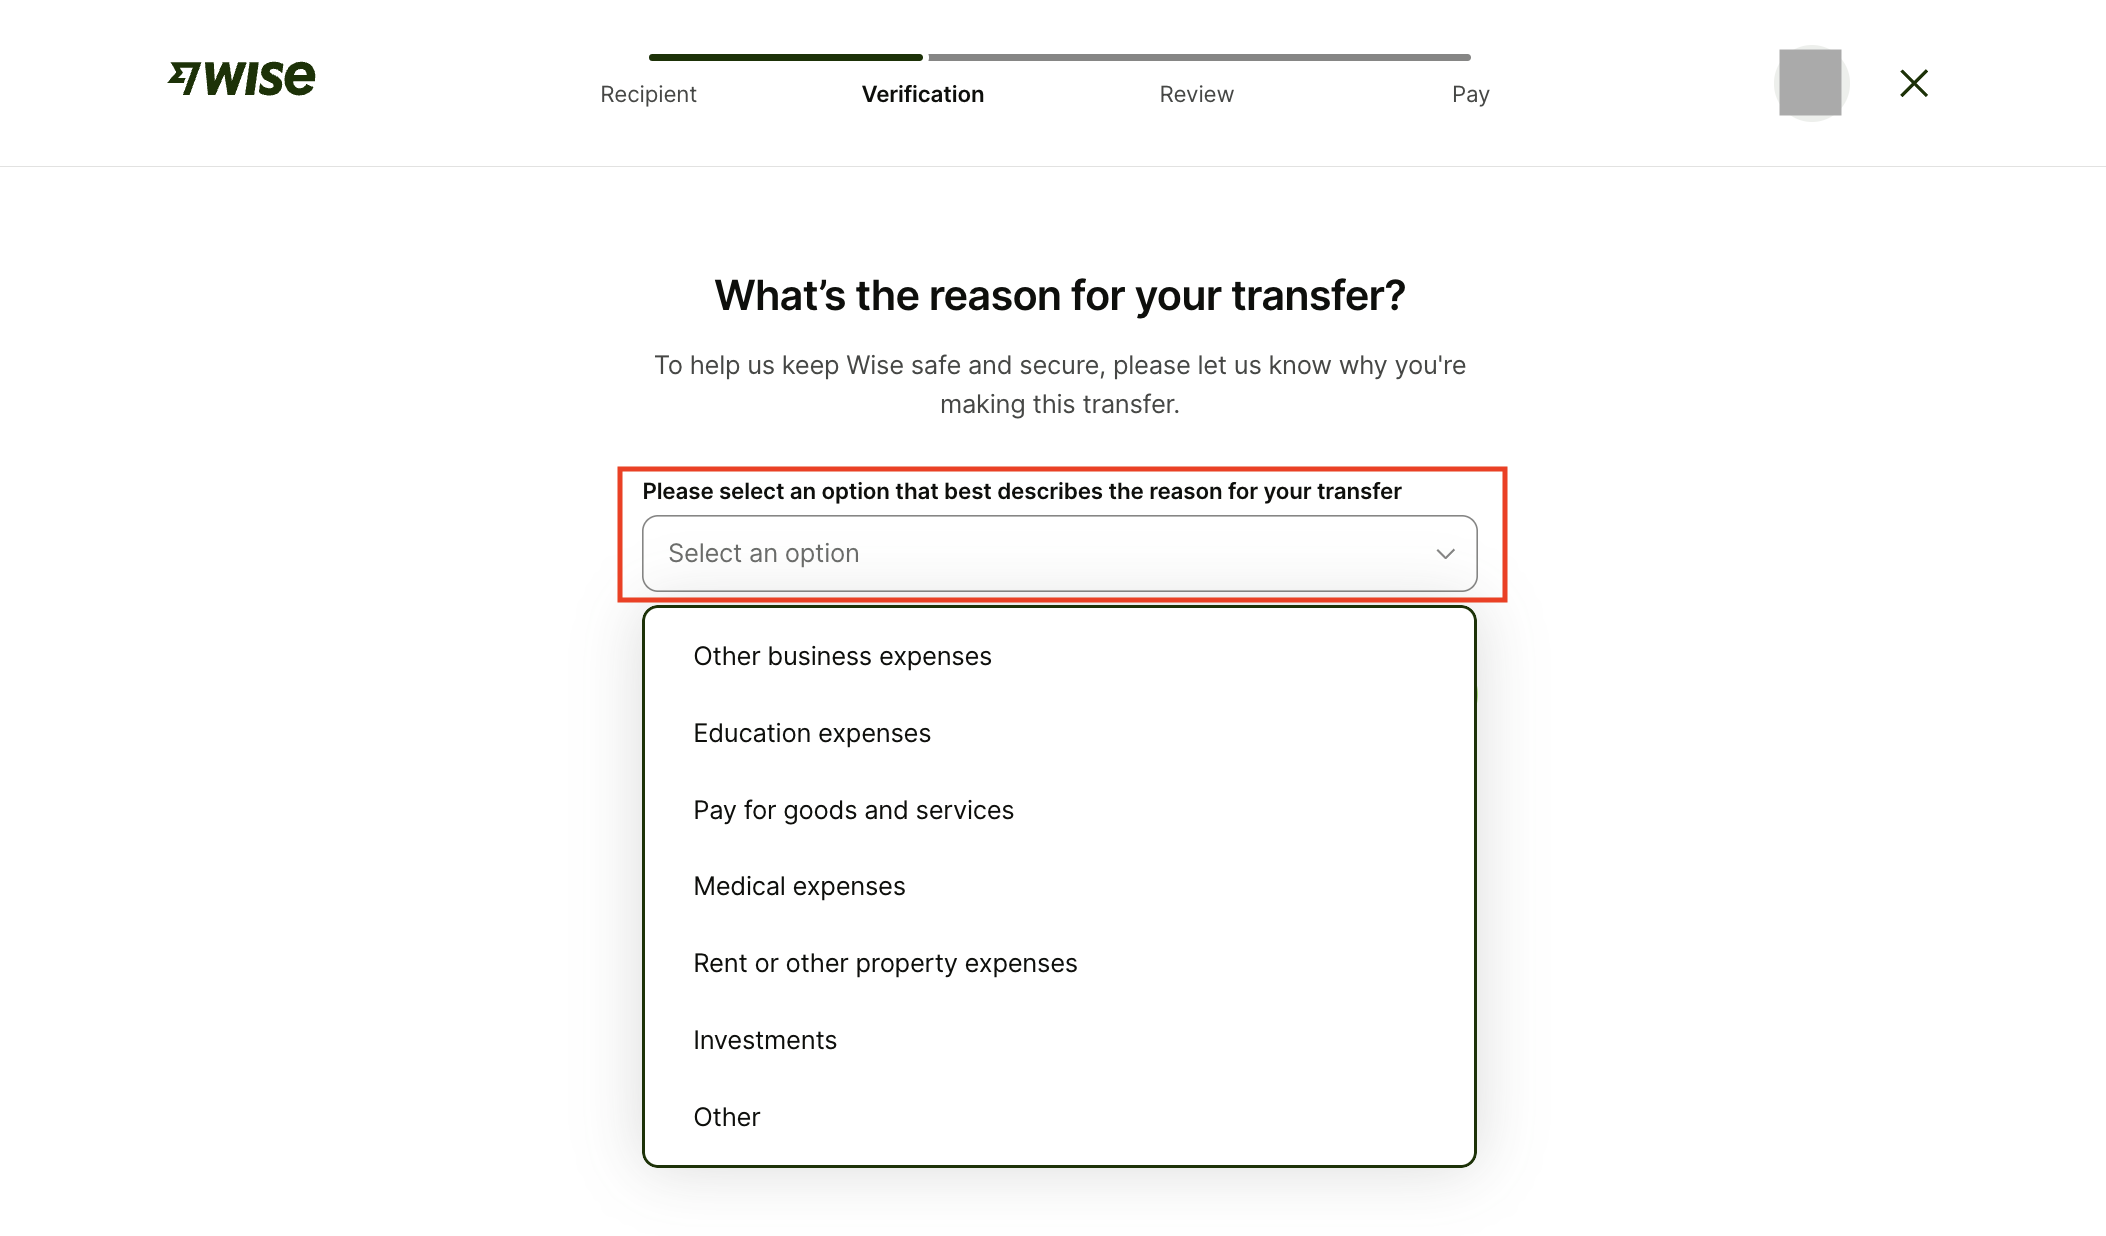
Choose "USD" from your account balance as the payment method, then select a transfer reason — you can fill this in based on your personal needs.

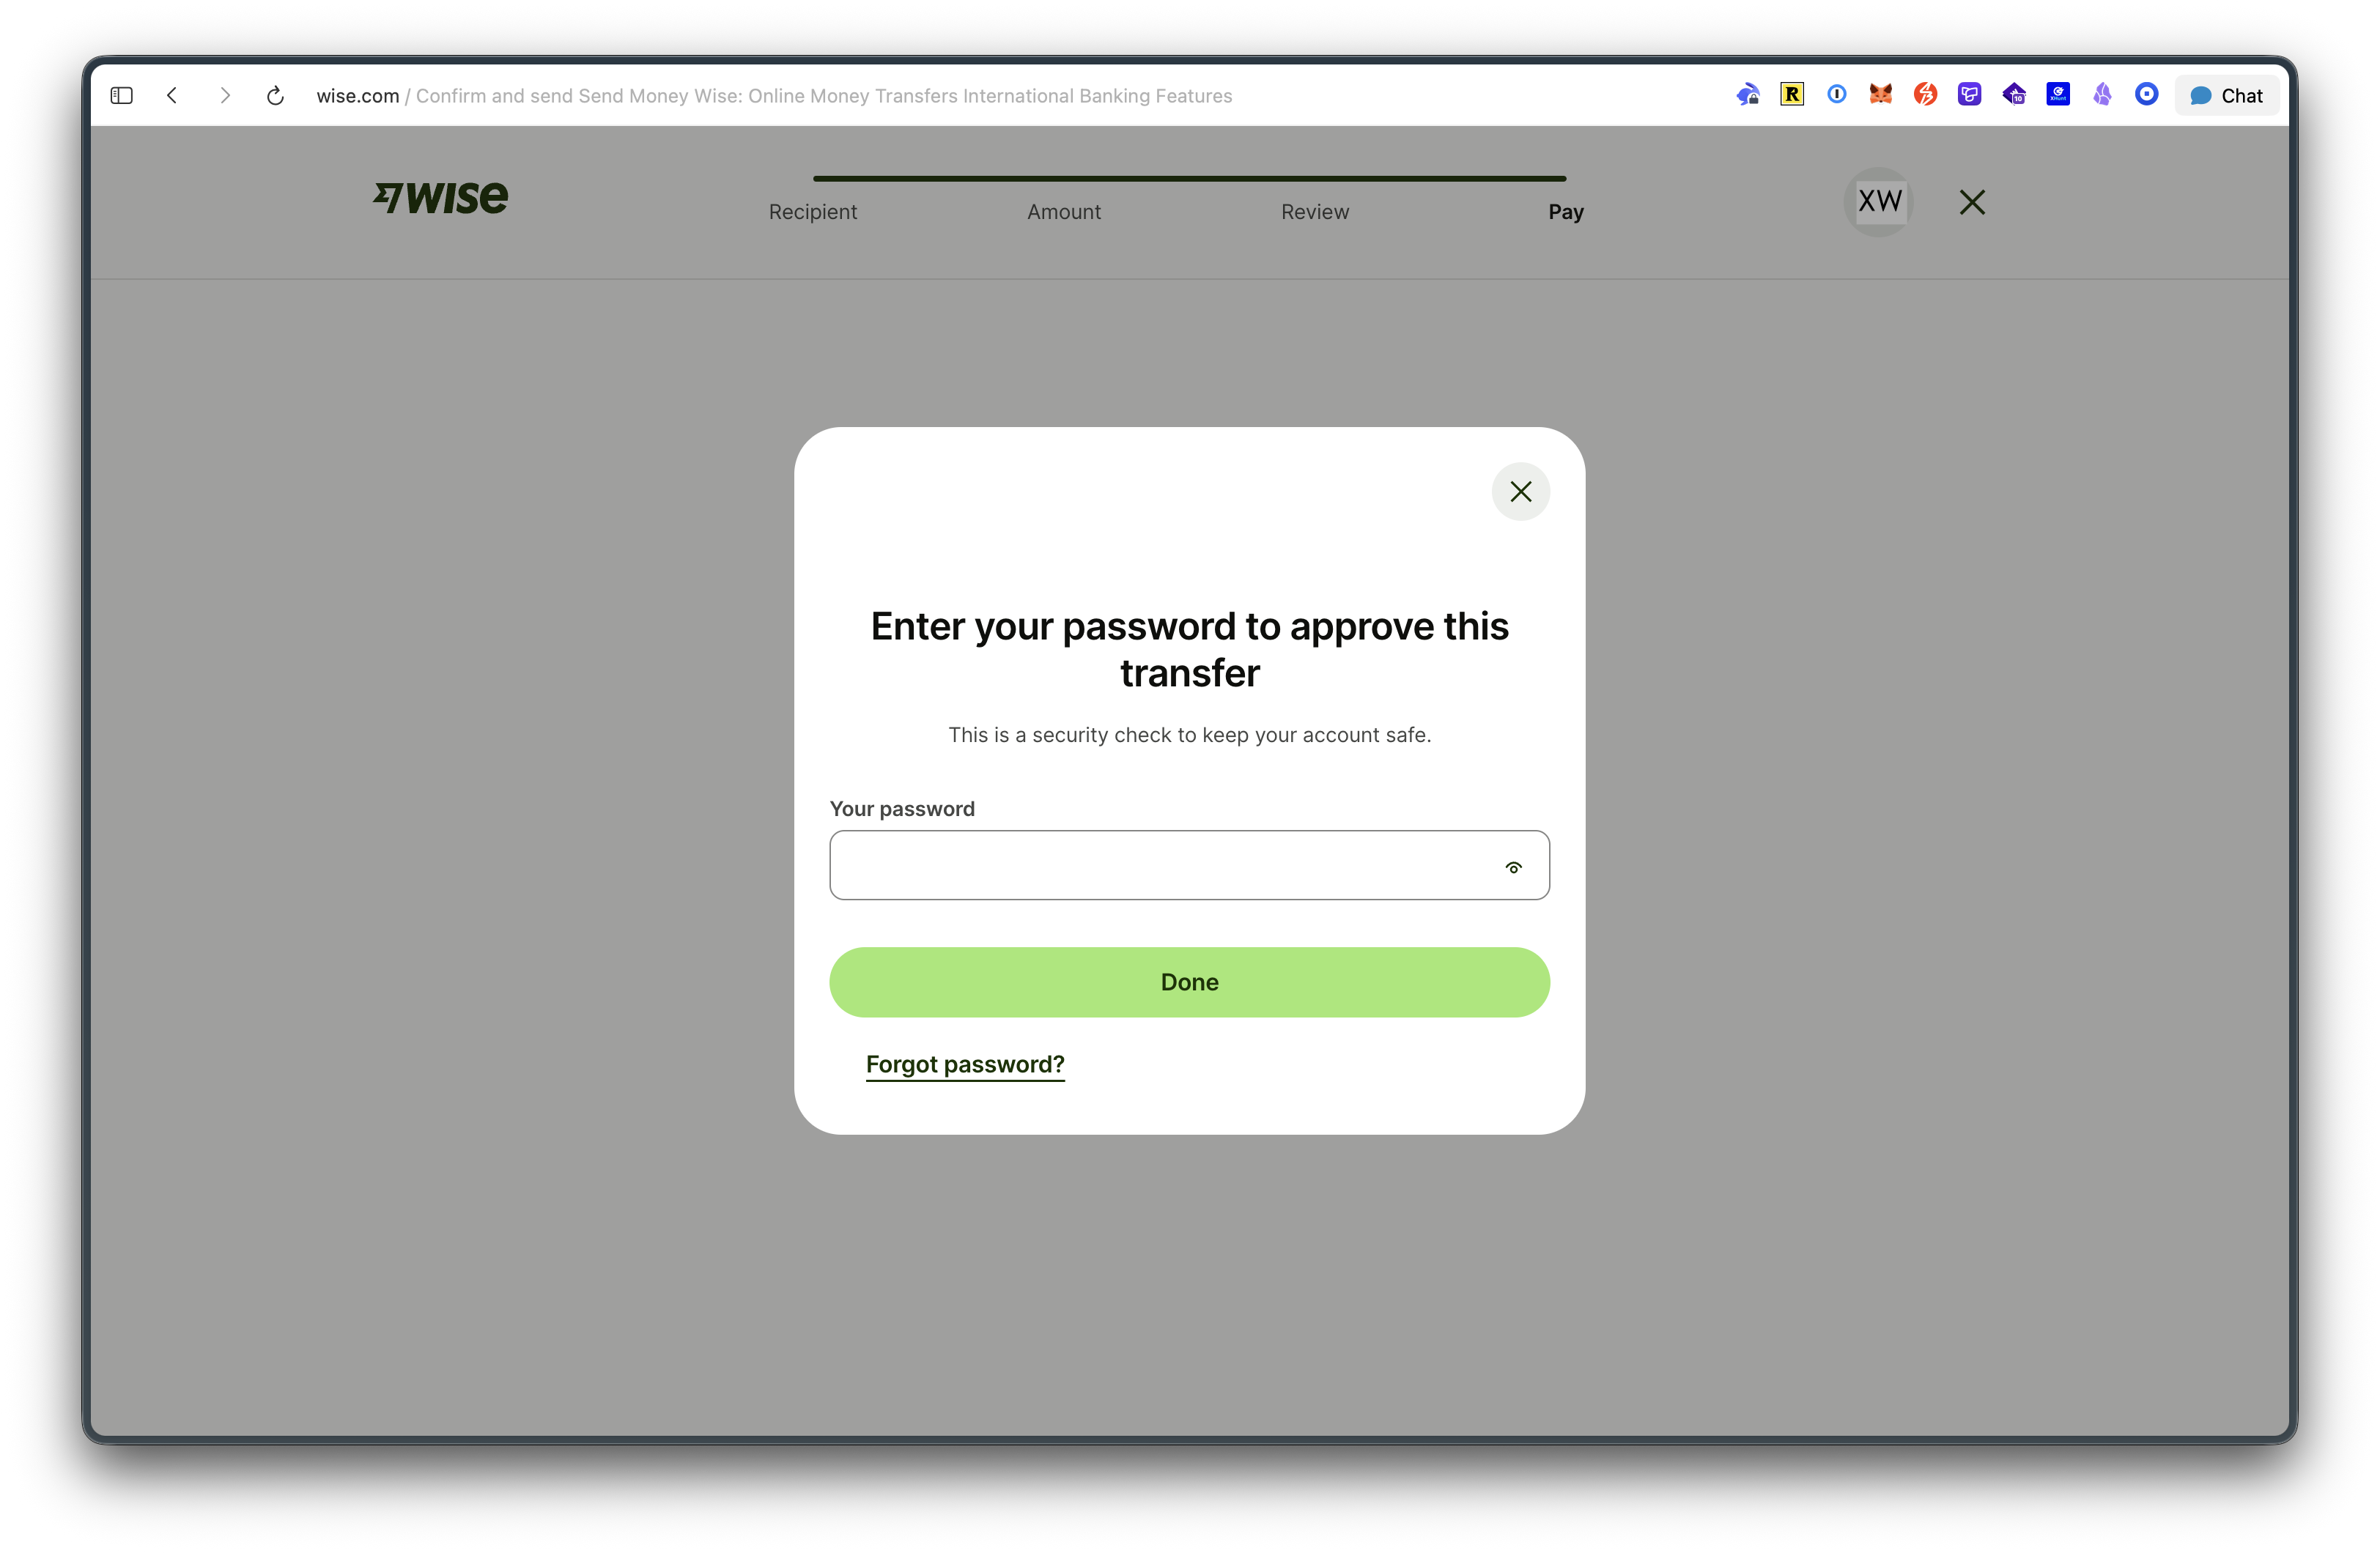
After confirming the transfer details are correct, enter your password to confirm the transfer.
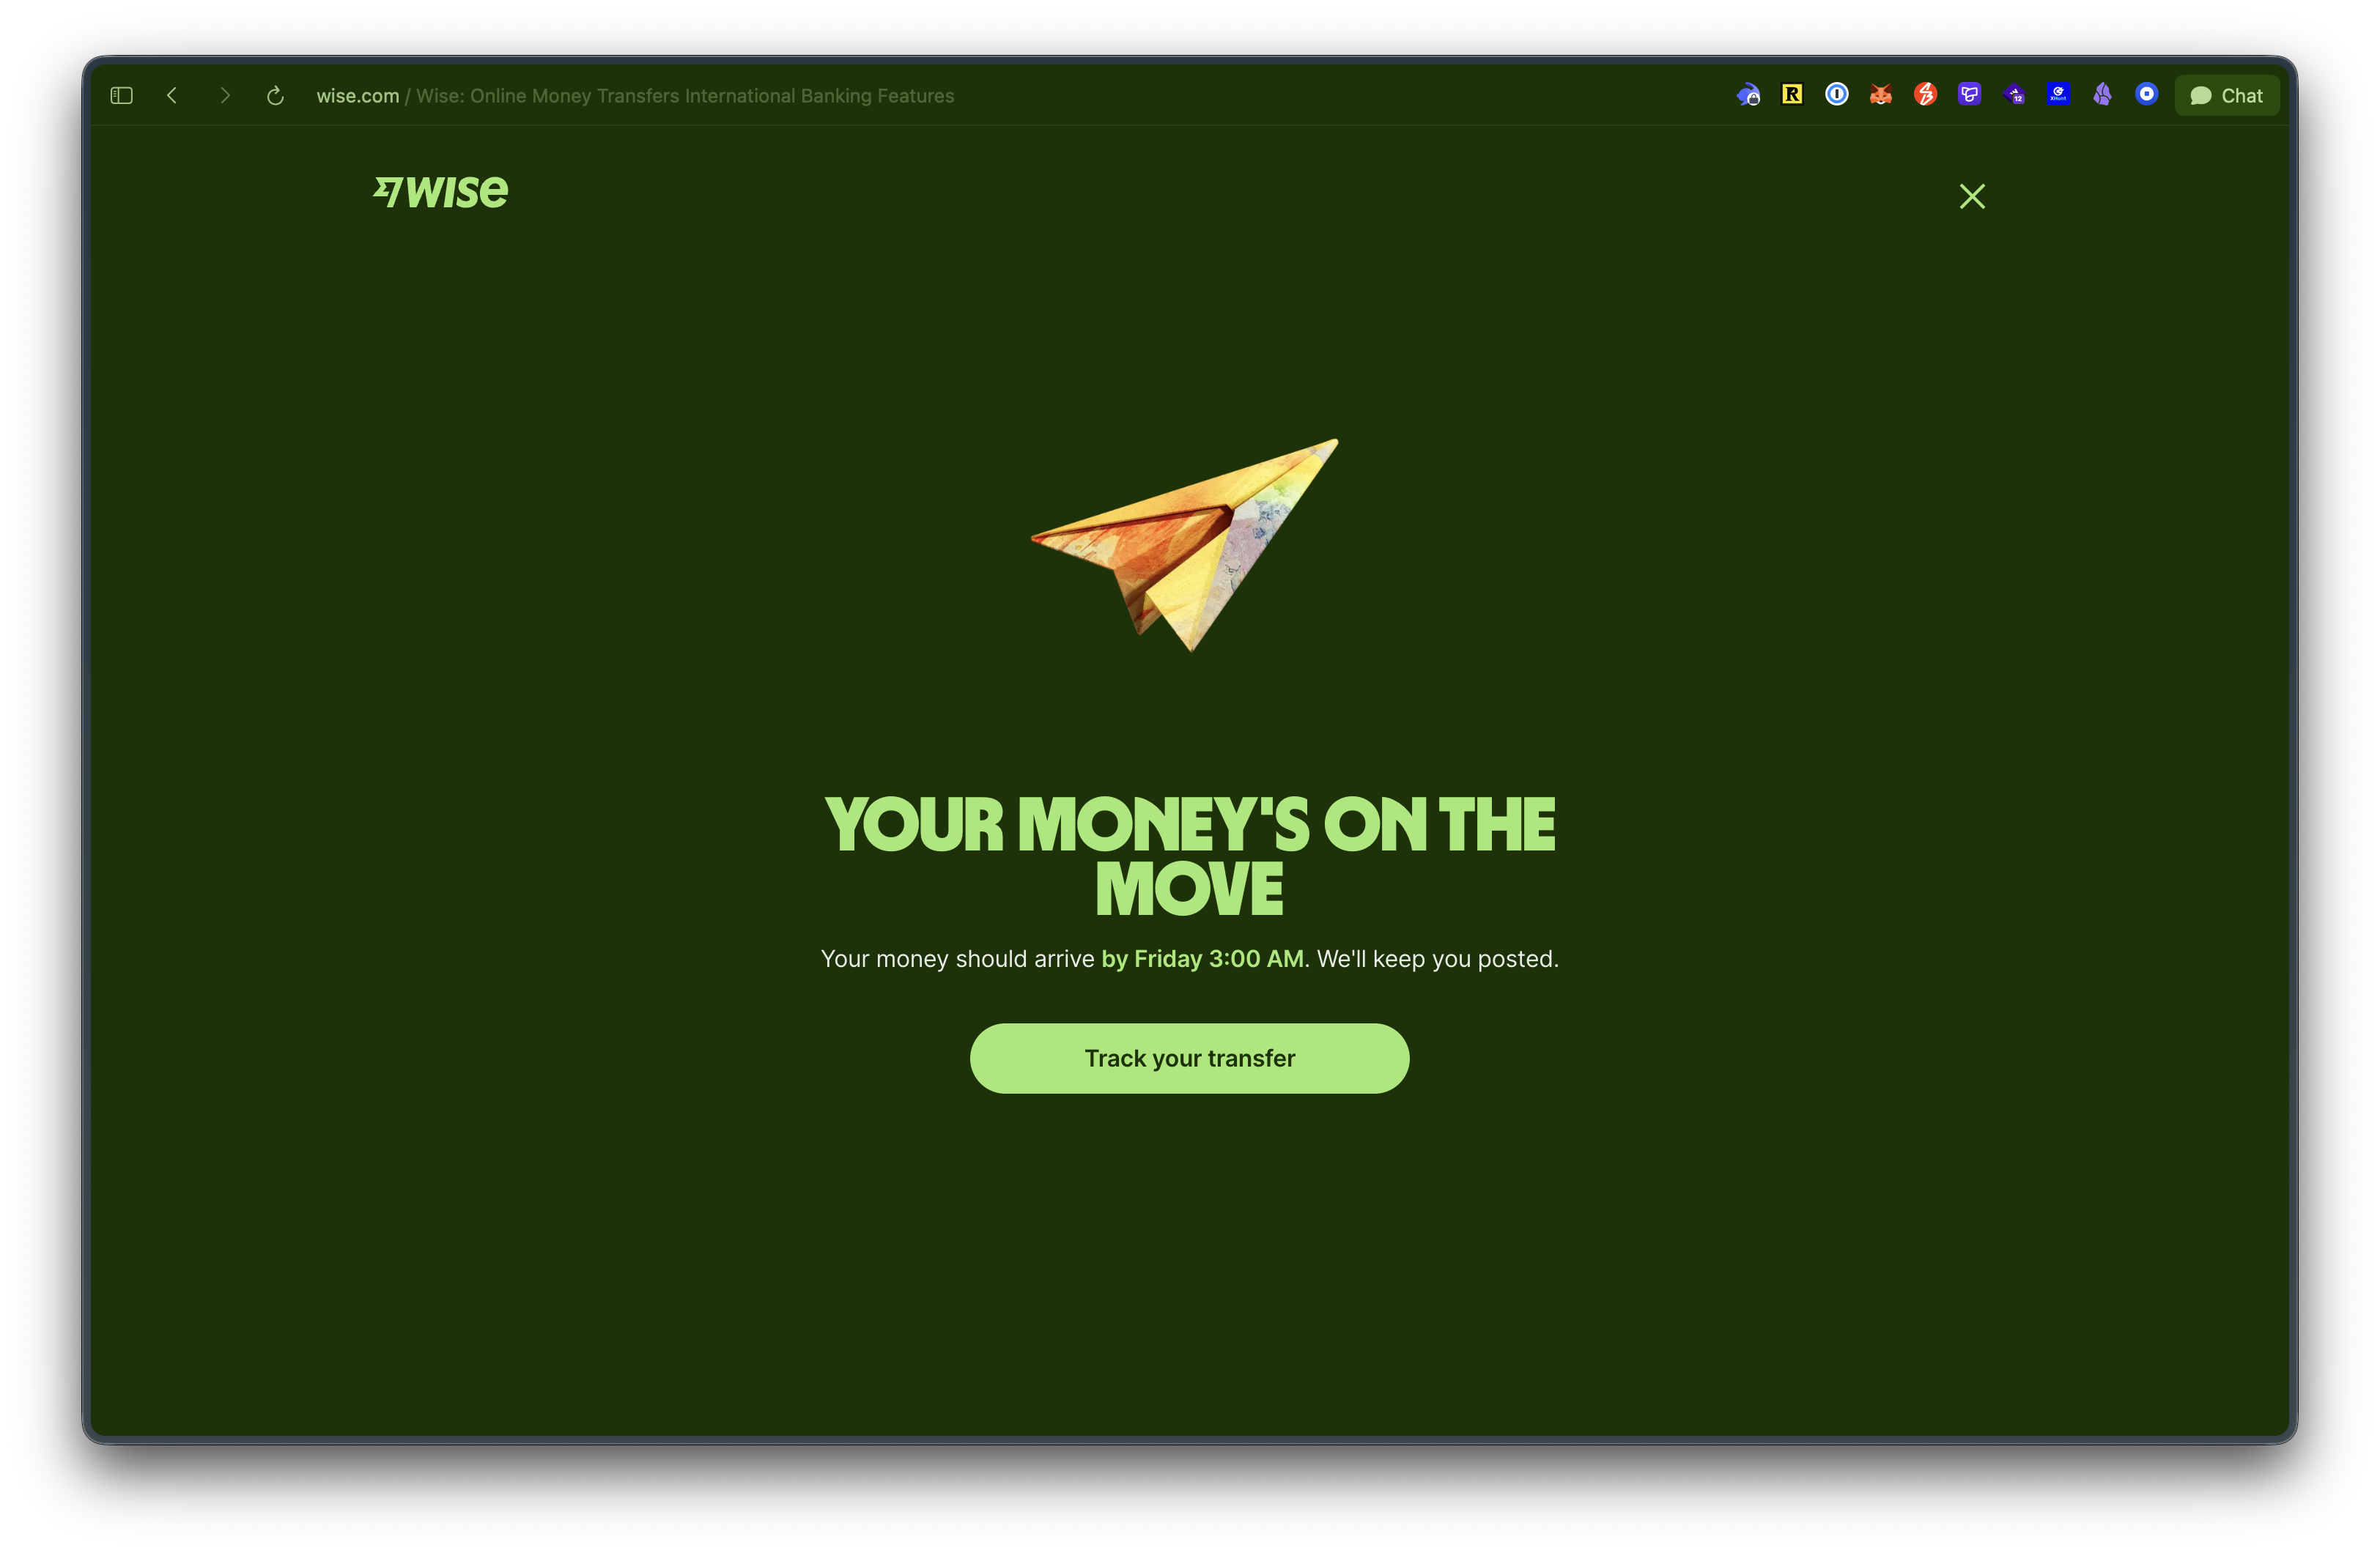
ACH transfers typically take 1–3 business days to arrive.
In addition to sending money from Wise back to Fluidkey via ACH, you can also use the global SWIFT network to transfer USD to any SWIFT-supported local bank account worldwide.
Attachment: How to Set Up a Wise USD Account
If you're new to Wise, you can first sign up using your preferred method, then follow the instructions below to set up your "USD account." Once that's done, you'll be able to transfer money directly from Fluidkey to Wise.
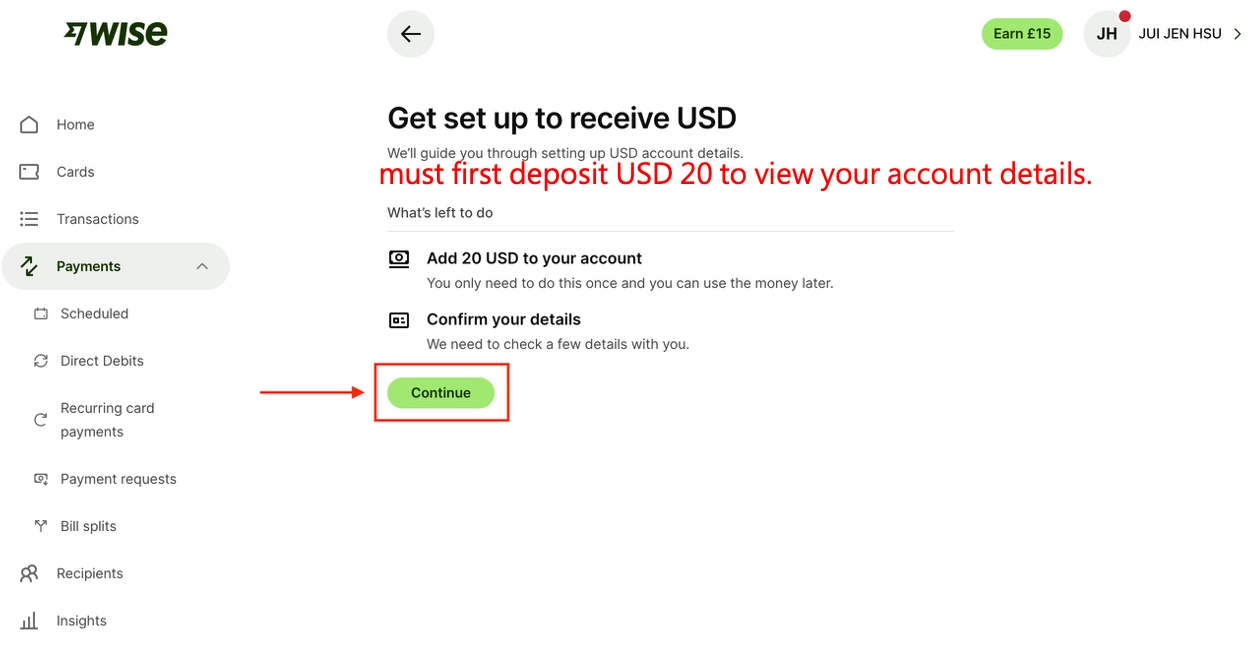
To open a USD account and obtain USD receiving details, every new user must first deposit USD 20 before they can begin KYC and start using the account. The following tutorial is tailored for Taiwanese users — please evaluate the exact options and steps based on your own situation.
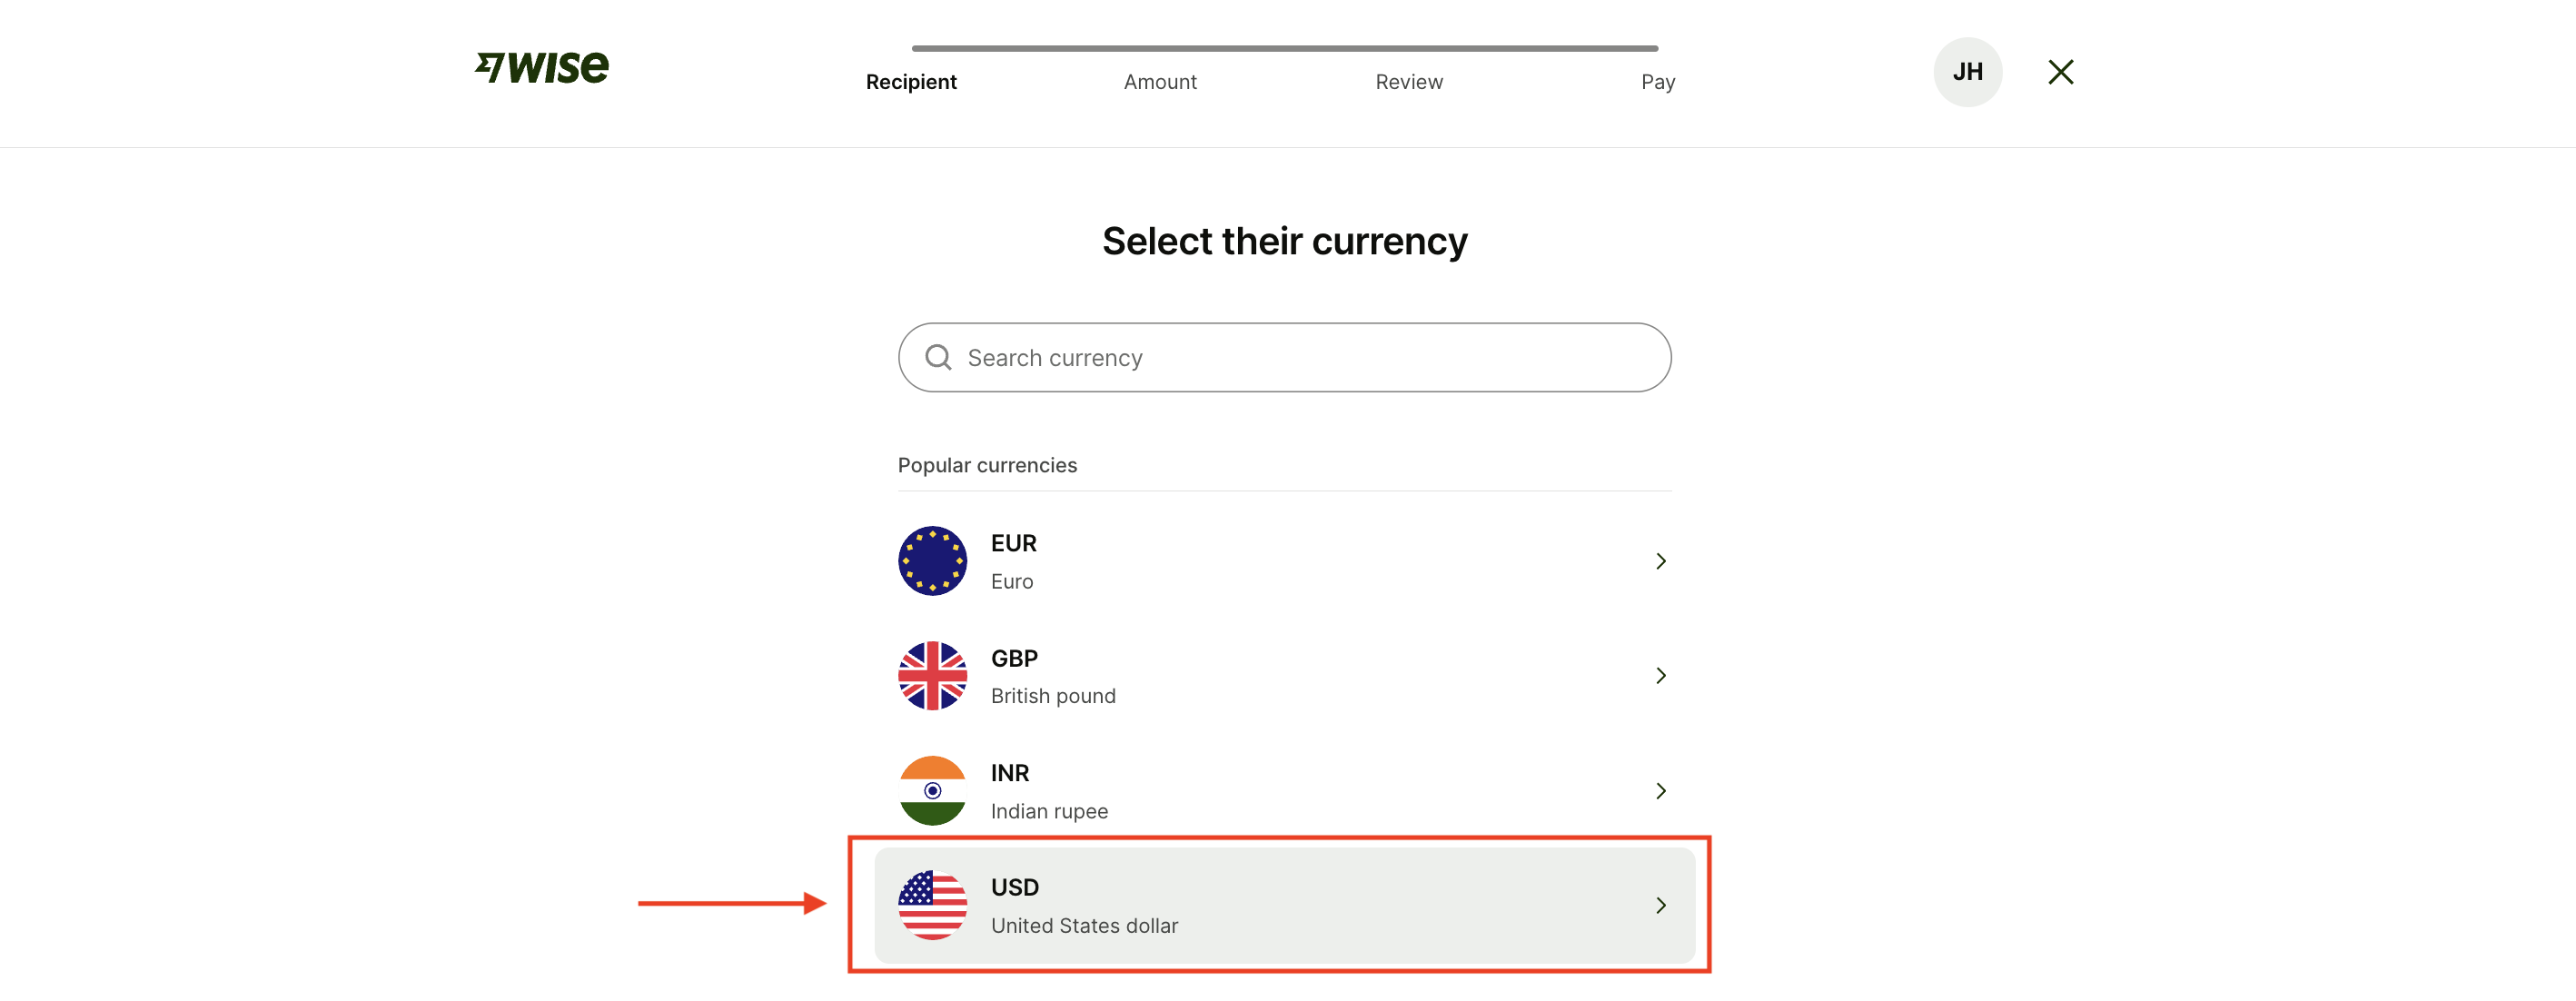
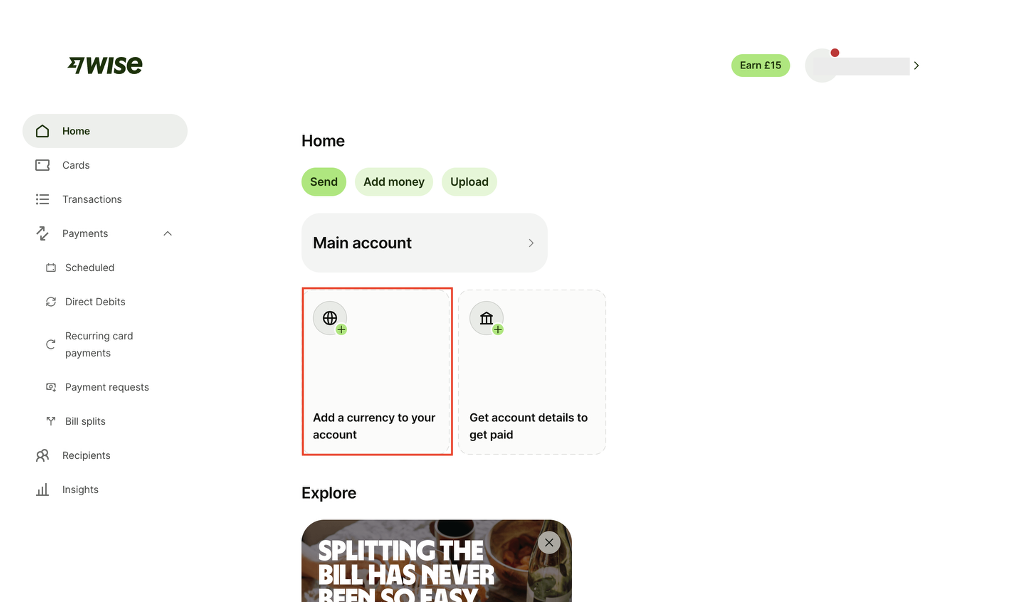
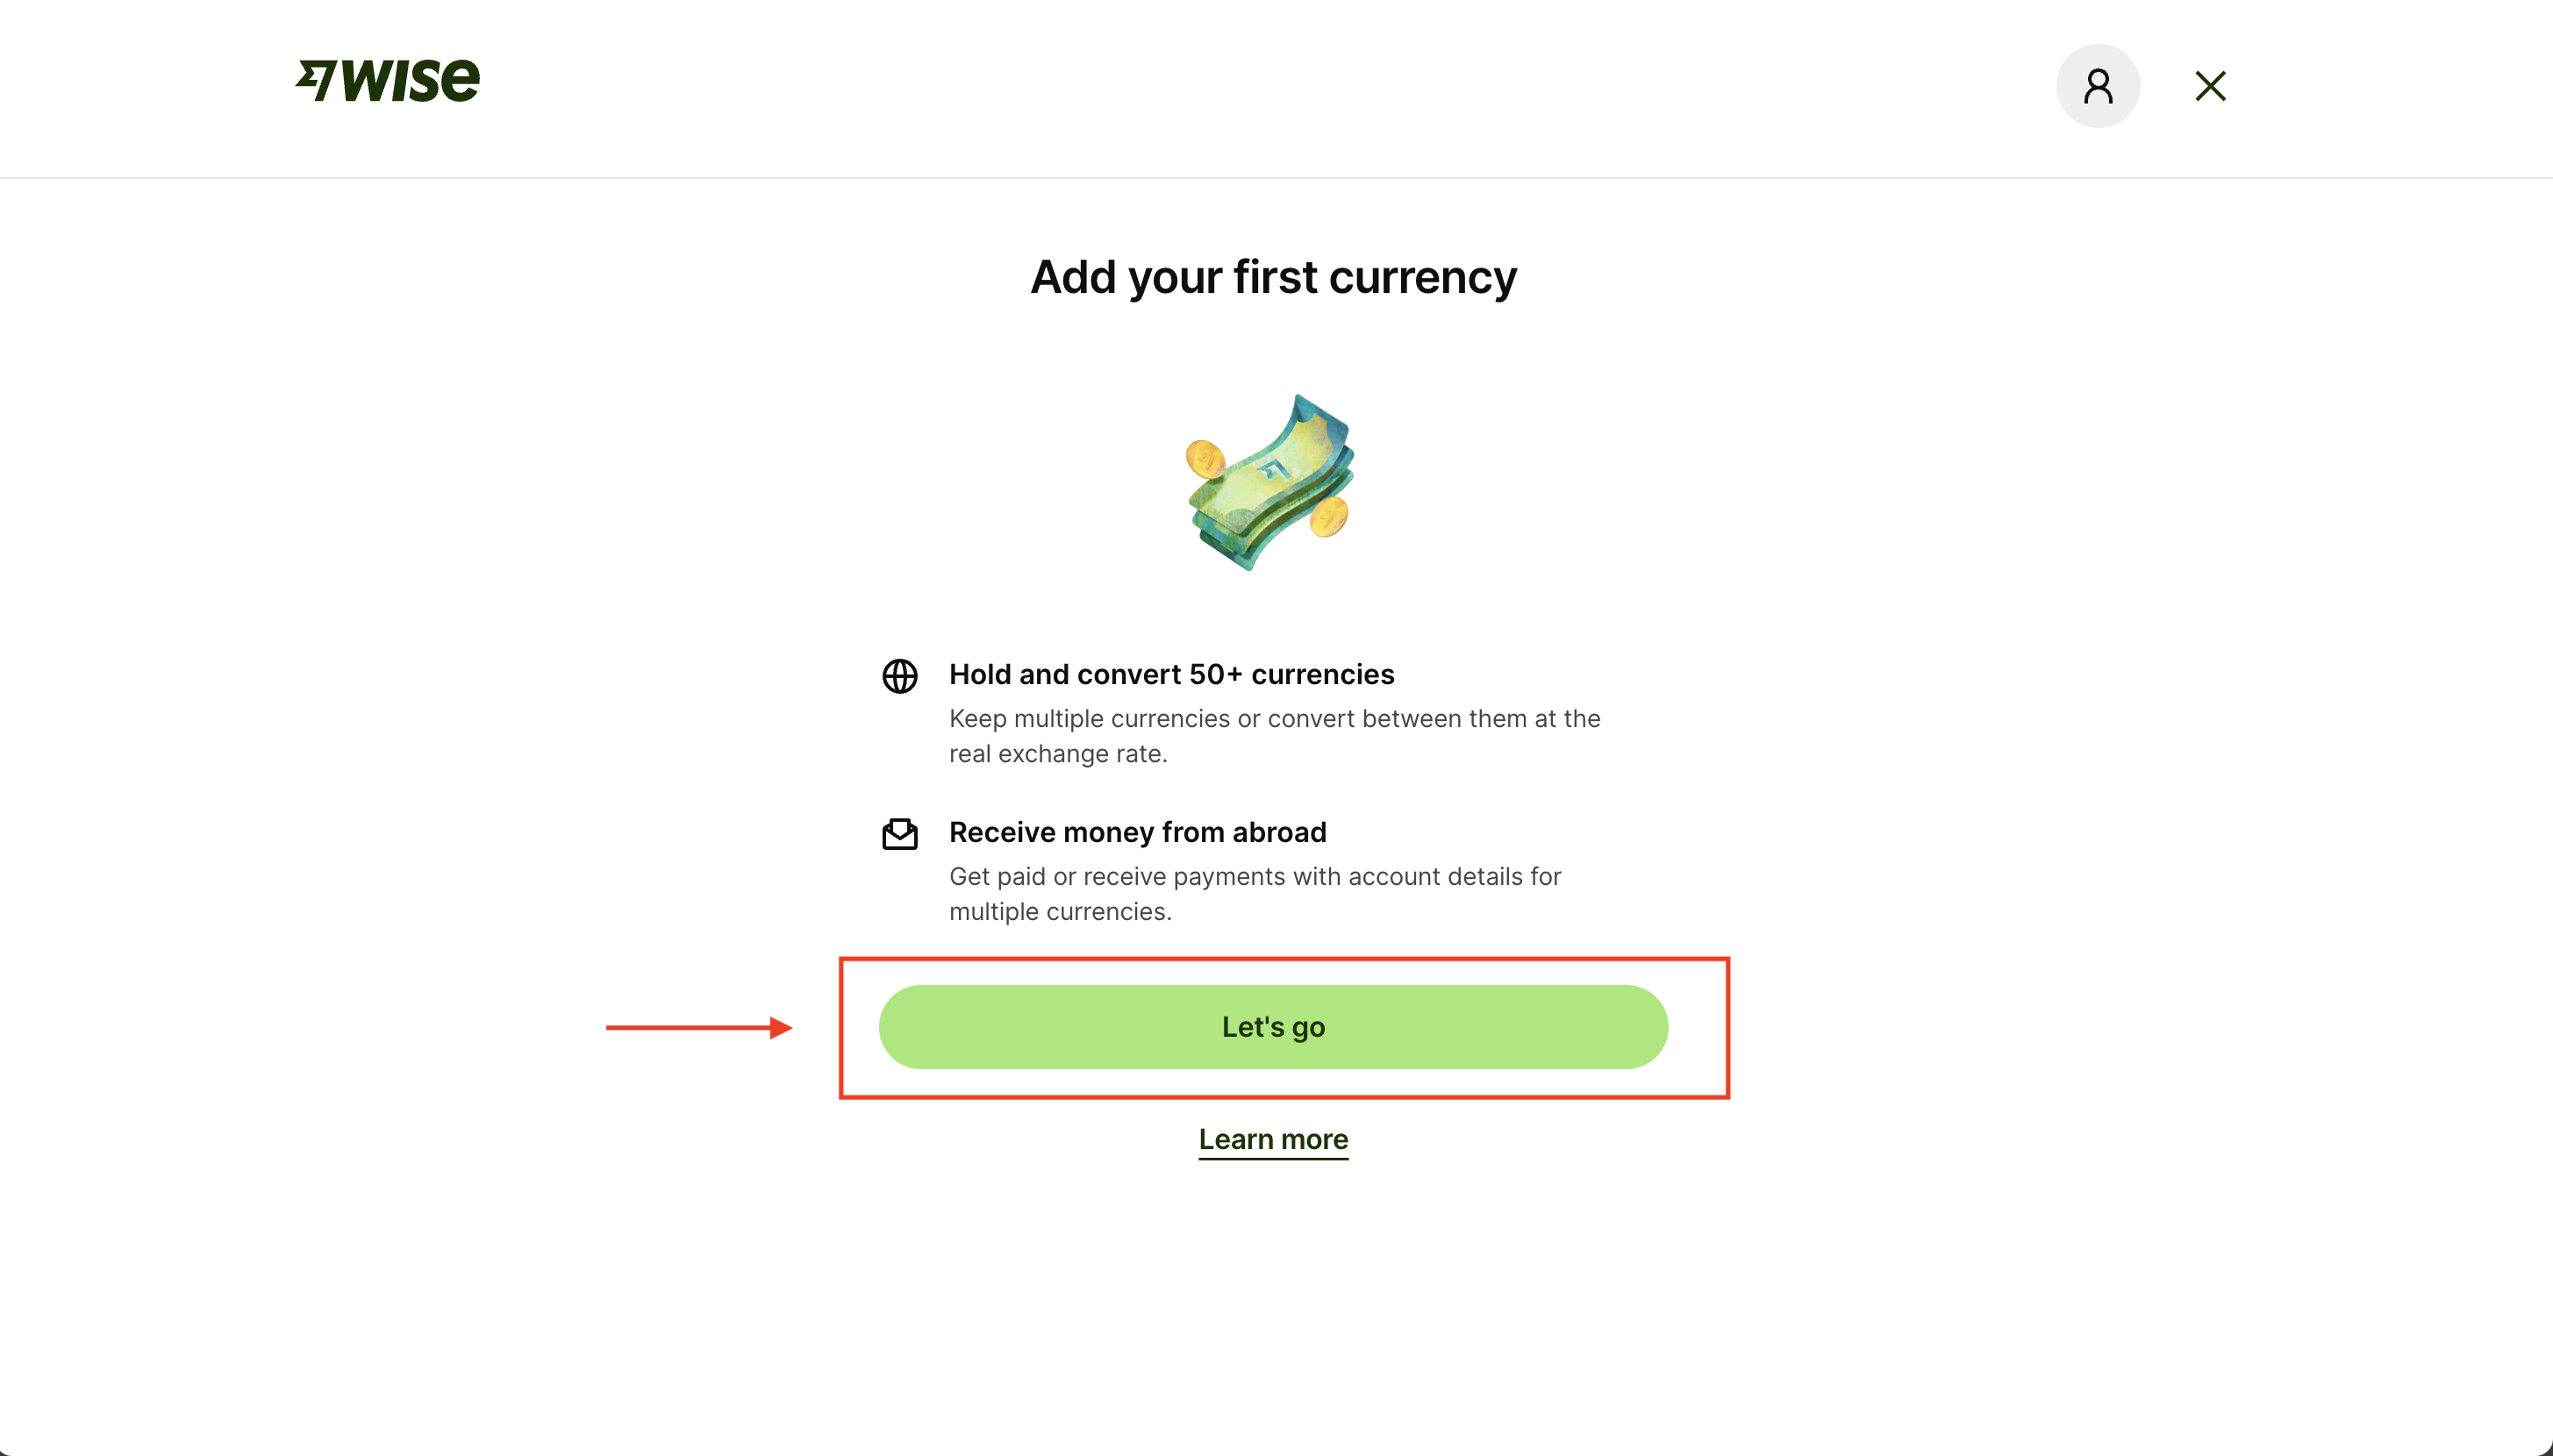
Step 1 — Add USD as a Currency
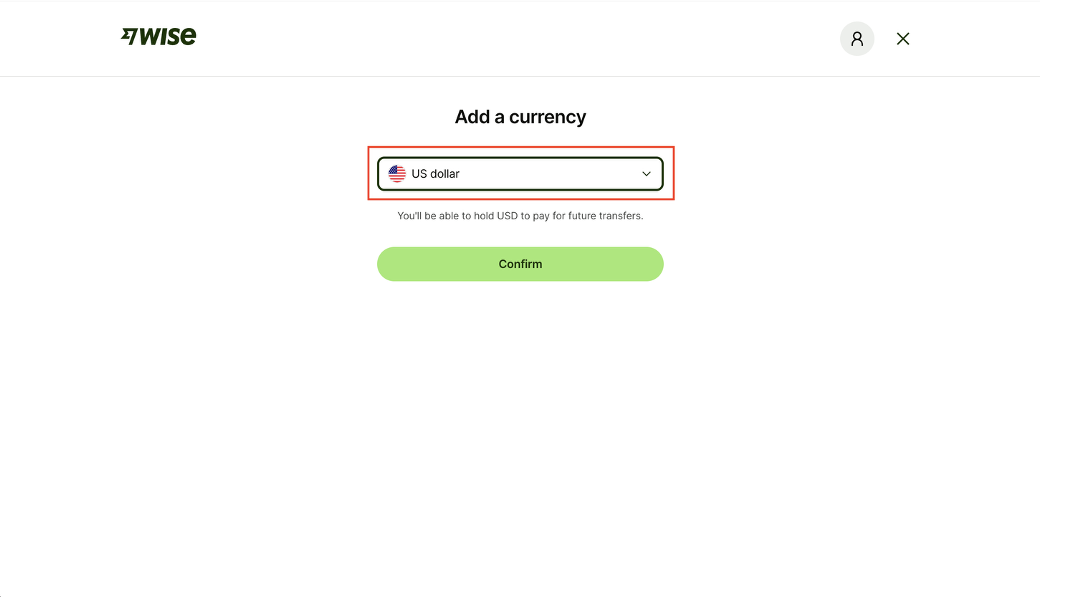
Follow Wise's prompts on the "Home" page, choose "Add a currency to your account," and select "USD" in the subsequent steps.
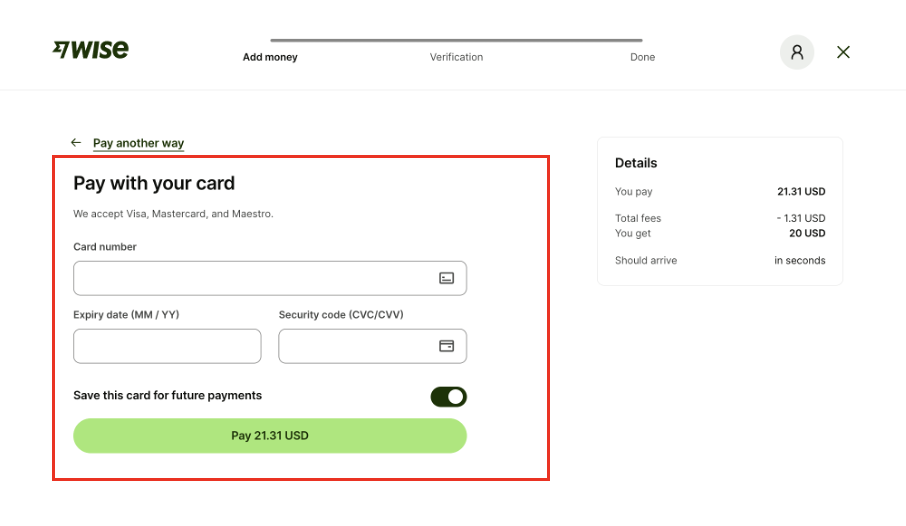
Step 2 — Complete the First USD 20 Deposit
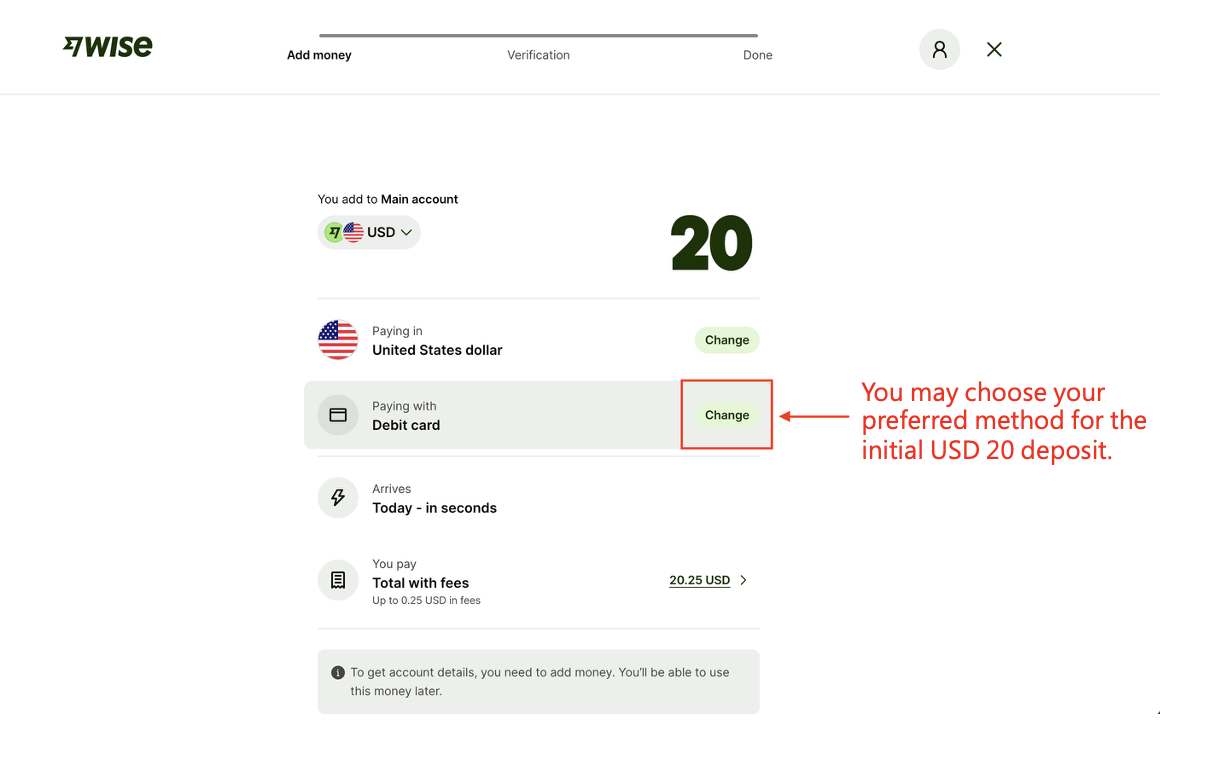
Click "Account Details." You'll be asked which currency you'd like to receive — choose "USD."

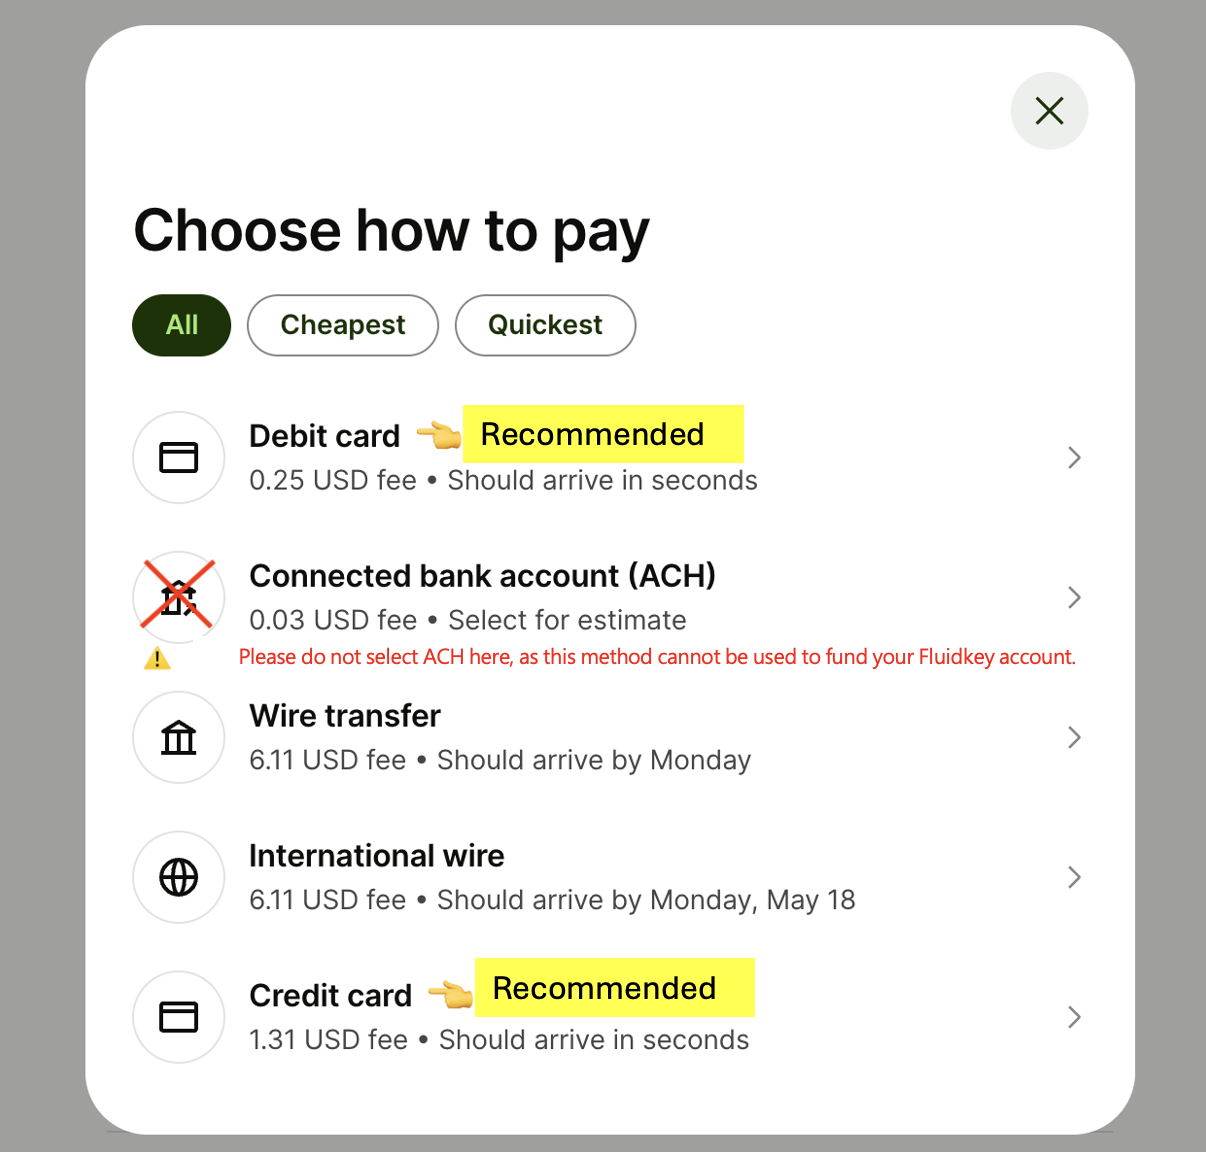
Every user must deposit at least USD 20 when first setting up their USD account. Tap "Change" next to the payment method to select your preferred deposit option for this initial transfer.
Entering an amount below USD 20 will trigger an error message.
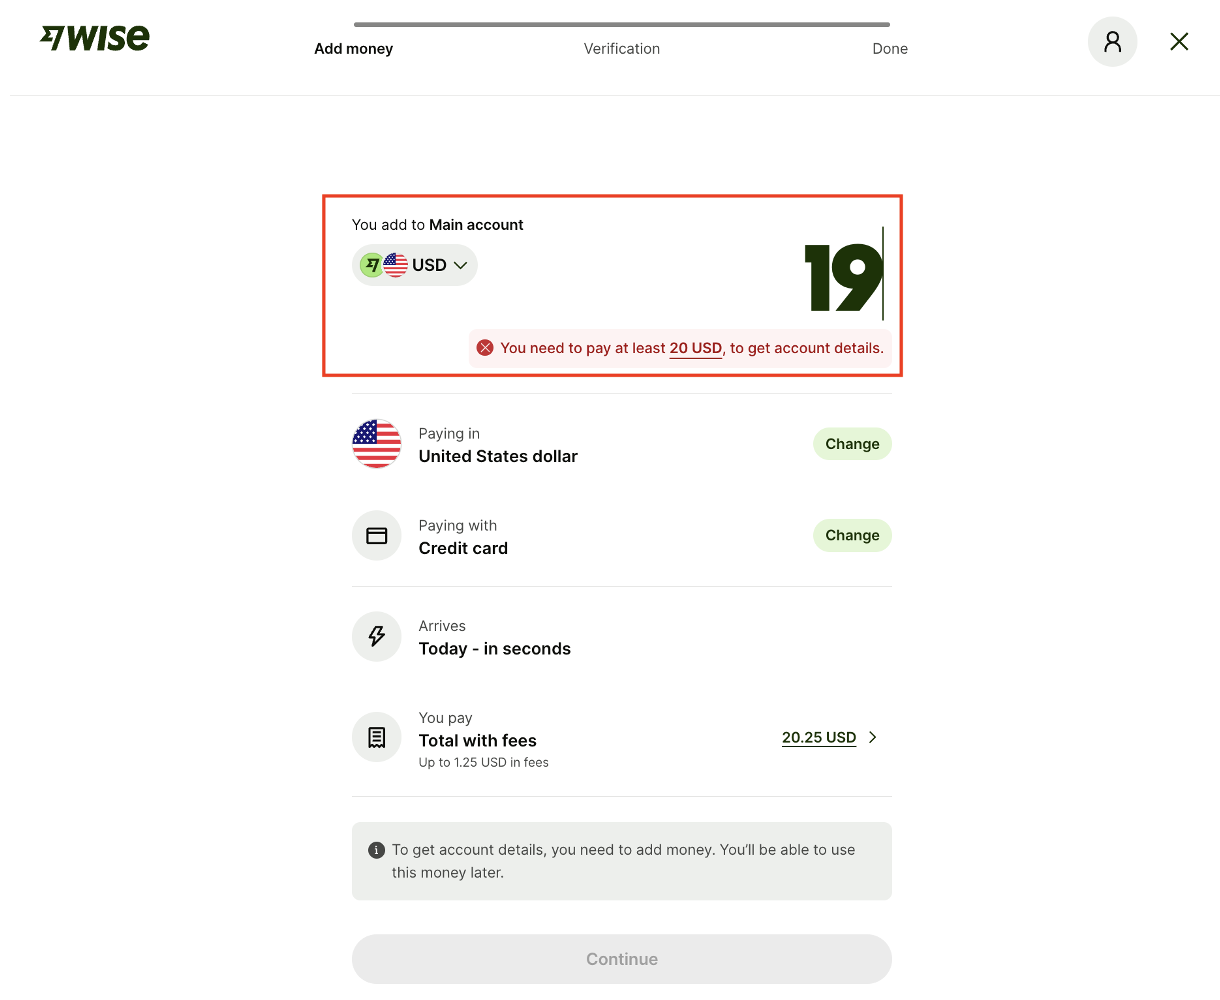
We recommend choosing the fastest-clearing option: Debit Card (with a USD 0.25 fee) or Credit Card (with a USD 1.31 fee).
If you choose Credit Card as your payment method, you can complete the transaction just like any standard credit card payment — enter your card number, expiration date, and CVV to finalize the deposit. Since the system detects that the card issuer is not a US-based bank, Wise will notify you that your issuer may charge an additional foreign transaction fee.

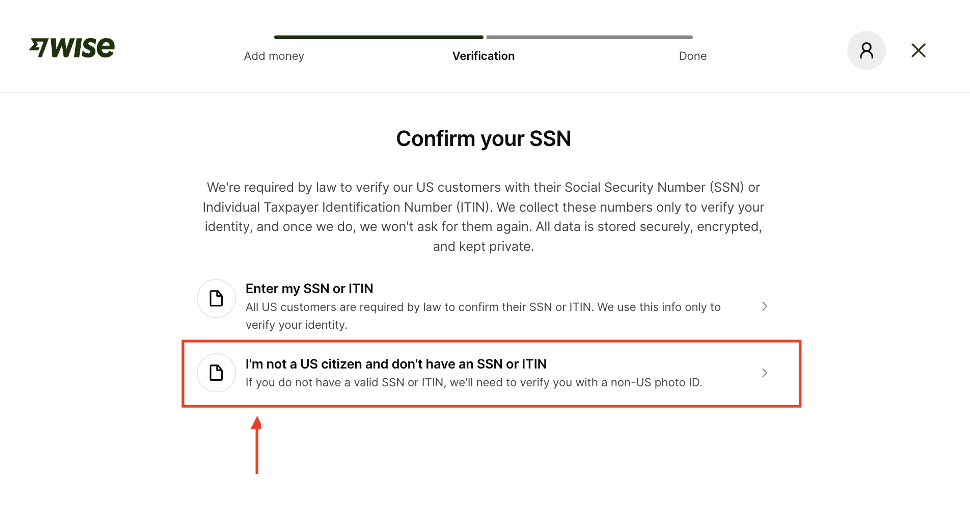
Step 3 — Confirm Your Tax Obligations
After the deposit is complete, Wise will ask about your tax obligations and then guide you through the identity verification (KYC) process.
If you are a tax resident living in Taiwan and only hold Taiwanese citizenship, you can follow the steps shown below. If you hold additional foreign nationalities, please fill in the form truthfully based on your personal status.

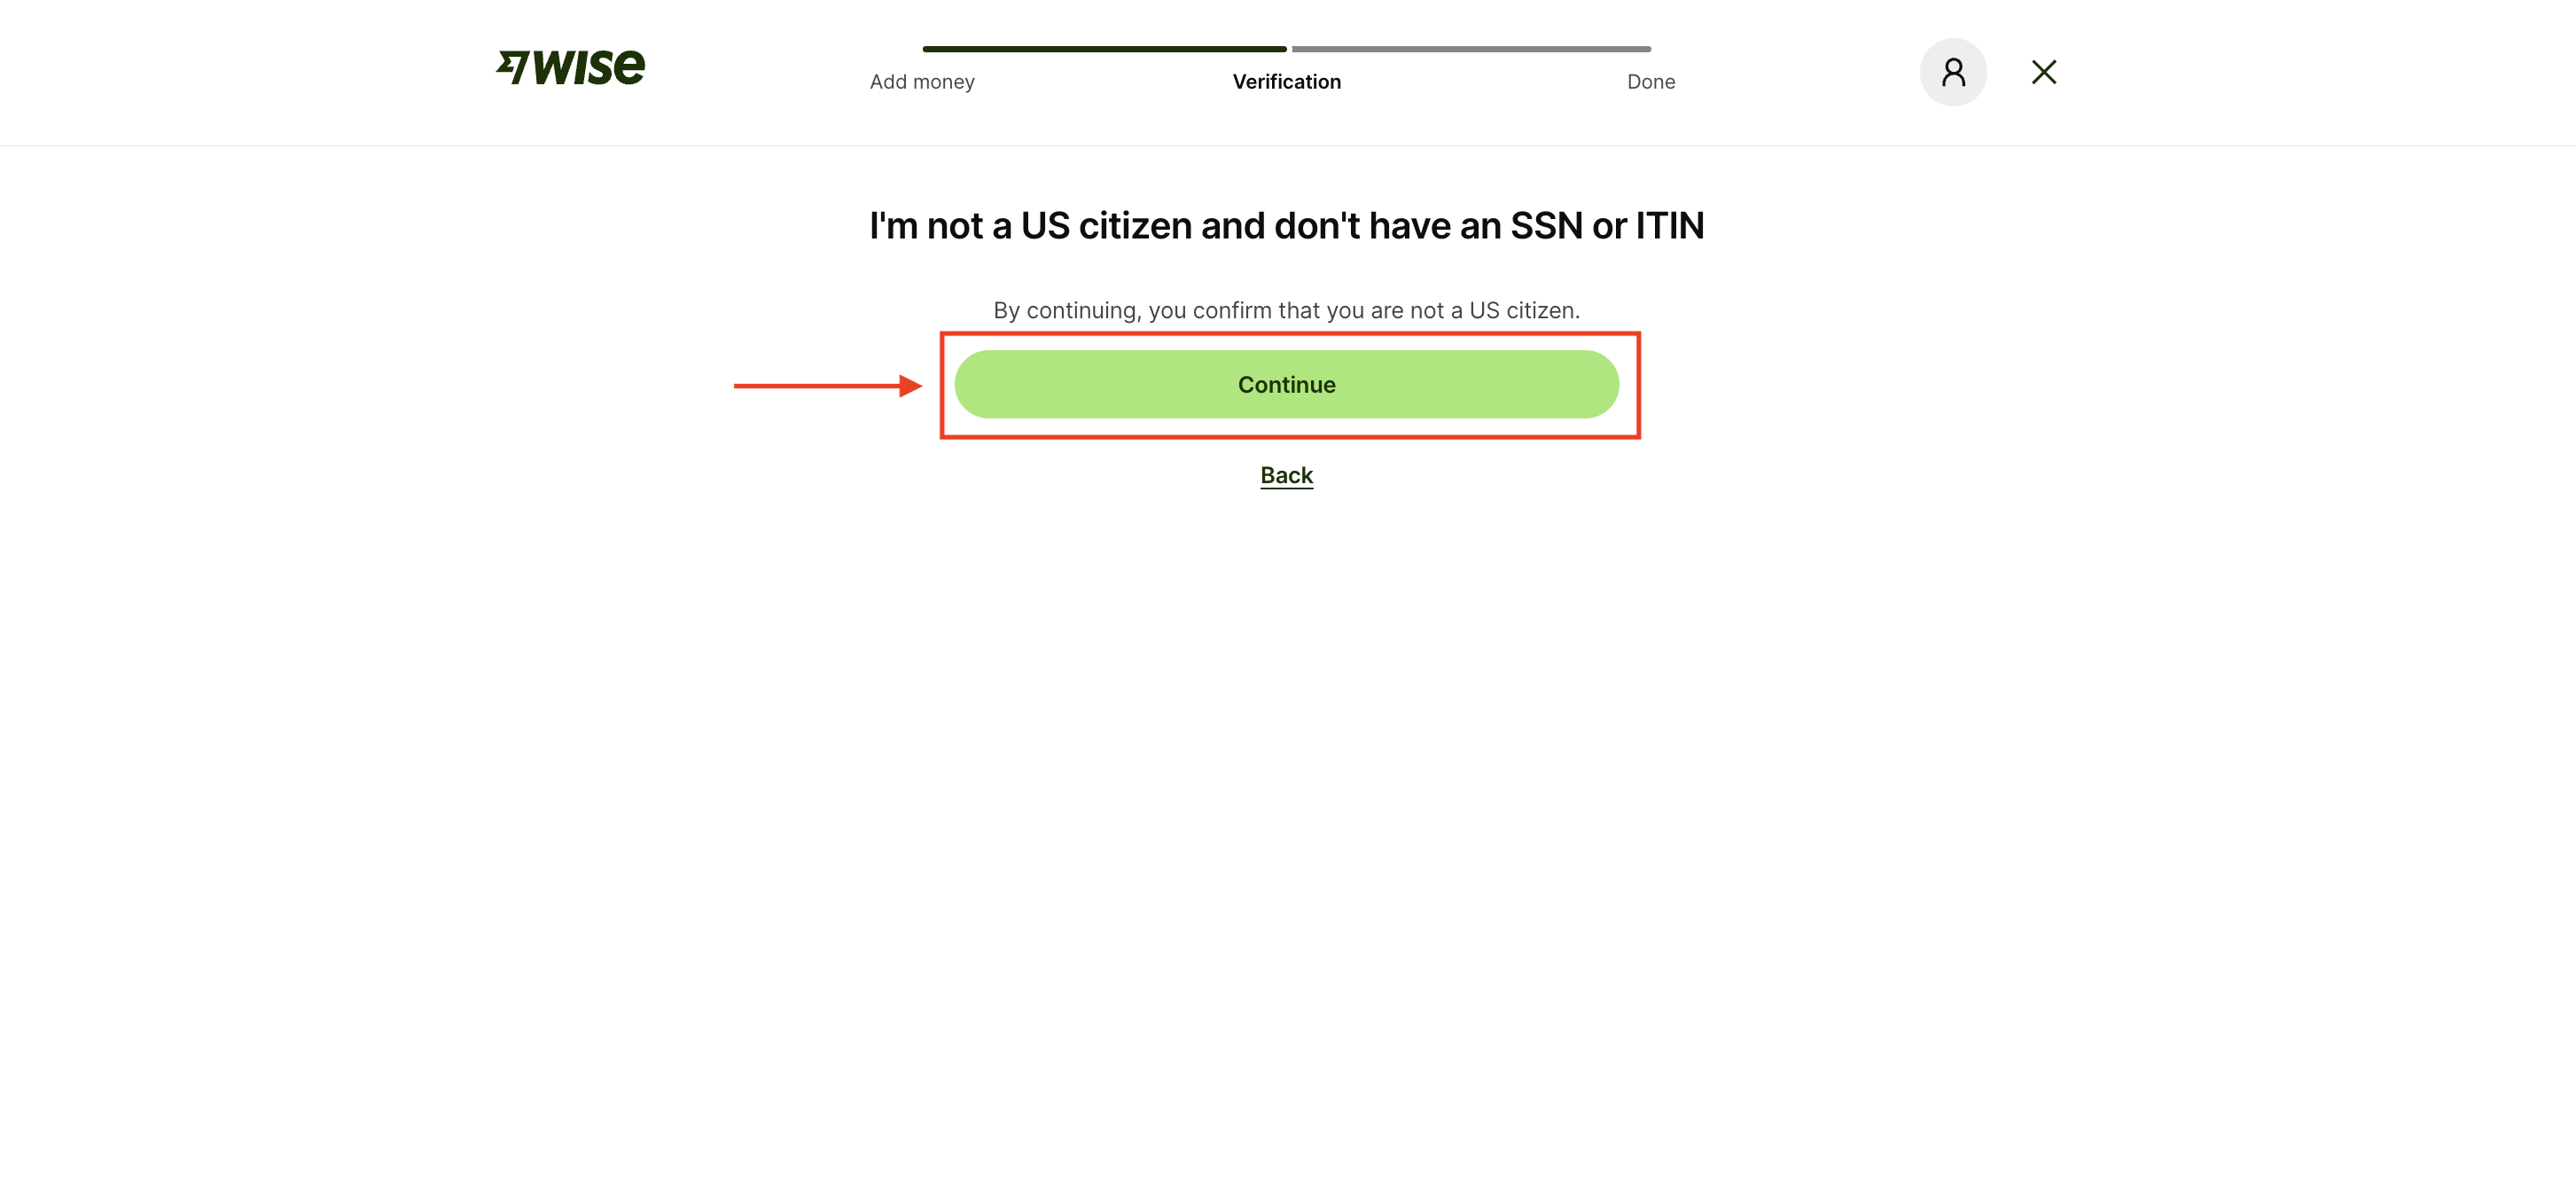
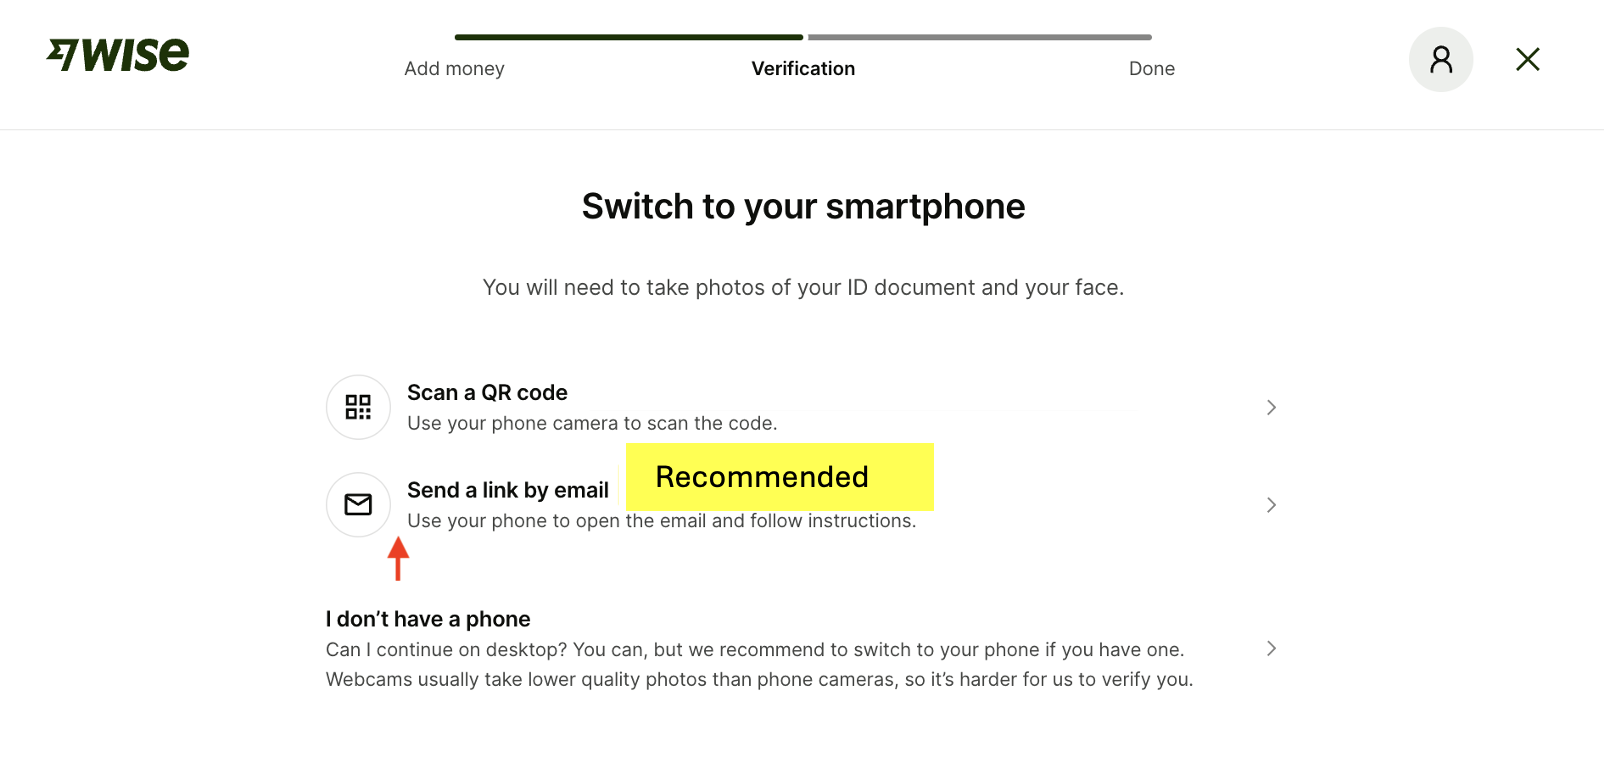
Step 4 — Complete Identity Verification (KYC)
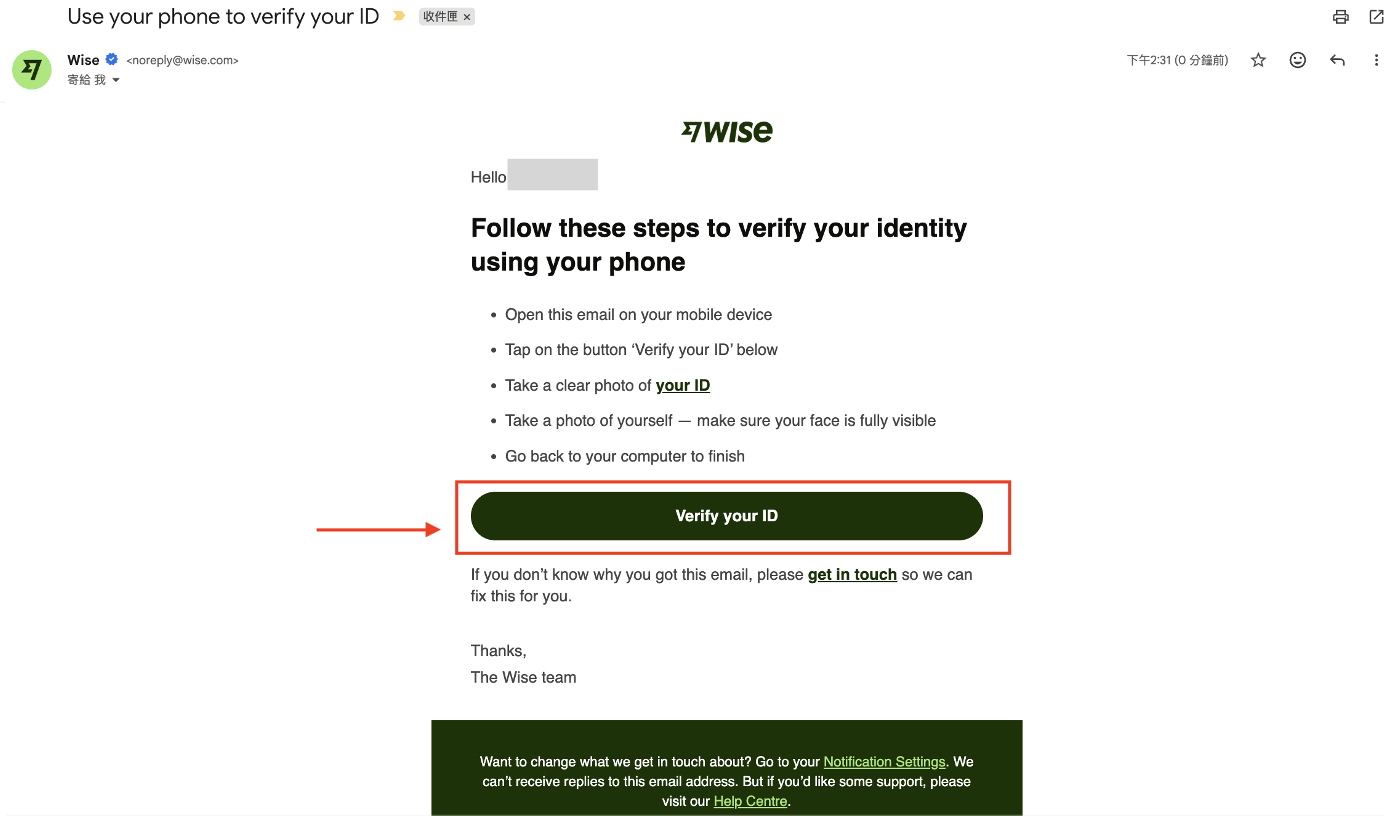
If you happen to have your passport on hand, you can scan the QR code with your phone and start the process right away. Alternatively, we recommend having Wise send the verification link to your email so you can complete the process later.
Once you receive the verification email, click "Start verifying my ID."
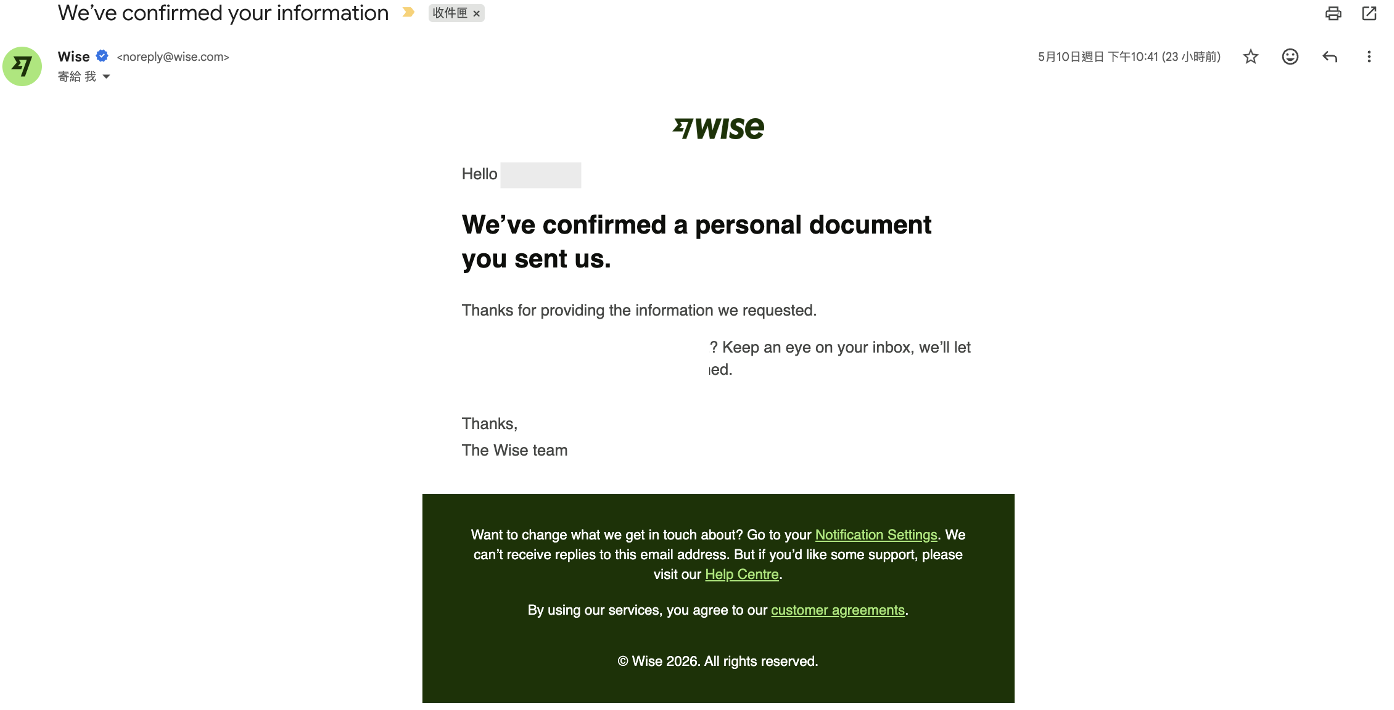
The rest of the KYC flow follows the standard process, so we won't go into detail here. Once complete, you'll receive a confirmation email from Wise. In our testing, the KYC approval email arrived within about 20 minutes. Processing time varies between users, but Wise is generally quite efficient.
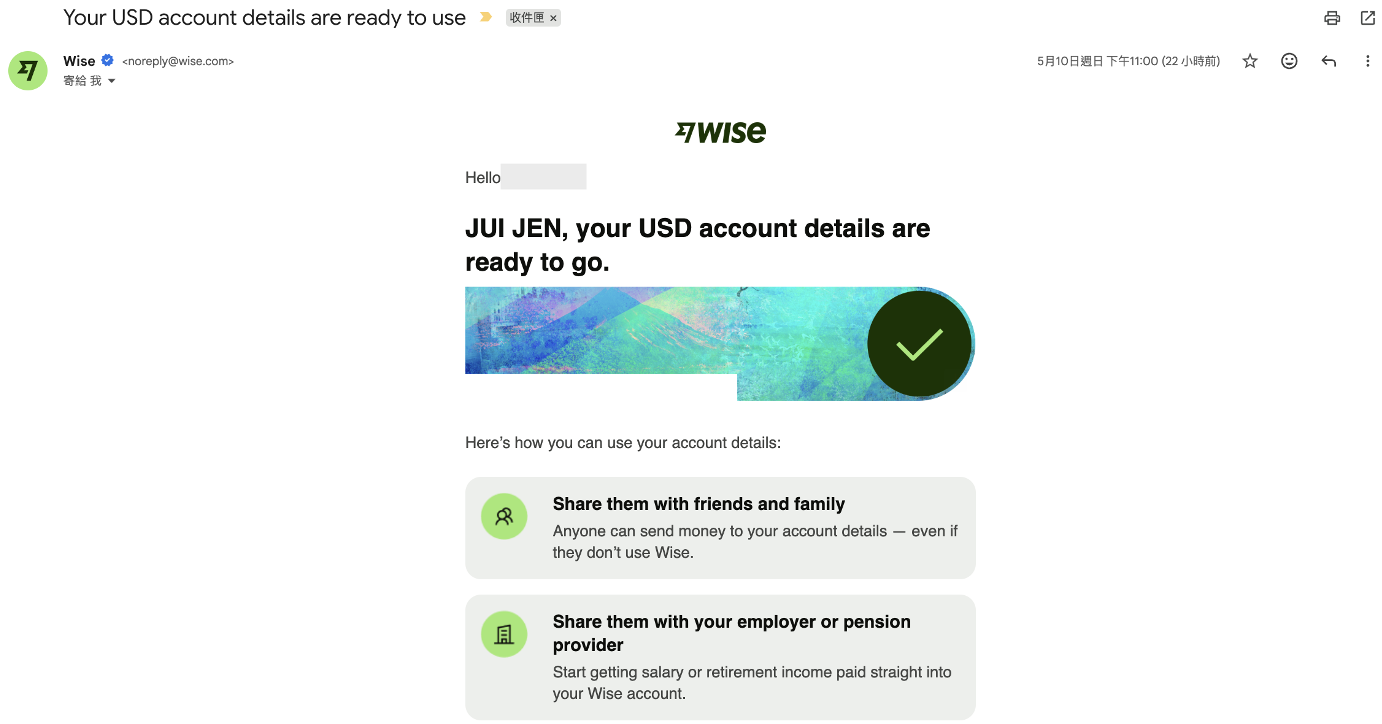
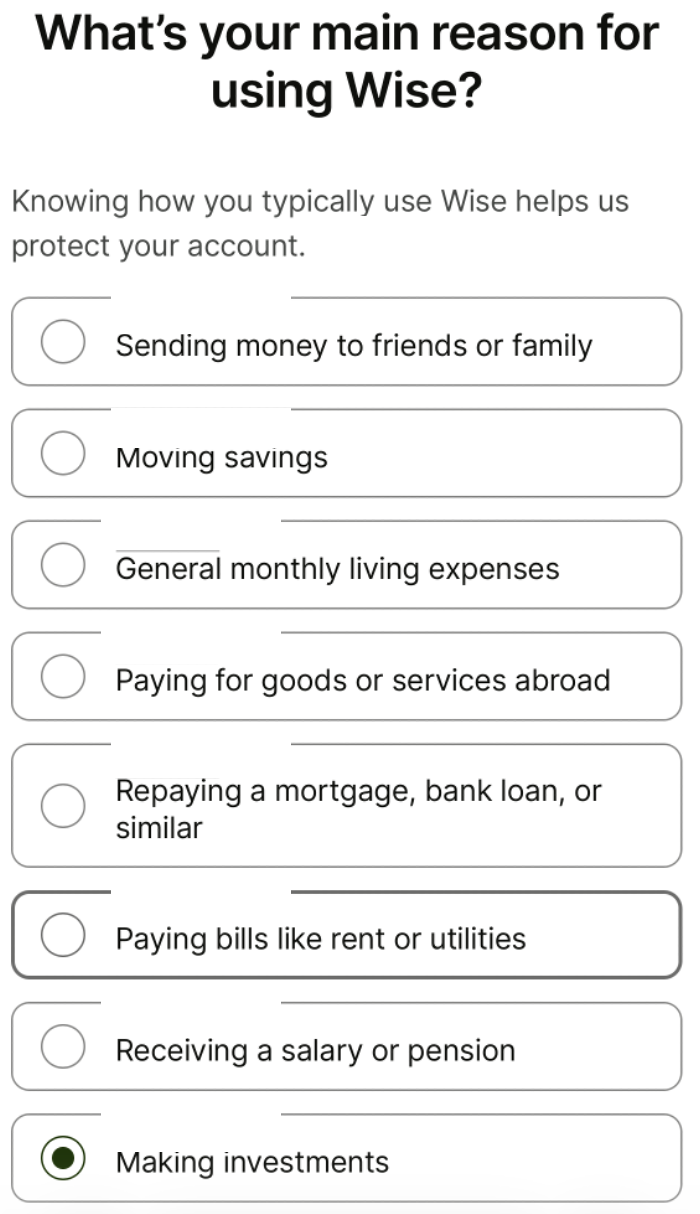
Step 5 — Confirm Account Usage, Complete the Deposit, and Get Your USD Receiving Details
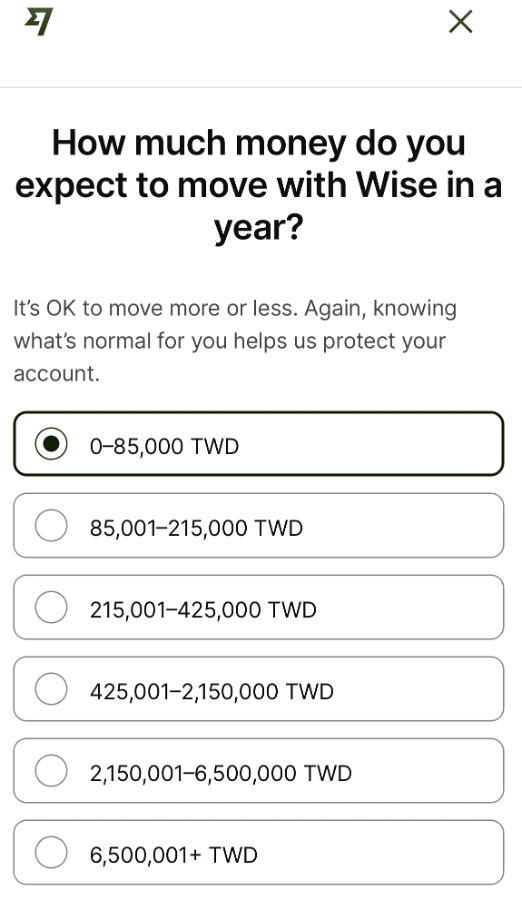
After KYC is complete, return to the main page. Wise will ask about how you plan to use your account so it can confirm and process your first deposit. You can respond based on your expected usage — just answer honestly.
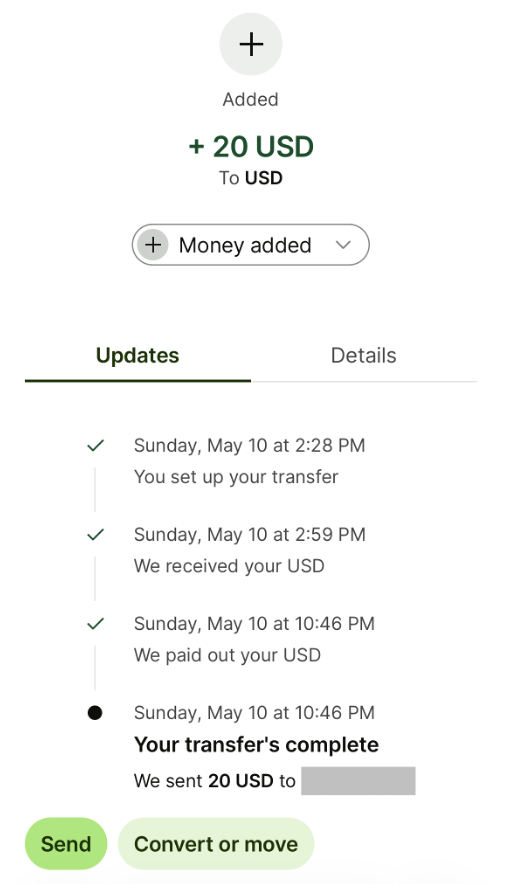
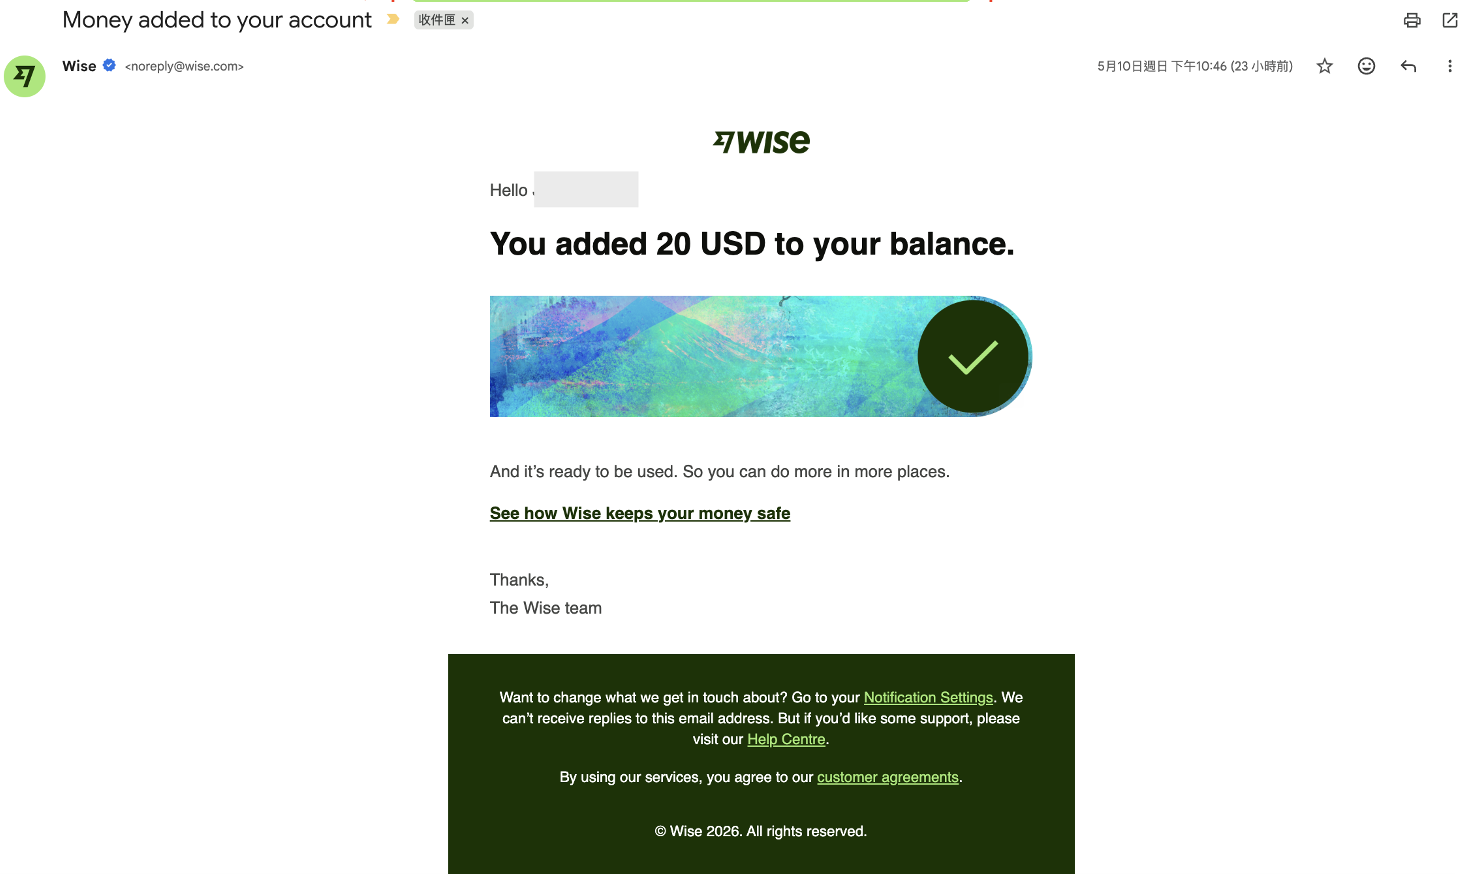
Finally, you'll see your USD 20 successfully deposited, and clicking "View Account Details" again will reveal your full USD receiving information!
Disclaimer
The content of this article is provided solely for the purpose of sharing technical and product information, and does not constitute investment, financial, tax, or legal advice. Cross-border fund transfers are subject to the financial regulations, foreign exchange controls, and tax reporting requirements of the relevant jurisdictions. Users are responsible for verifying the applicable rules based on their own location and circumstances, and for bearing any associated risks. Any operations described herein are for illustrative purposes only; please evaluate carefully and consult a qualified professional before use where appropriate.